


Tutorials
Faux Porcelain Sculpted Relief with Colorized Resin in a Wire Frame
![]()
Here is yet another fun way to use the Wire Frames, but this time we are using the Faux Porcelain Sculpted Relief with Colorized Resin technique. All the steps of making a mold, sculpting and applying colorized resin are the same, but in this tutorial, we are just creating the Faux Porcelain Sculpted Relief in a Wire Frame.
Learn How!
Materials Needed:
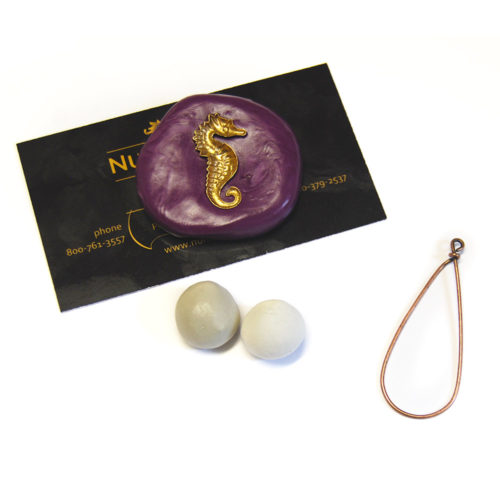
- Wire Frames
- Easy Mold Silicone Putty
- Brass Stamping
- Epoxy Clay-Black
- Nunn Design 2-Part Resin Kit
- Castin’ Crafts Opaque Pigments
Other:
- Wet Wipes
- Toothpicks
- Business Cards
- Ziplock Bag
Tools:
- Needle Nose Pliers
Creating the Mold
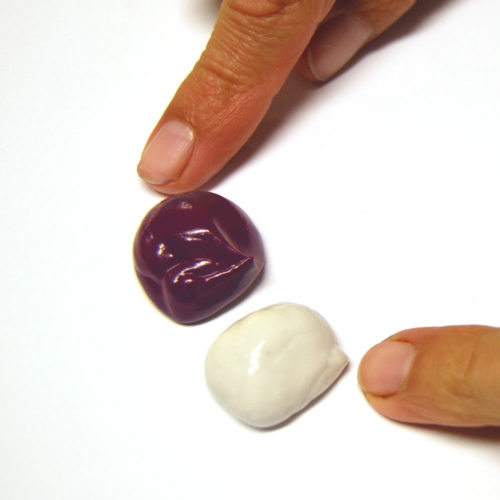
Step 1:
To make the Silicone Mold, pinch off two equal sized balls of Part A and B of the Silicone Putty. Be sure that the balls are large enough and will allow you to make an impression to fit your Brass Stamping of choice.
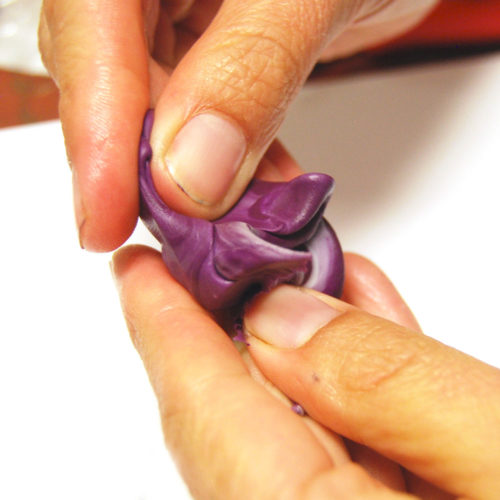
Step 2:
The Easy Mold Silicone Putty has a 3-minute working time before it begins to harden and not take the impression. Knead both part A and part B together until the putty is blended completely and has a uniform color. Tip: Getting the knack for mixing just the right amount will take some practice. You might mix too much or too little putty the first time.
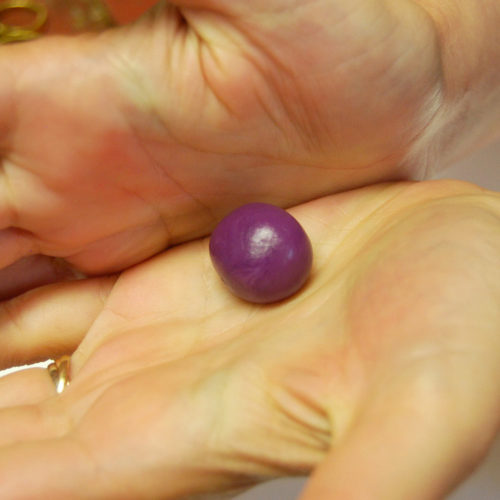
Step 3:
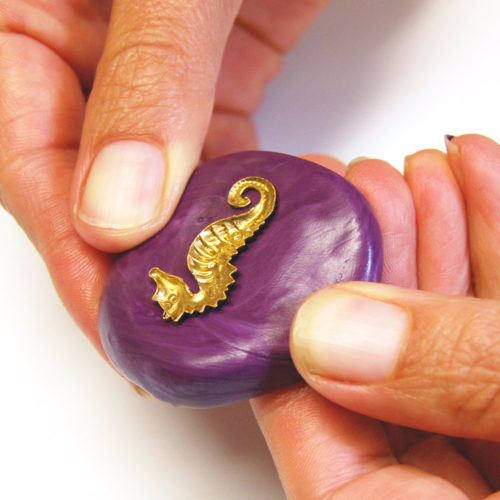
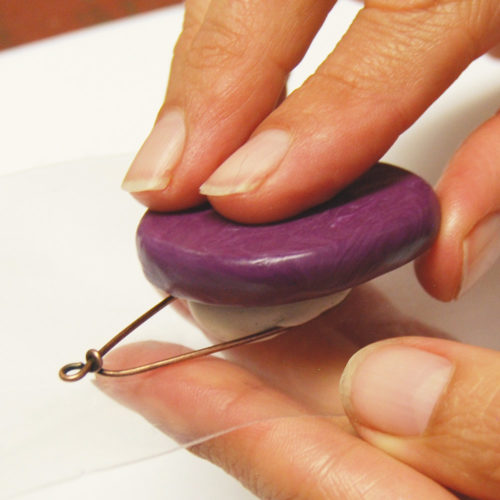
Roll the fully mixed Silicone Putty into a round ball and flatten slightly. Make sure the putty is smooth and not wrinkled. Press your Brass Stamping into the silicone putty, but not so far into the putty that you hit the bottom. Tip: To prevent your mold from sticking onto your work surface, use a glossy business card or a zip lock bag.
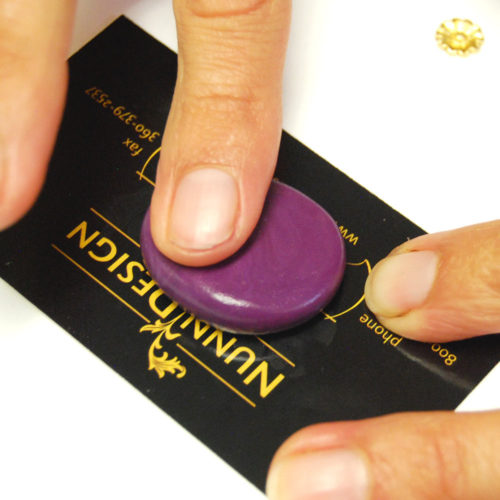
Step 4:
The Silicone Molding Putty takes 25 minutes to cure. Once the putty is hard to the touch, bend back the sides to release and remove the Brass Stamping. Now you are ready to create your impressions with the mold.
Creating the Impression
Step 5:
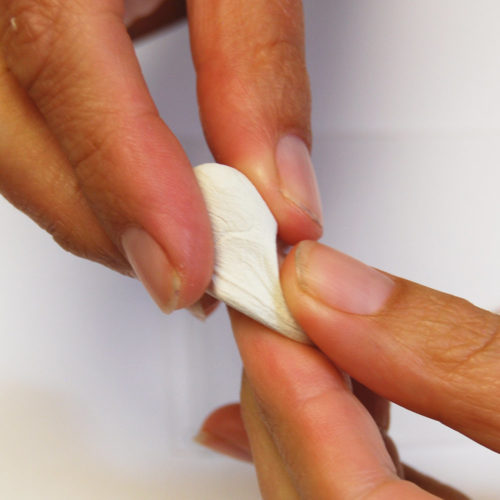
Follow the manufacturer’s instructions for the handling and mixing of the Epoxy ClayEpoxy Clay. While wearing gloves, pinch off two equal blueberry sized balls of Part A and Part B and blend together fully until the clay is no longer marbled and uniform in color. You have approximately 90-120 minutes of working time before the clay starts to harden, so take your time. Once the clay is thoroughly mixed, remove your gloves to make it easier to work with the clay.
Step 6:
Roll the ball of the Epoxy Clay in the palm of your hands until it is smooth. Place it into the center of the Wire Frame and pat it down into the wire frame. You will want a small slightly domed ball like shown here. If you have too much, remove the clay, pinch off a wee bit, roll and pat into the Wire Frame again.
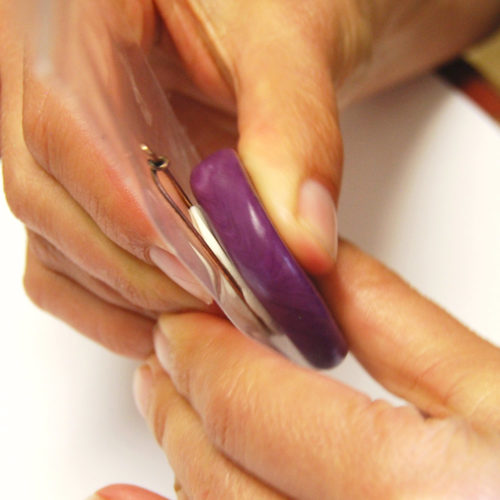
Step 7:
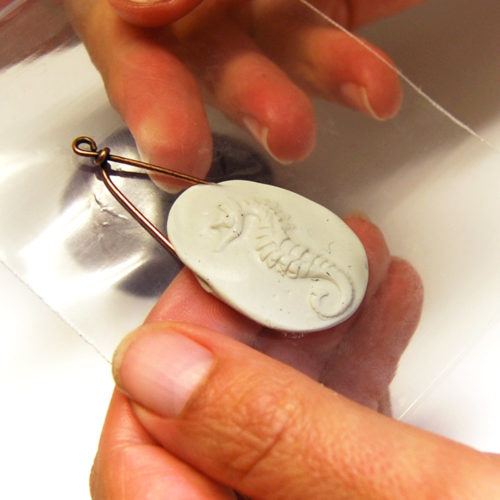
Now, let’s make an impression in our Epoxy Clay. Place your silicone mold over the Epoxy Clay filled Wire Frame. I like to pick-up the mold and use my fingers to push from the top as well as the bottom to create the impressions. If the sculpted relief isn’t right don’t fret. Remove the clay from the Wire Frame and start over again until you get the impression just the way you want.
Step 8:
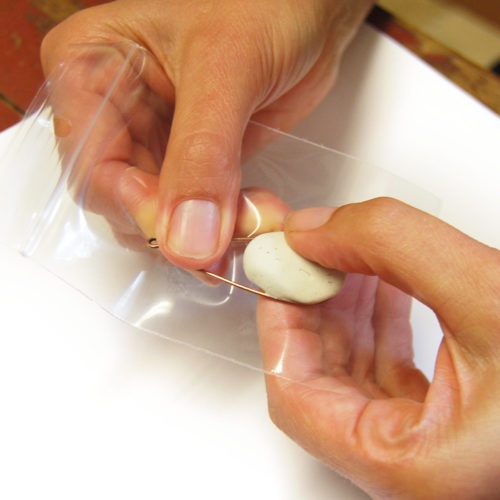
Use a wet-wipe to clean up any Epoxy Clay that might have gotten on the Wire Frame. The clay hardens like cement, so cleaning it up now and being tidy as you go makes the process easier and the results so much nicer.
Mix Your Resin!
Step 9:
Read the resin instructions for safety concerns regarding the Nunn Design Resin. When I work with resin, I always:
- Place a large plastic bag over my work surface and tape it down.
- I make sure I have ventilation in my workroom.
- I wear gloves.
- I wear glasses (readers because I can’t see anymore. Plus it protects my eyes!).
- I have a pile of wet wipes handy.
Step 10:
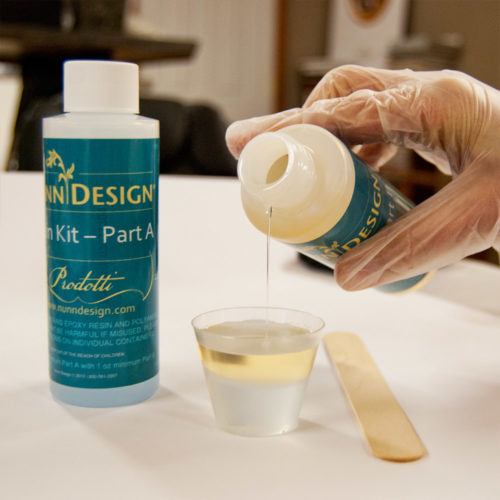
Place one cup (included in the Nunn Design Resin Kit) onto your table. For curing purposes, it is very important that the resin be an exact 1 to 1 ratio of Part A and Part B. I suggest getting your eyes level with the resin so you can see the lines on the measuring cup. Pour Part A of your resin kit up to the ½ fluid ounce mark on your measuring cup. Pour Part B of your resin kit into the same cup until it is filled to the 1 fluid ounce mark. It is important to pour Part A first and then Part B. It is some chemical thing about the part B being heavier or something.
Step 11:
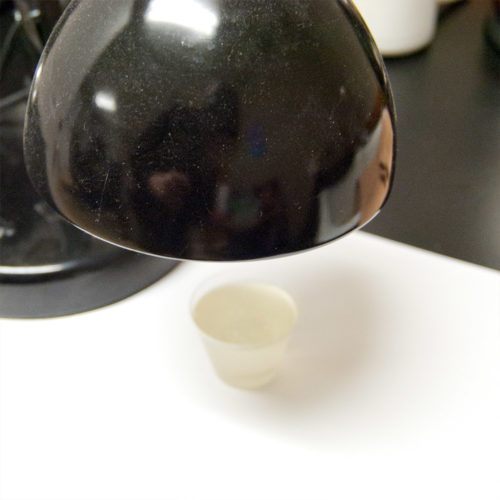
Set your timer for 2 minutes. Using the stir stick from your kit (a popsicle stick or coffee stir stick will work great too), slowly and carefully stir your resin scraping the sides as you stir. Stir for a minimum of 2 minutes. If your resin is still cloudy continue to mix until clear. After mixing is complete and your resin is clear, scrape both sides of your stir stick on the edge of your resin filled cup. Set the mixture under a warm lamp for 5 minutes. I like the lamps with the adjustable arms that can get right down next to the resin. This aids the air bubbles in the resin to rise to the surface and pop.
Step 12:
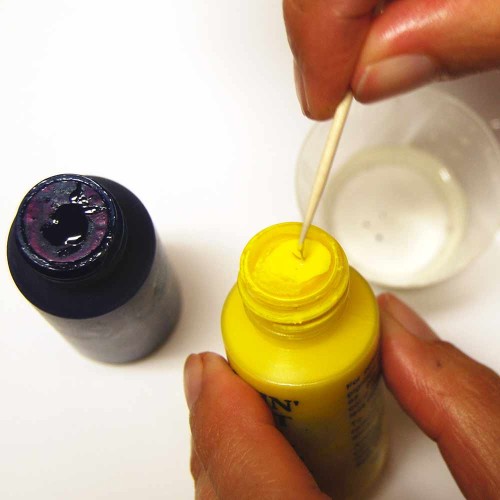
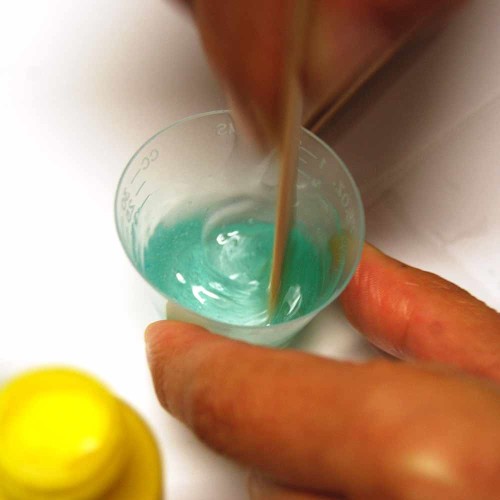
After your resin has been under the lamp for 5 minutes, pour a small amount of the mixed resin into a second measuring cup. Add in a toothpick tip worth of the Castin’ Craft Opaque Pigment Yellow and Castin’ Craft Opaque Pigment Blue to create the teal color show here. You can mix the full 1 fluid ounce measuring cup of resin if you want, but I transfer the resin into smaller cups because it is easier to stir and less messy to move around when less full. Tip: Be sure that the colorant does not equal more than 10% of your resin as having more than 10% could cause issues with curing!
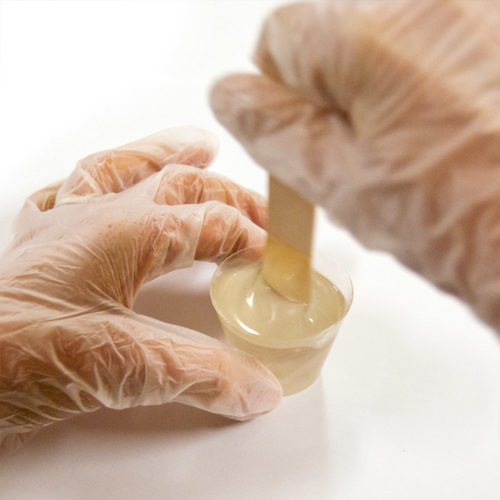
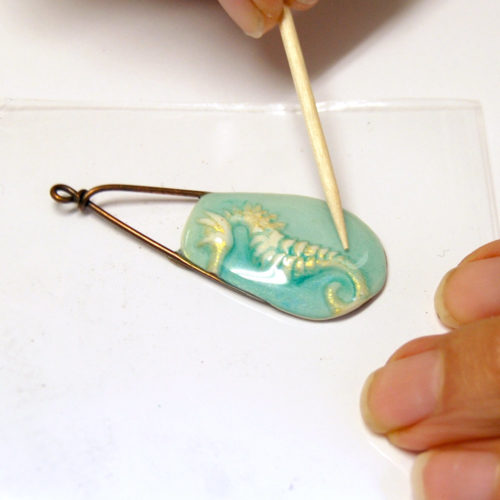
Step 13:
Drizzle a wee bit of resin onto the surface of the sculpted relief. Add just enough resin to create a slight pool in the center. Use a toothpick to move the resin around so that there is a full even coverage. If you do have any overflow, use a wipe to clean up any resin. Let cure for up to 72 hours.
Step 14:
Once your piece has fully cured, it is easy to remove any resin that might have overflown. Use a pair of needle nose pliers to gently detach the resin from the ring. Once you are able to remove a little bit of the resin, it is fairly easy to peel away the rest of the resin that had spilled. Be patient and your clean up efforts will be rewarded.
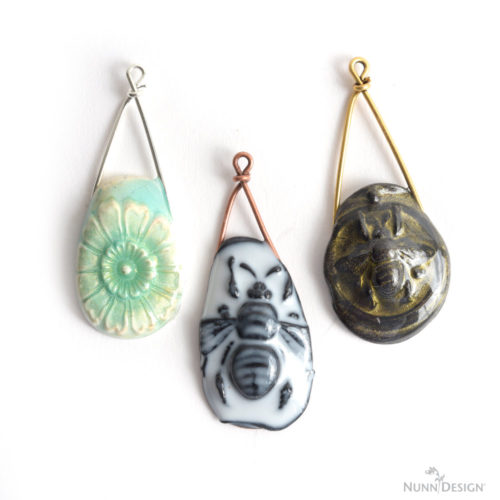
Here are other inspirational ways that you can combine different colors of Epoxy Clay with various colors of colorized resin.
Shop Supplies!
Shop Supplies Wholesale:
- Wire Hoops
- Easy Mold Silicone Putty
- Brass Stamping
- Epoxy Clay-Black
- Nunn Design 2-Part Resin Kit
- Castin’ Crafts Opaque Pigments
Shop Nunn Design Wholesale
Nunn Design has been supplying jewelry artists with findings for over 20 years. Shop wholesale jewelry findings for creative jewelry makers.
Shop Nunn Design!How to Purchase Wholesale?
If you are interested in becoming one of the many designers who trust their jewelry to Nunn Design Findings, please join us by registering to become one of our wholesale customers!
Please visit our Where to Buy Page for a listing of online stores that sell Nunn Design Findings retail.

If you enjoyed reading this post, please subscribe to our blog. Here are 10 Reasons Why to Subscribe and a place to do so!