


Transfer Sheets, Tutorials
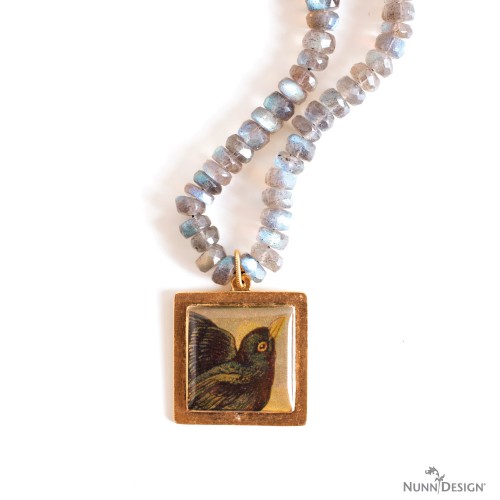
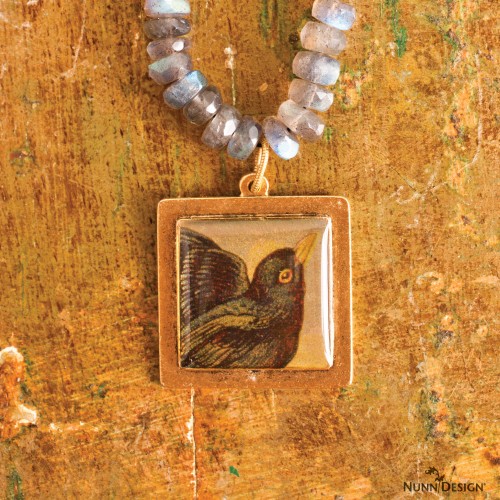
Make Your Own Keepsake Pendants-Transfer Sheets with Resin
Yesterday we covered collage sheets and resin, a process that has a few necessary steps to prepare the collage image for resin. Nunn Design Transfer Sheets are printed on a special water decal paper, making them resin ready with no sealing necessary. Just apply the transfer image to your bezel surface of choice and pour on your resin. I’m telling you, it’s a beautiful thing!!
Keepsake Pendants-Transfer Sheets with Resin
Supplies Needed:
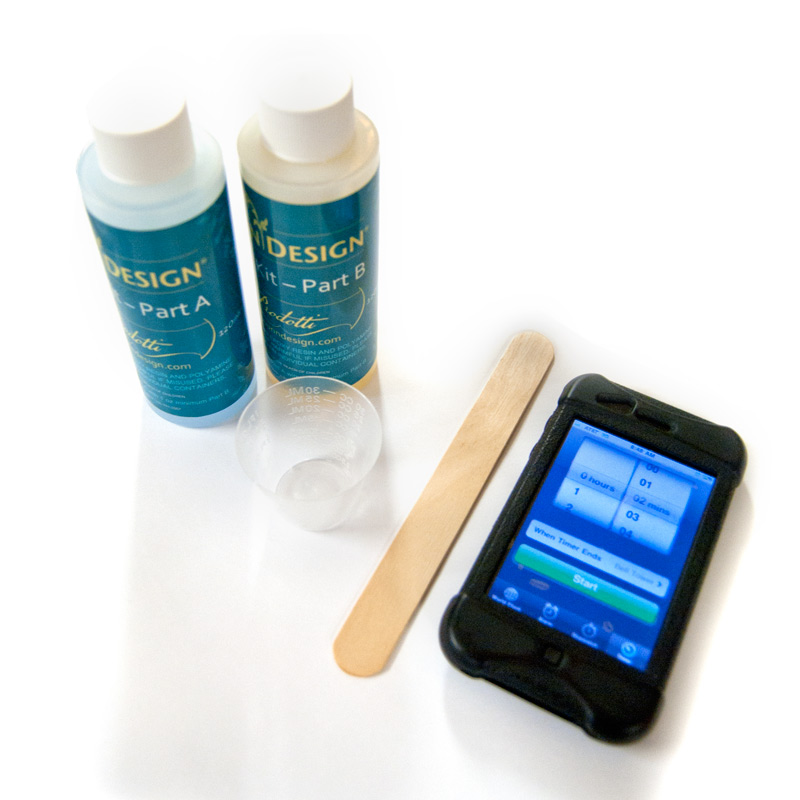
Nunn Design Resin
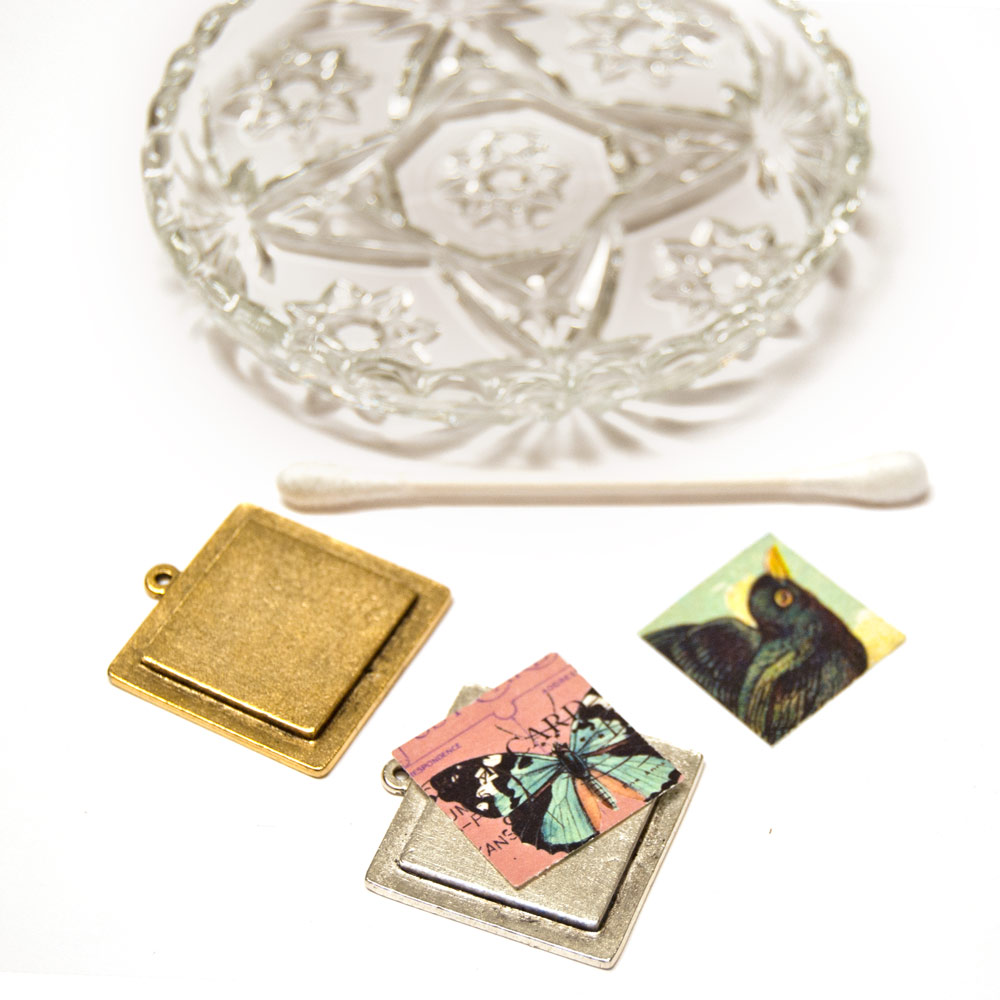
Nunn Design Transfer Sheet
Nunn Design Patera Bezels
Tools Needed:
Cotton Swab
Headpin or toothpick
Small dish of water
Paper towels (for drying brush)
Scissors
How To Apply Transfer Sheets:
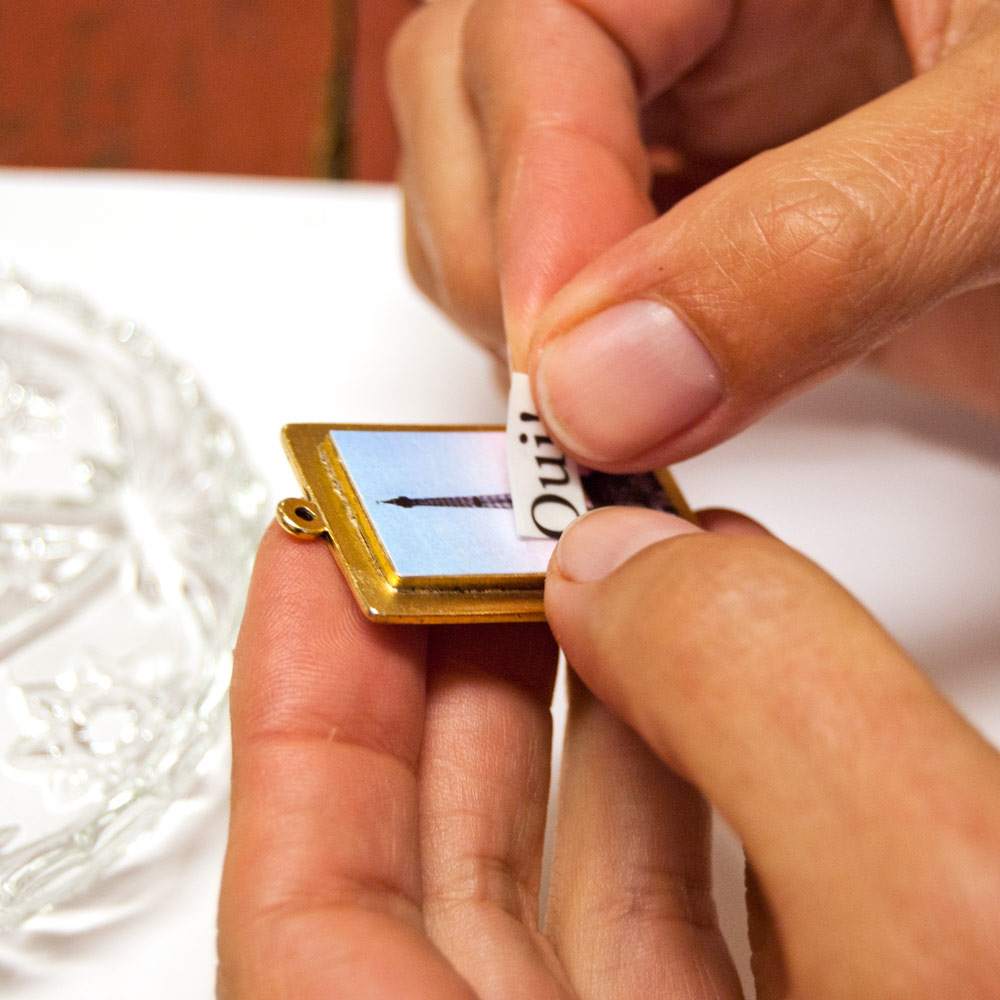
Step 1. Select an image from one of the Nunn Design Transfer Sheets. Nunn Design offers a limited line of punches. Each available punch cuts the image to fit into the bezel. This is especially handy if you are cutting a circle. For an image that is a square or rectangle, it is easy to cut the paper by hand with a pair of scissors.
Step 2. If you are using a punch, turn your punch upside down and slide your Nunn Design Transfer Sheet into the side slot thus viewing the image through the punch opening. Prior to this step, you may need to trim the edges of the transfer sheet to allow the image to be seen in full view. Once your image is in full view, place your finger on the transfer sheet to prevent it from sliding while pressing down and punching out your image. I like to stand to make sure I’m applying pressure evenly while punching.
Note: If the punch is dull, it can tear the transfer sheet as opposed to punching it. Insert tin foil and punch several times to sharpen the metal cutter on the punch.
Step 3. If you are cutting your image with scissors, make sure that your image is flush to the side of the bezel and not overhanging at all. If the image is not flush with all sides, there is a great potential for the image to be lifted from the metal surface if snagged.
Step 4. Fill a small shallow dish with warm water approximately ¾ of the way full. The Nunn Design Transfer Sheets are printed on a film with a paper backing. When the transfer sheet is submerged into water, it separates the film front from the paper backing.
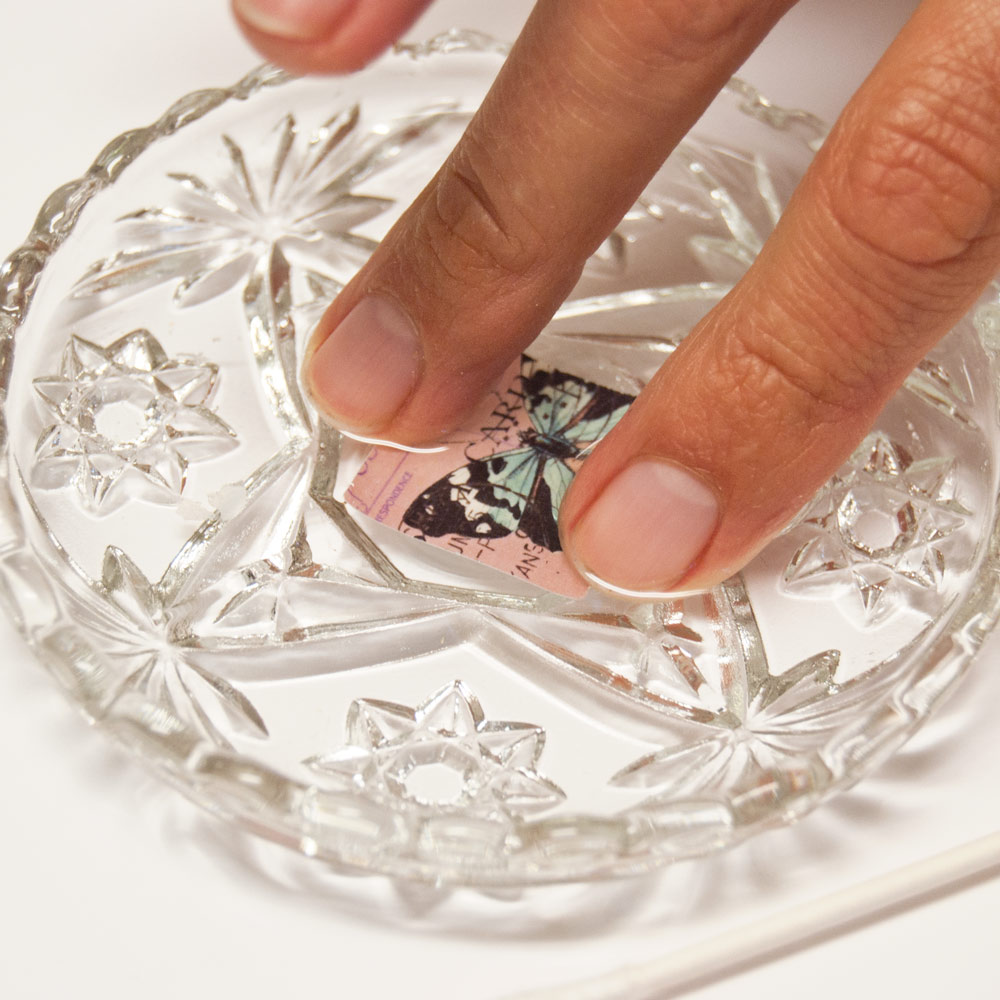
Drop one of your trimmed transfer sheets into the water and wait 30 seconds. I like to work with one of my transfer sheet images at a time, so I’m not in a rush as all of the backs release from the film fronts at the same time.
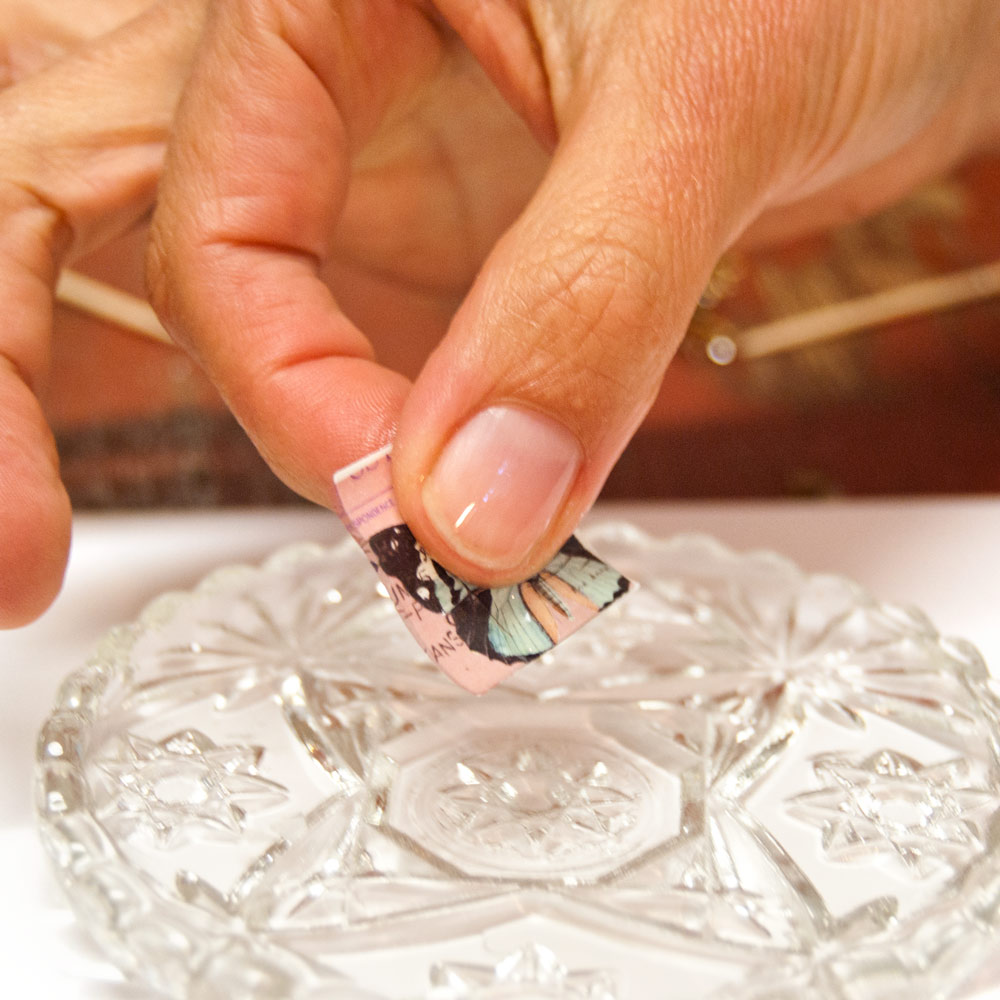
Step 5. The film is very fragile, so you will want to be gentle when handling it. When you remove the transfer sheet from the water, you will be able to feel the film and paper backing sliding apart from one another and you hold them in your fingers. Leave the paper backing attached to the film front and dry your fingers with a paper towel.
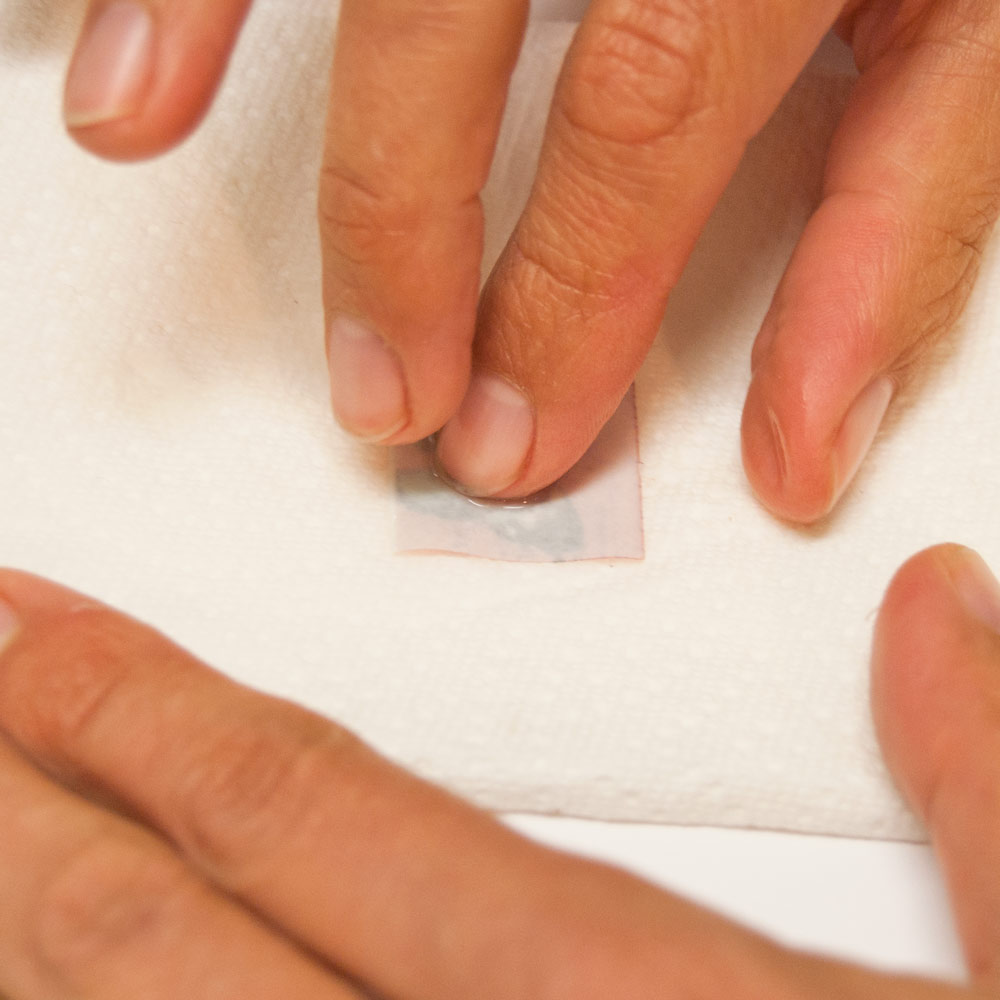
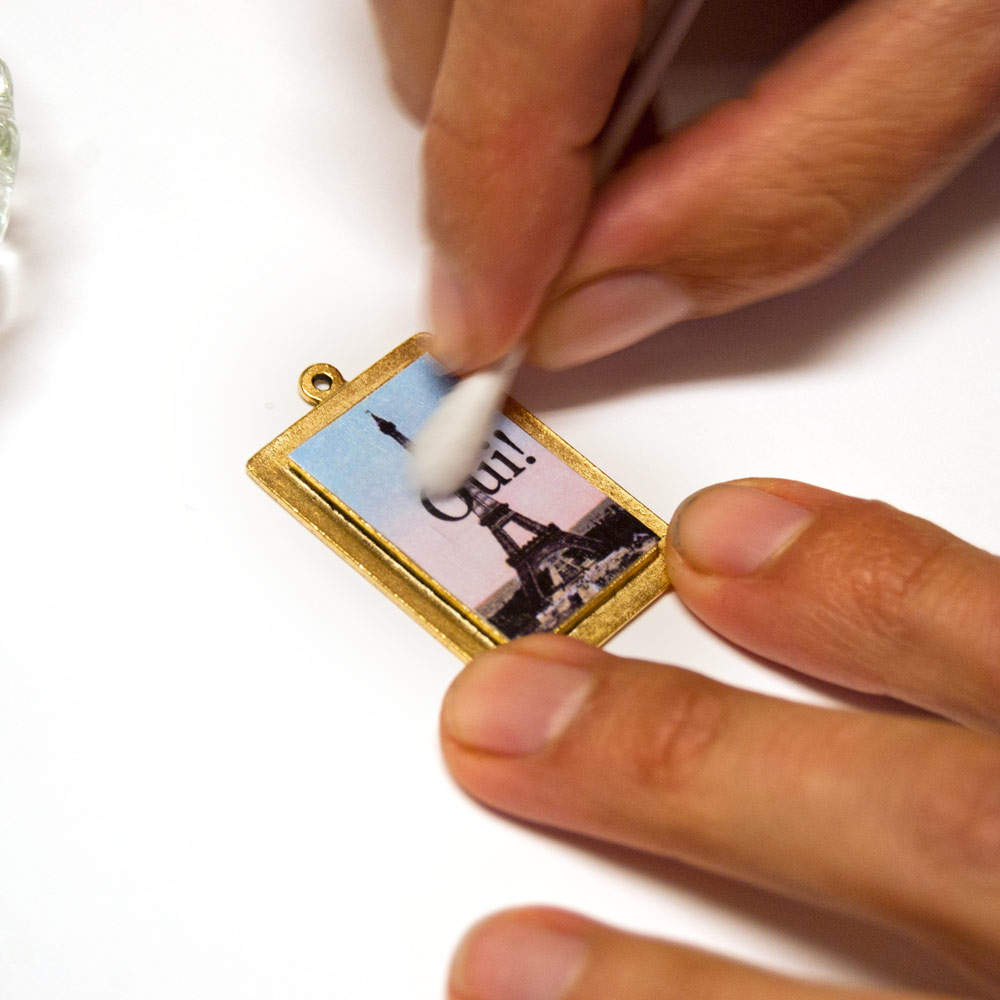
Step 6. Slide the film of the transfer sheet image off the paper backing and onto Patera Bezel surface. Move it gently with your fingers until you have it in the position you want.
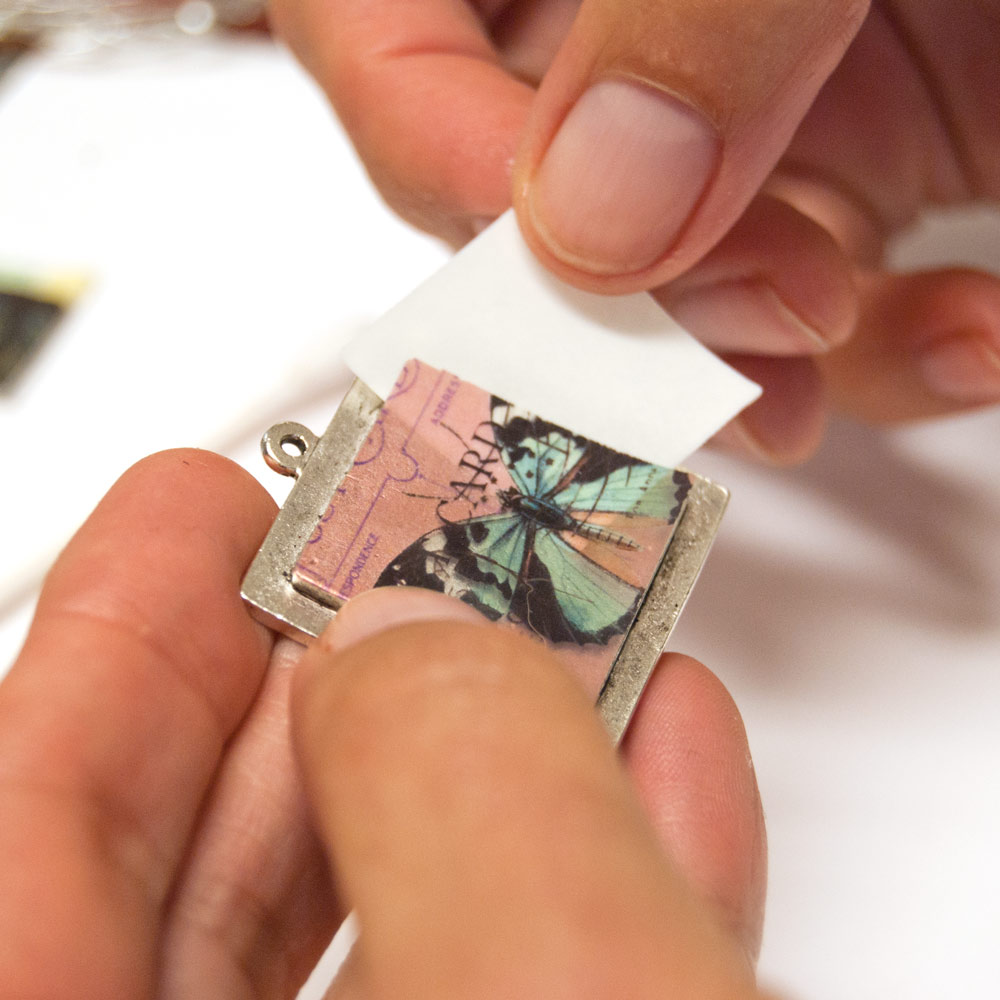
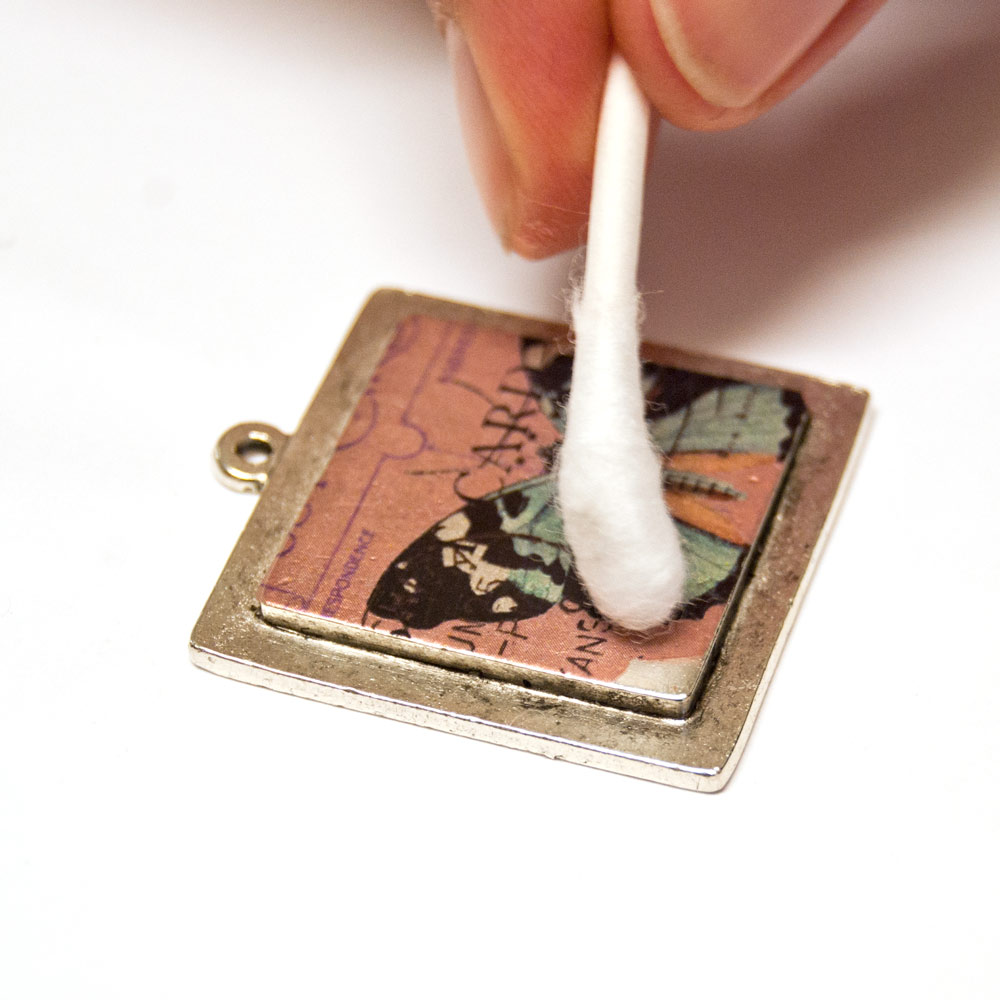
Once the transfer sheet is in position, press firmly with your Q-tip in the center of the image and gently, but firmly, burnish (another word for rub) the film down with your Q-tip. If your film won’t stick to your surface, remove the film and paint a thin coat of the Nunn Design Sealant and reapply. If the film rips, yikes, so sorry, you’ll need to start again. Although, I have seen some really cool pieces done with the words all ripped!
Note: Transfer sheets are printed on a water decal film and do not require sealing with a sealant prior to being applied over the top of the image. If you are doing a transfer sheet on top of a collage sheet, first attach your collage sheet and then apply the transfer sheet over the collage sheet. It is important to create a strong barrier between the collage sheet image and the Nunn Design Resin. If you don’t seal the image with Nunn Design Sealant, the Nunn Design Resin can run the ink in the image and absorb into the paper causing the image to darken. To seal the image, use a clean and dry brush. Paint on a coat of Nunn Design Sealant and let dry for 20 minutes. Apply a second coat after 20 minutes. Allow bezels to dry overnight.
Mixing Nunn Design Resin
STEP 7: Prepare Your Work Surface
Preparing your work surface: Read the resin instructions for safety concerns regarding the Nunn Design Resin. When I work with resin, I always:
• Place a large plastic bag over my work surface and tape it down.
• I make sure I have ventilation in my workroom.
• I wear gloves.
• I wear glasses (readers because I can’t see anymore. Plus it protects my eyes!).
• I have a pile of wet wipes handy.
STEP 8: Pour Part A, Then Pour Part B into Cup
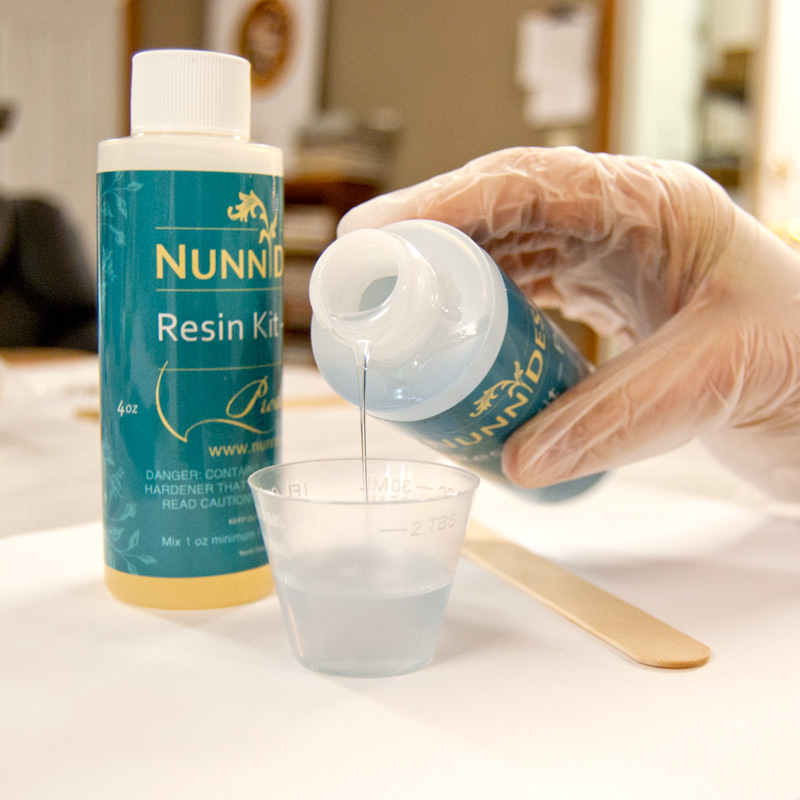
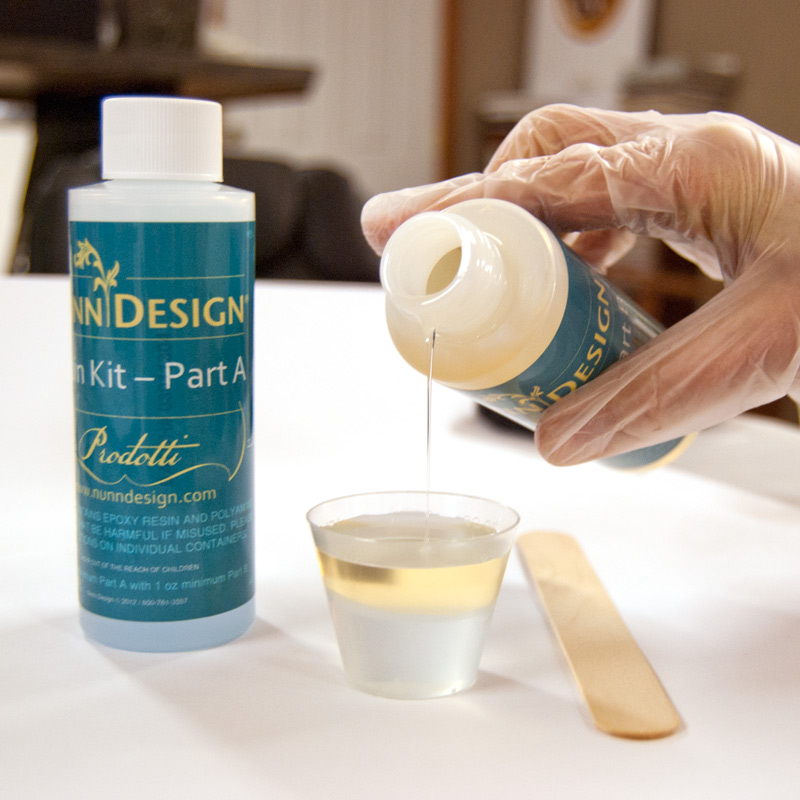
Mixing your resin: Place one cup (included in the Nunn Design Resin Kit) onto your table. For curing purposes it is very important that the resin be an exact 1 to 1 ratio by volume of Part A and Part B. I suggest getting your eyes level with the resin so you can see the lines on the measuring cup. Pour Part A of your resin kit up to the ½ fluid ounce mark on your measuring cup. Pour Part B of your resin kit into the same cup until it is filled to the 1 fluid ounce mark.
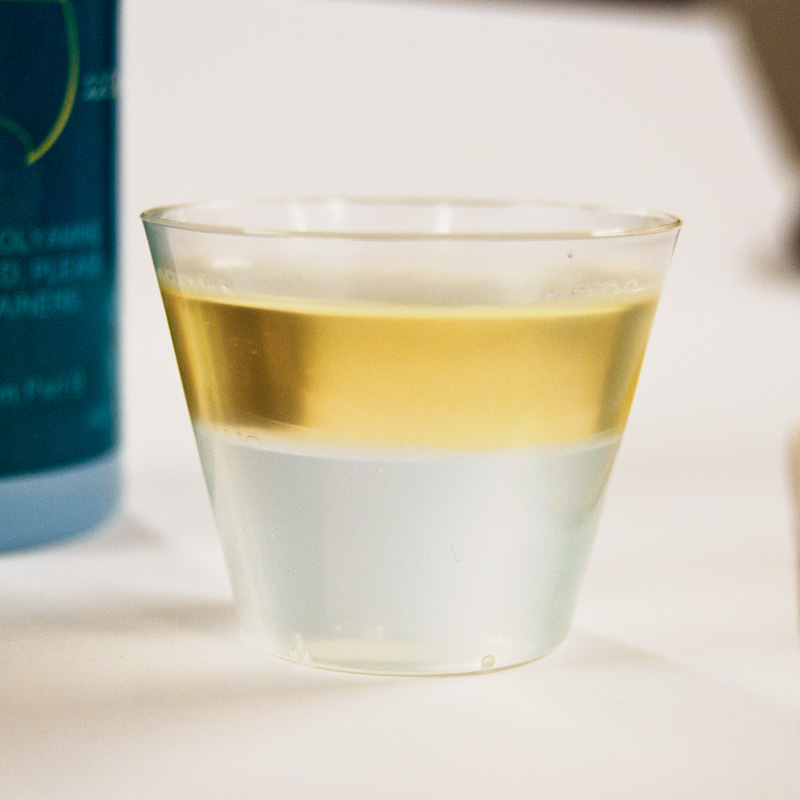
STEP 9: Set Timer, Stir 2 Minutes, Set under Lamp 5 Minutes
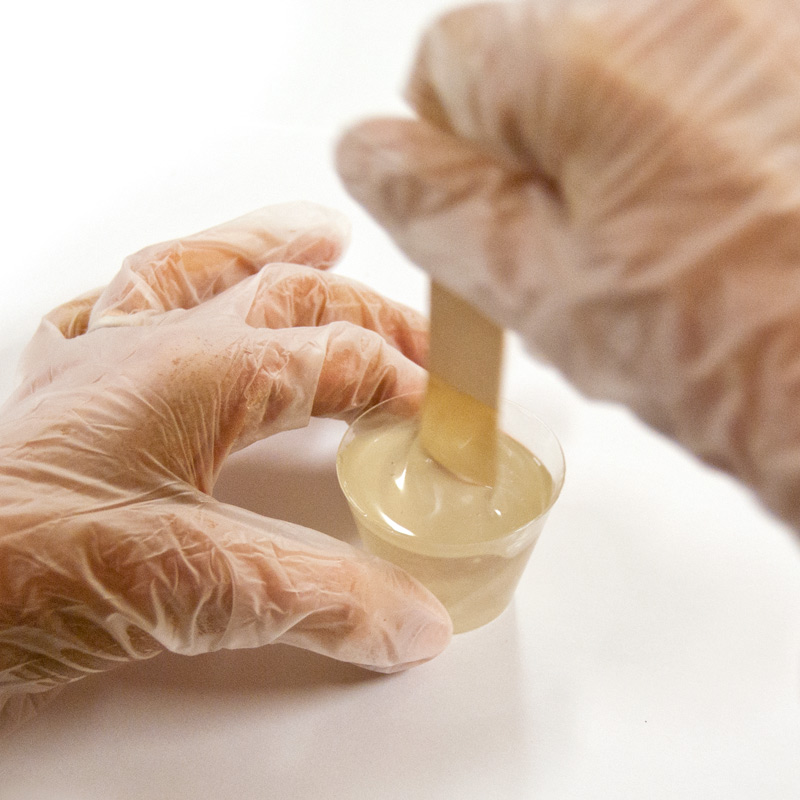
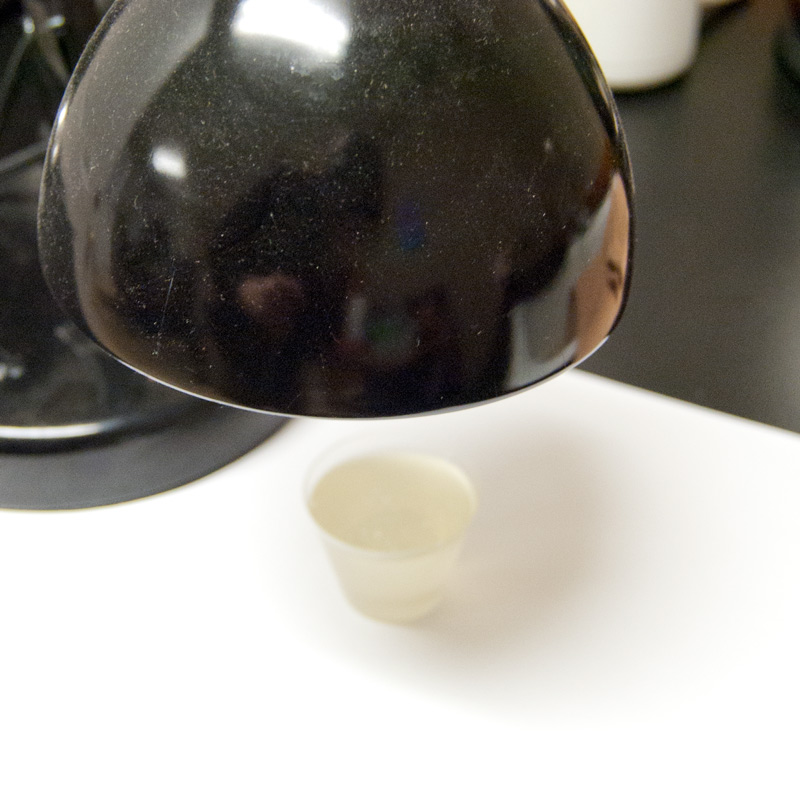
Set your timer for 2 minutes. Using the stir stick from your kit (a popsicle stick or coffee stir stick will work great too), slowly and carefully stir your resin scraping the sides as you stir. Stir for a minimum of 2 minutes. If your resin is still cloudy continue to mix until clear. After mixing is complete and your resin is clear, scrape both sides of your stir stick on the edge of your resin filled cup. Set the mixture under a warm lamp for 5 minutes. This aids the air bubbles in the resin to rise to the surface and pop.
STEP 10: Lay Down Cards To Create A Movable Surface
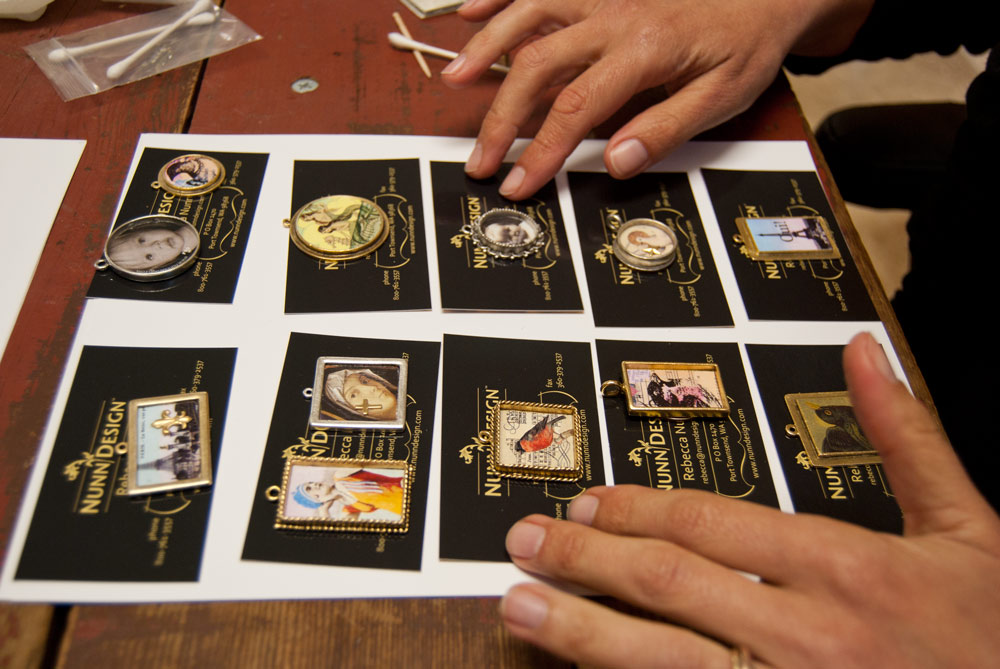
I tend to work in small areas (typically my kitchen table), so I like to work on a surface that I can easily move around and not disturb. Place some business cards or heavy card stock onto a cookie sheet, making it easy to move the bezels without getting any resin on your fingers. Lay your bezels onto the business cards keeping in mind that you will be covering them later with cups to prevent dust for getting on the surface of the uncured resin.
Pouring Nunn Design Resin Into Patera Bezels
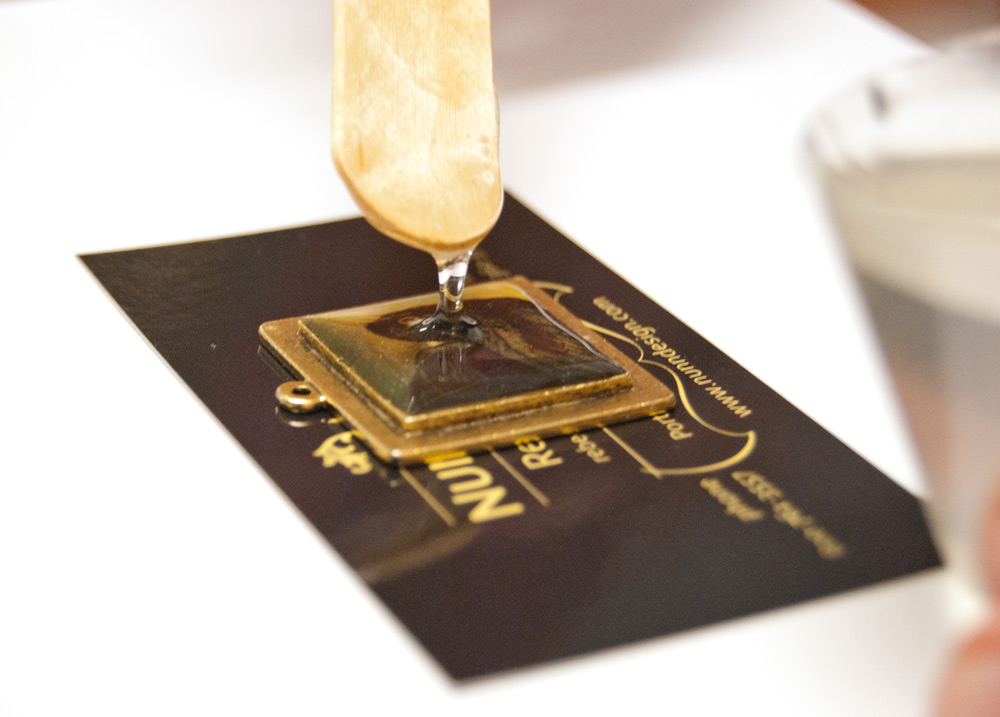
STEP 11: Drizzle resin onto transfer image
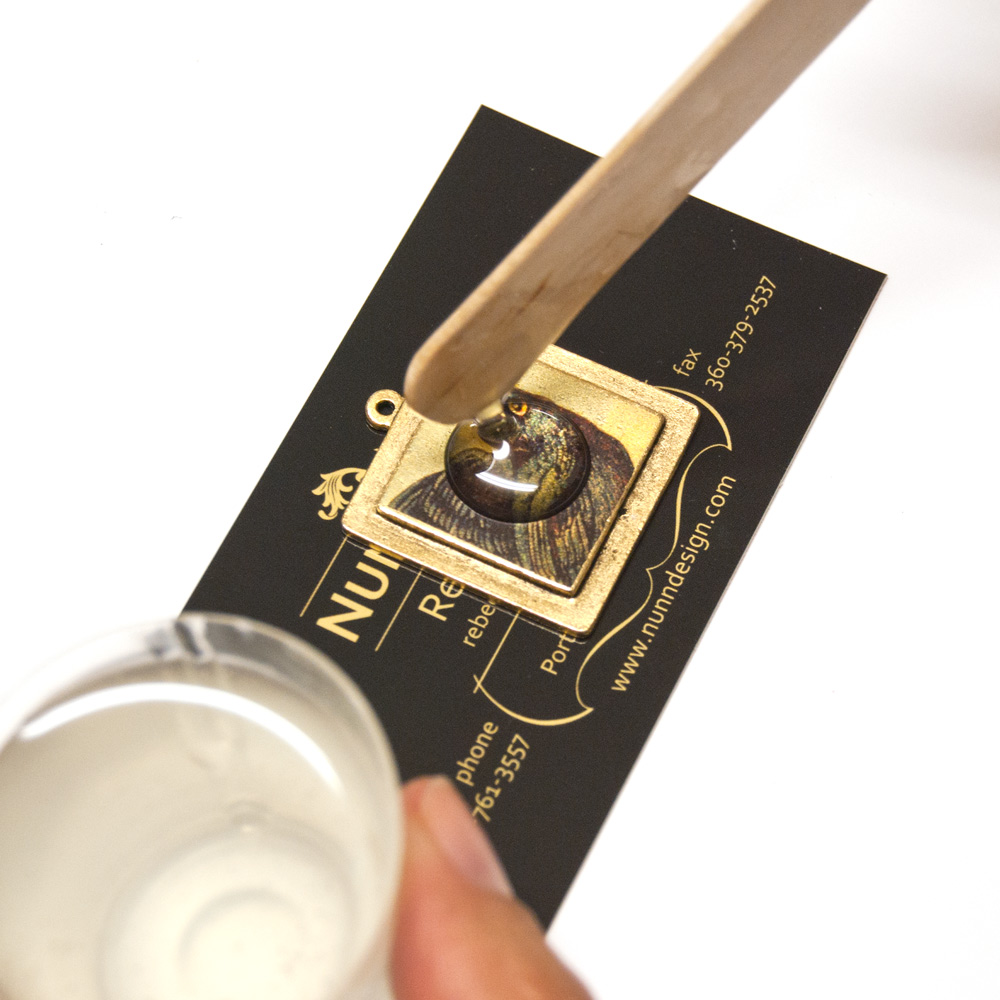
Using the stir stick included in the Nunn Design Resin Kit, drizzle the mixed resin onto the transfer image. Pour the resin until about 85% full. This allows room for you to insert a toothpick if bubbles arise. If you pour the bezel to have a high dome right away, you will run the risk of the resin overflowing. Once your resin is cured, mix another batch of resin and pour until it is has the high dome effect you would like.
Note: On Patera Bezels that don’t have sidewalls, the issue of bubbles is pretty much a non-issue. On the Raised Tags and Raised Pendants, I do not under pour the resin to 85%. I initially dome them as high as I want for my finished piece.
STEP 12: Pouring resin
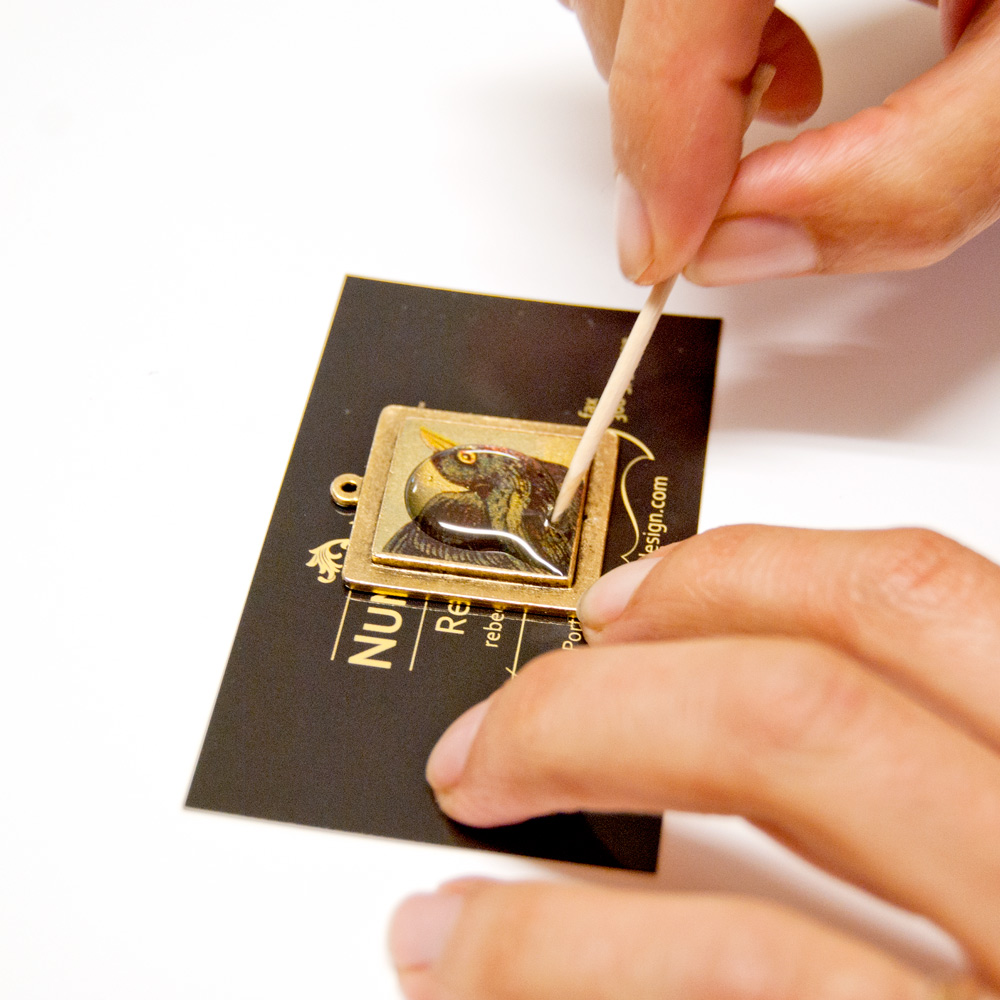
It can be intimidating to pour resin onto a flat surfaced bezel. The Nunn Design Resin is a self-doming resin. The resin wants to know where the side edges are, but the resin will not continue to flow over the sides (well, it will if you DUMP a TON of resin onto the surface). For starters, pour a small amount of resin onto the center of the bezel and use a toothpick to drag the resin to the sides. Once the resin knows where the edges are, it will start to wick itself back up into the center. As you continue to slowly drizzle more resin onto the center pool of poured resin, it will start to spread out to the sides. Once it hits the sides it will stop and start to pool higher, creating a nice domed effect. It sounds complicated, but once you start to play, you’ll experience what I’m talking about.
Using your toothpick, you will want to keep a close eye on your pendants for the first couple of hours. The resin is off gassing and can cause air bubbles to rise to the surface. If bubbles rise to the surface, use a toothpick or headpin to drag the bubbles over to the sides to pop. Breathing on the bubble (not blowing, but breathing heavily) will help the air to expand and pop the bubbles. This part of working with the resin can be tedious. It takes time and it is best not to be in a hurry during this phase of working with resin.
STEP 13: Cover to prevent dust
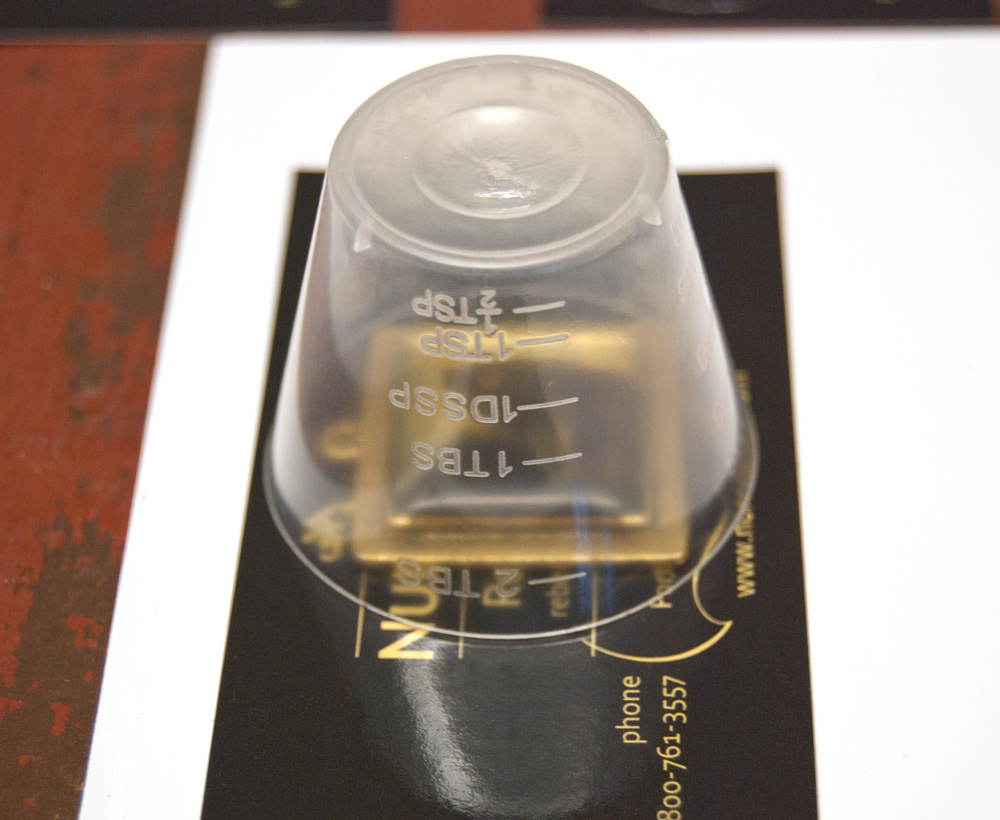
While the resin is curing and you are checking the bezels for air bubbles, place a small dish or cup over the curing piece to prevent dust or animal fur from getting into the resin. Allow the cover to let air still flow underneath it, so the resin has room to breathe. The intention is to have it covered to prevent dust, but not too covered that the resin can’t breathe.
STEP 14: Let cure
Let your bezels cure for up to 48 hours before handling. The resin will feel dry to the touch after 12 hours of curing time, but it is still curing for a full week after it has been mixed.
Shop Supplies RETAIL:
You can explore this technique with our Buy & Try Keepsake Pendants Program.
shop now! > Buy & try – keepsake pendants
Shop Supplies WHOLESALE:
Shop Nunn Design Wholesale
Nunn Design has been supplying jewelry artists with findings for over 20 years. Shop wholesale jewelry findings for creative jewelry makers.
Shop Nunn Design!How to Purchase Wholesale?
If you are interested in becoming one of the many designers who trust their jewelry to Nunn Design Findings, please join us by registering to become one of our wholesale customers!
Please visit our Where to Buy Page for a listing of online stores that sell Nunn Design Findings retail.

If you enjoyed reading this post, please subscribe to our blog. Here are 10 Reasons Why to Subscribe and a place to do so!
Can you please tell me where I can buy the Nunn Transfer sheets for my bezels?
Thank you,
Dianah Rutledge
Shoot. A lot of our suppliers are no longer stocking our transfer sheets. You can purchase them retail on our site at: http://nunndesign.com/shop/retail-keepsake/buy-try-technique-transfer-sheet-combo-6/#sthash.Dm42gM71.dpbs
Or to make your own, you can purchase the LazerTran stock on Amazon: http://www.amazon.com/s?ie=UTF8&page=1&rh=i%3Aaps%2Ck%3Alazertran%20inkjet%20paper