


Inside Nunn Design
12 Ways to Prevent a Resin Jewelry Disaster!
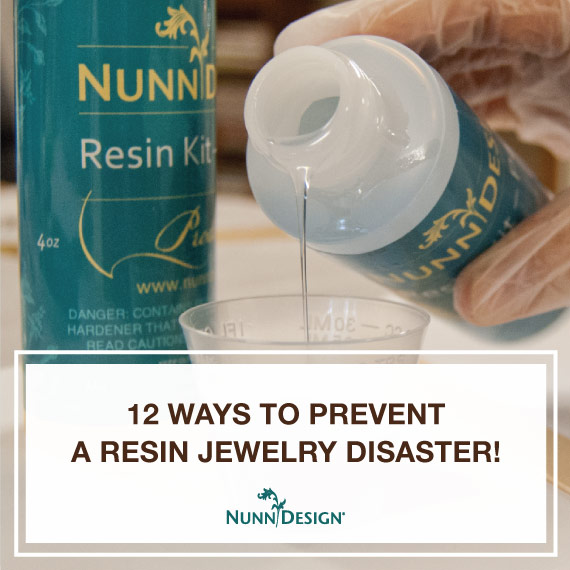
Working with Nunn Design 2-Part Resin to create mixed media jewelry that is one-of-a-kind is fun and crazily creative! If you are scared of resin or have heard some stories about resin disasters, here are 12 ways to prevent them from happening to you.
1. Monitor the Resin and Room Temperature.
Make sure your room temperature and resin are brought up to a temperature of 70-73 degrees, or cooled to that same temperature.
How will this prevent a disaster? This will help prevent additional bubbles from forming in the resin if the room is too cold – and will allow for your working time to be prolonged if the room isn’t too hot.
2. Mix a Minimum of 1 TBSP Part A to 1 TBSP of Part B Ratio
The ratio of Part A and Part B has to be a minimum of 1 tbsp to 1 tbsp in order for the resin to properly activate. Always pour Part A into the mixing cup first, then pour Part B. It is a volume thing, not a weight thing.
How will this prevent a disaster? If you don’t mix a full cup or if you don’t have the 1 to 1 ratio exact, the resin will remain slightly tacky and not cure.
3. Mix for a Full 2 Minutes (or more)!
Mix slowly and thoroughly while scraping the insides of the mixing cup and stir stick for at least two full minutes or until part 1 and part 2 is no longer cloudy. If it is still not clear and slightly cloudy after 2 minutes, continue to stir until it is clear.
How will this prevent a disaster? If it isn’t fully mixed, the resin won’t be fully activated and won’t cure. The surface could remain slightly tacky to the touch.
4. Take Your Time Measuring and Stirring
If you go too fast, chances are you will make an error in your ratio, spill the resin or overly “whip” the resin. Take your time and do it right the first time.
How will this prevent a disaster? Ah, messy resin = messy resin jewelry. If you “whip” the resin, you will also be adding extra air bubbles into the resin.
5. Let Freshly Mixed Resin Sit for 5 Minutes
When the resin is freshly mixed, there will be a lot of air bubbles inside of the resin. If you set the resin under a warm lamp for 5 minutes, these air bubbles will rise to the surface and pop.
How will this prevent a disaster? Air bubbles will be some of your biggest challenges. Finding ways to eliminate them from the start will help the jewelry making process go smoother and easier.
6. Make Sure to Seal Items Before Embedding into the Resin
Resin is naturally oily and can absorb into the paper and porous items. To prevent the items you are embedding into resin from becoming translucent, make sure to properly seal the items first. This can be done with a resin spray or Nunn Design Glue.
How will this prevent a disaster? If the resin absorbs into the paper it could potentially run the inks and darken the image. If the resin absorbs into flowers or organics, the items will become translucent and darken.
7. Make Sure All Items Embedded into Resin are Bone Dry
Resin does not like moisture one bit! It is super important than anything you are embedding into the resin is thoroughly dry. So if you are sealing, allow for time for it to fully dry. If you are embedding organics, make sure that they are fully dried and preserved.
How will this prevent a disaster? Fewer chances of air bubbles forming in the resin.
8. Drizzle Resin Slowly & Agitate Resin!
When it comes time to pour your properly mixed resin into your Nunn Design Finding of choice, “drizzle” the resin into the bezel with a stir stick. Before you drizzle your resin up to the lip of the bezel, take a moment to go along the inside base edges of the bezel with a toothpick. Agitating the resin at the 90-degree angles in the bezel will help dislodge any air bubbles that could be lying underneath the surface of the resin.
How will this prevent a disaster? Bubbles are one of the most common challenges with resin. Pouring slowly and allowing for time to agitate the resin will help prevent these issues.
9. Allow Resin Pieces to Cure on A Tape Covered Business Card
I can guarantee that you will have your resin jewelry items pour over the sides of the bezels. It just happens. The key to having this be a non-issue is to find ways to make clean up easy. I like to use business cards covered with packing tape because it allows me to move the cards around on my work surface and not disturb the resin. It also makes it really easy to peel the resin off of the bezel once the resin is cured.
How will this prevent a disaster? It is really easy to disturb resin that has a high dome. By keeping the bezel level and resting on a tape covered business card, it is easy to move around the curing resin and clean it up if there is overflow.
10. Babysit Your Resin Pieces!
The resin will continue to off-gas for the first couple of hours. Check frequently to see if any bubbles have risen to the surface of the resin. If so, use your hot breath to “huff” on the resin. The hot air from your breath will cause the bubbles to expand and pop. If you have some really stubborn bubbles, you can use a toothpick to “poke” at them. You can also drag the bubbles over to the side of the bezel to help them to pop.
How will this prevent a disaster? Bubbles are just a given for resin. Knowing that you have to keep checking hours after you have poured will allow you time to make sure your pieces come out clear and bubble free(er).
11. Remove Excess Resin During the Soft-Cure Phase
As I mentioned in step 9, resin often over pours. The ideal curing period to remove excess resin is when the resin is at the “soft cure phase.” The resin will be firm to the touch and slightly tacky around the 7-9 hour point of the curing process. This is the ideal time for peeling away any excess resin off of the sides or back of the bezel.
How will this prevent a disaster? Ah, overflow can be messy. Just wait it out and then clean it up.
12. I Want To Start Over! How to Remove Cured Resin from the Bezel!
If you are unhappy with your end results, or if your resin just never fully cured properly (review steps 1-11 and repeat!) you can remove the resin from the bezel. Find a pot and some cooking tongs that you are no longer using for cooking purposes (I found my pot at a garage sale for 25 cents). Fill the pot ½ full with water and bring it to a boil. Place the bezels into the boiling water with a pair of cooking tongs and let boil for 5 minutes. Using the tongs, remove the bezel and poke at the resin with a toothpick. If the resin is still hard to the touch, place the bezel back into the pot for another 5 minutes. Once the resin is softened, it will be easy to remove it from the bezel with a drizzle stick. Clean the bezel with rubbing alcohol and start again at step 1.
How will this prevent a disaster? You can reuse the Nunn Design Bezels, saving you money and allowing you the freedom to explore. Trial and error are necessary for really pushing your creativity!
Watch a Video!
Watch this short video for an overview of the process of mixing Nunn Design Resin.
Your Resin Story?
Alright, are any of you guilty of any of these? Please tell us your resin story!

If you enjoyed reading this post,
please subscribe to our blog.
Here are 10 Reasons Why to Subscribe
and a place to do so!
Shop Nunn Design Wholesale
Nunn Design has been supplying jewelry artists with findings for over 20 years. Shop wholesale jewelry findings for creative jewelry makers.
Shop Nunn Design!How to Purchase Wholesale?
If you are interested in becoming one of the many designers who trust their jewelry to Nunn Design Findings, please join us by registering to become one of our wholesale customers!
Please visit our Where to Buy Page for a listing of online stores that sell Nunn Design Findings retail.
If you enjoyed reading this post, please subscribe to our blog. Here are 10 Reasons Why to Subscribe and a place to do so!
Thank you – I needed both these lists of tips. I just finished my 3rd batch of resin tries and it’s getting better. So happy to know I can re-do and save the precious bezels that contain disasters. I’m still having a bit of trouble with using paper backgrounds. I coat back & front with sealers but a few have had discoloration around the edges so I’m wondering if I also coat the edges if that would help. I also have trouble getting a perfect fit – I have to trim – trim and still it sometimes is not perfect. I guess it’s just practice. Thanks.
Hi Barbara!
It sounds like sealing the edges of your paper is the missing step. Here is a tutorial that may be helpful!
https://nunndesign.com/cheatsheets/Make-Your-Own-Keepsake-Pendants_Collage-Sheets-Resin.pdf
Thank you!