


Tutorials
Colorized Resin with Glitter Roxs Tutorial
![]()
With each batch of flat tags that we plate, we test them to make sure that the plating doesn’t chip when metal stamped. As a result of our testing, we have amassed a large stash of unsellable tags. If we had a stash growing, chances are that metal stampers who didn’t stamp just right might have damaged tags too. Hence, I was in pursuit of finding ways to utilize the waste. The technique of colorized resin and pouring the resin over the damaged tags solved my damaged tag and waste issues.
This tutorial features our Hammered Flat Tag Long Narrow Horizontal (mouthful!) and our Flat Tag Small Rectangle Horizontal, both from the 2016 Summer Collection.
Learn How!
Nunn Design Supplies:
- Nunn Design Flat Tags
- Nunn Design 2-Part Resin Kit
- Castin’ Craft Opaque Pigments
- Glitter Roxs
Other:
- Wet-Wipes
- Toothpicks
- Business Cards
Step 1: Mixing and Colorizing the Nunn Design 2-Part Resin
Read the resin instructions for safety concerns regarding the Nunn Design Resin.
When I work with resin, I always:
- Place a large plastic bag over my work surface and tape it down.
- I make sure I have ventilation in my workroom.
- I wear gloves.
- I wear glasses (readers because I can’t see anymore. Plus it protects my eyes!).
- I have a pile of wet wipes handy.
- This is a great blog post that covers 20 Habits for Successfully Using Nunn Design 2-Part Epoxy Resin. Even if you are a seasoned resin mixer, this might be worth a read.
- You can also watch this great video on How to Mix Nunn Design Resin
Step 2:
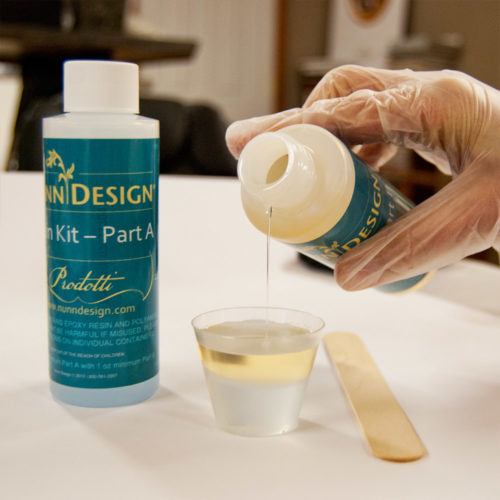
Place one cup (included in the Nunn Design Resin Kit) onto your table. For curing purposes, it is very important that the resin be an exact 1 to 1 ratio of Part A and Part B. I suggest getting your eyes level with the resin so you can see the lines on the measuring cup.
Pour Part A of your resin kit up to the ½ fluid ounce mark on your measuring cup.
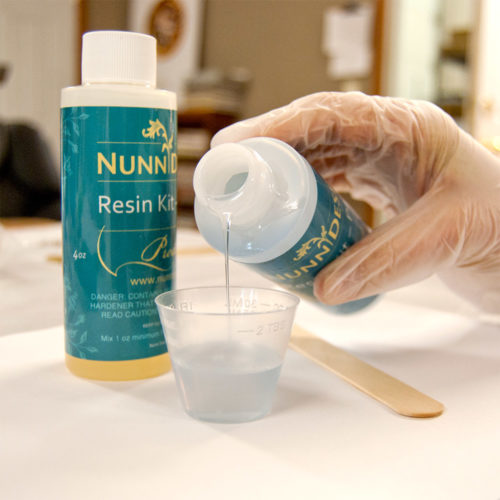
Pour Part B of your resin kit into the same cup until it is filled to the 1 fluid ounce mark.
Step 3:
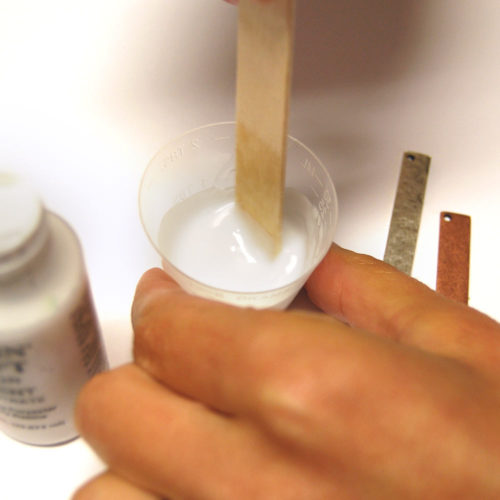
Set your timer for 2 minutes. Using the stir stick from your kit (a popsicle stick or coffee stir stick will work great too), slowly and carefully stir your resin scraping the sides as you stir. Stir for a minimum of 2 minutes. If your resin is still cloudy continue to mix until clear. After mixing is complete and your resin is clear, scrape both sides of your stir stick on the edge of your resin filled cup.
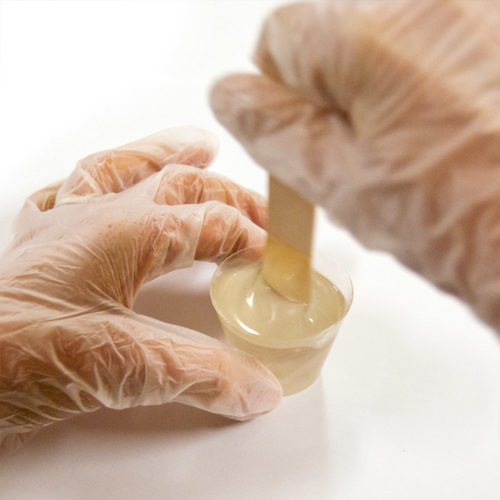
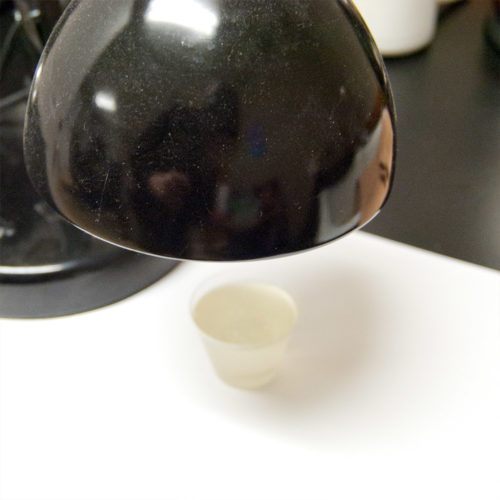
Set the mixture under a warm lamp for 5 minutes. This aids the air bubbles in the resin to rise to the surface and pop.
Step 4:
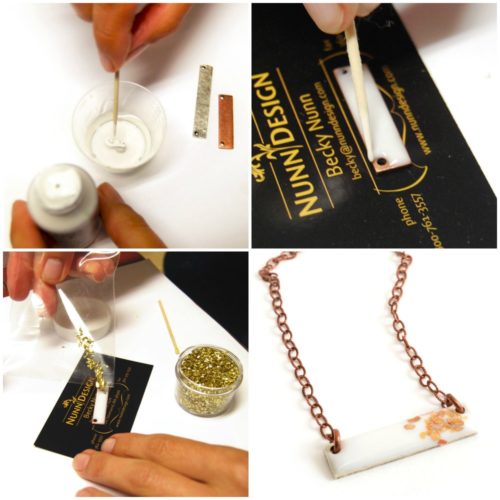
After your resin has been under the lamp for 5 minutes, pour a small amount of the mixed resin into a second measuring cup. Add in a toothpick tip worth of the Castin’ Craft Opaque Pigment White. If the color isn’t opaque enough, continue to add more pigment.
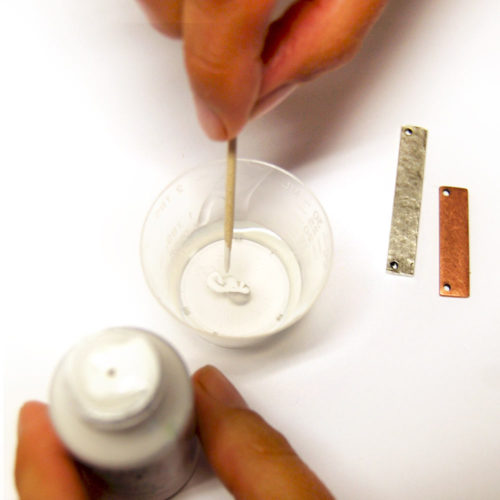
You can mix the full 1 fluid ounce measuring cup of resin if you want, but I transfer the resin into smaller cups because it is easier to stir and less messy to move around when less full.
Tip: Be sure that the colorant does not equal more than 10% of your resin as having more than 10% could cause issues with curing!
Step 5:
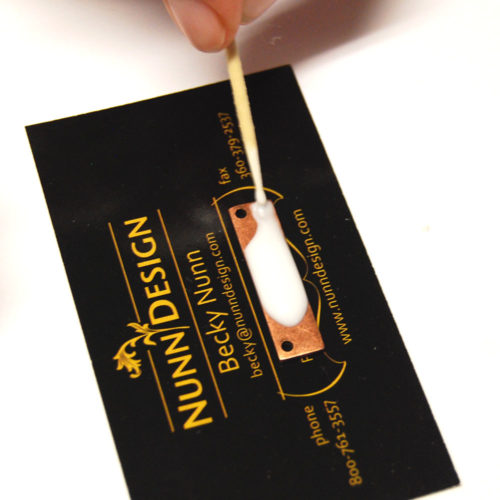
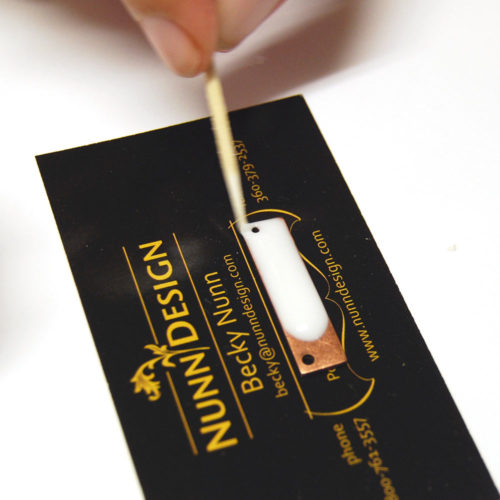
Use a stir stick to drizzle a small amount of colorized resin onto your flat tag. It is always easiest to add just a wee bit and add more, versus pouring on too much and having to clean up the overflow.

Step 6:
With a toothpick, pull the colorized resin to the edges of the flat tag. Nunn Design’s 2-Part Resin is a doming resin.
The resin will get to the edges and not overflow but only if you have not applied too much to the surface area. Moving the resin around the holes can be a little tricky if you have a lot of resin drizzled onto the flat tag. It might be easy for the resin to fill the holes.
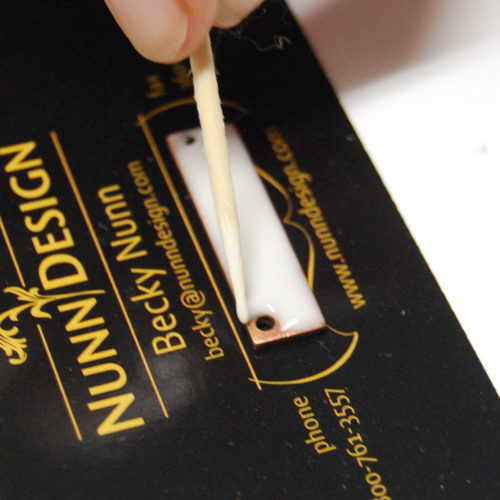
Step 7:
If the colorized resin does fill a hole, slide the flat tag over to the edge of the business card and gently pick it up from the underside (being careful not to touch the edges). Move the flat tag to another area on your business card. This will clear the hole of filled resin.
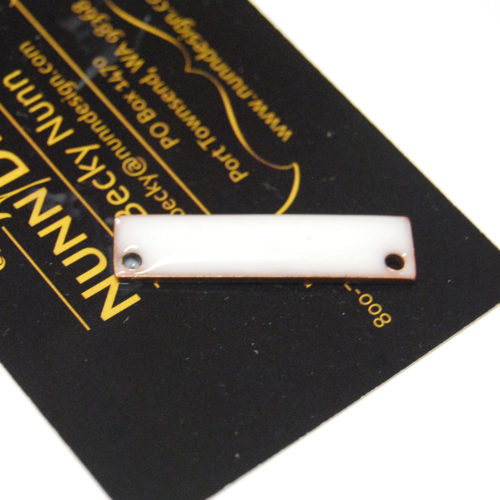
Step 8:
In order to control the flow and the quantity of the Glitter Roxs that I added to my flat tag, I sprinkled a couple Roxs onto a cello bag. Gentle tap the surface of the cello bag and apply the Glitter Roxs where desired.
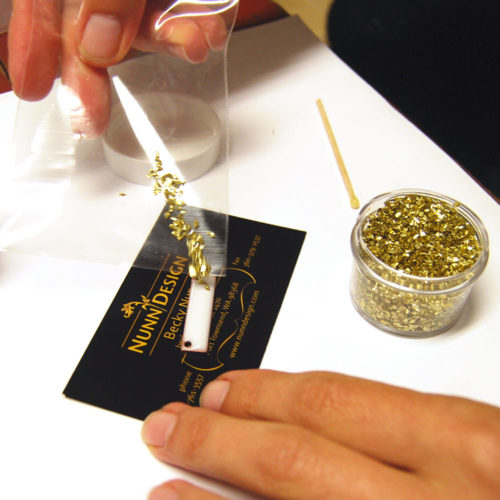
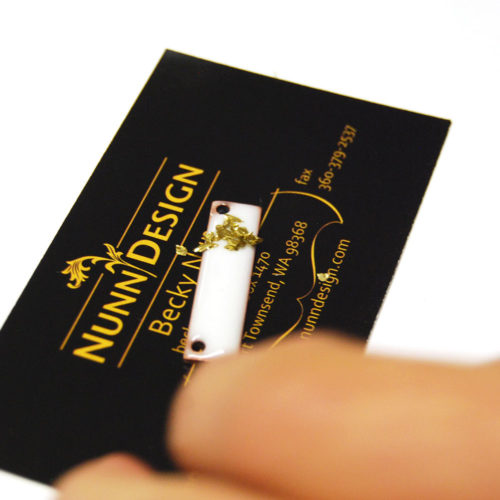
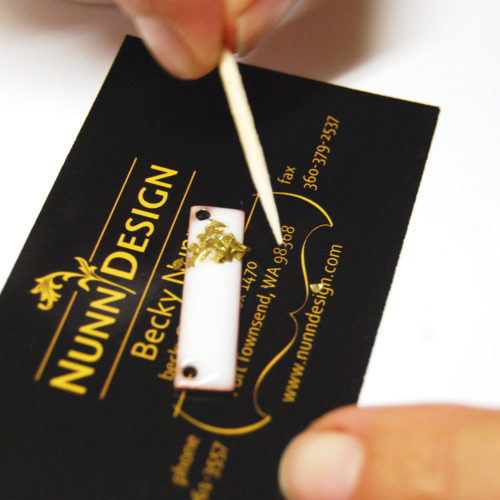
Step 9:
Use a toothpick to gently guide the Glitter Roxs where you would like them.
Step 10:
Let the resin cure for 24 hours before finishing your necklace.
![]()
(ND Gallery: Chara)
![]()
(ND Gallery: Alpheratz)
Shop Supplies Wholesale:
- 2016 Summer Collection!
- Nunn Design Flat Tags
- Nunn Design 2-Part Resin Kit
- Castin’ Craft Opaque Pigments
- Glitter Roxs
How to Purchase Wholesale?
If you are interested in becoming one of the many designers who trust their jewelry to Nunn Design Findings, please join us by registering to become one of our wholesale customers!
Nunn Design primarily sells wholesale, but we do offer Retail Kits and Retail Buy & Try Programs for certain projects. For all other findings, please visit our Where to Buy Page for a listing of online stores that sell Nunn Design Findings retail.

If you enjoyed reading this post,
please subscribe to our blog.
Here are 10 Reasons Why to Subscribe
and a place to do so!
Shop Nunn Design Wholesale
Nunn Design has been supplying jewelry artists with findings for over 20 years. Shop wholesale jewelry findings for creative jewelry makers.
Shop Nunn Design!How to Purchase Wholesale?
If you are interested in becoming one of the many designers who trust their jewelry to Nunn Design Findings, please join us by registering to become one of our wholesale customers!
Please visit our Where to Buy Page for a listing of online stores that sell Nunn Design Findings retail.
If you enjoyed reading this post, please subscribe to our blog. Here are 10 Reasons Why to Subscribe and a place to do so!
Very nice. Almost looks enameled! TFS!
It does look like enamel! Have you seen this video: https://www.nunndesign.com/video/how-to-create-a-faux-french-enamel-look/#sthash.fENFhG70.dpbs