


Be Inspired, Tutorials
Embellishing with Epoxy Clay. Adding Color Accents to Nunn Design Charms
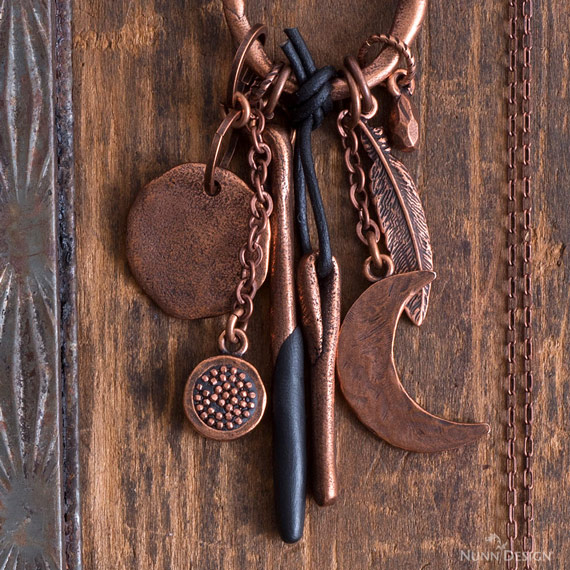
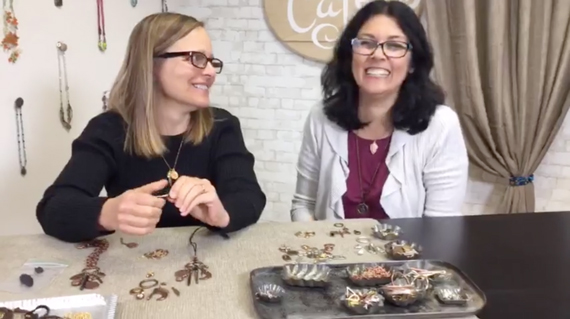
In a recent Facebook Live filmed while visiting the team at Artbeads, we explored designing a charm necklace.
We covered three steps; selecting a common theme, creating balance through layering, and by adding color. I also covered these 3 steps in yesterday’s post: 3 Steps to Designing a Charm Necklace. Select a Common Theme, Create Balance Through Layering and by Adding Color.
This tutorial explores how you can add color to Nunn Design Charms by using Epoxy Clay, a two-part epoxy air dry clay.
Learn How!
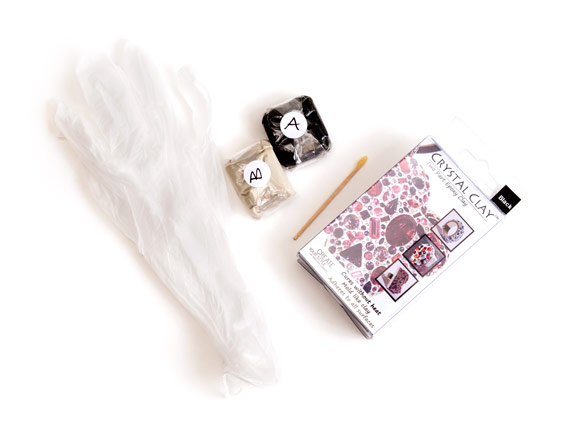
Supplies Needed:
Epoxy Clay-Epoxy Clay Black (cryclay-black)
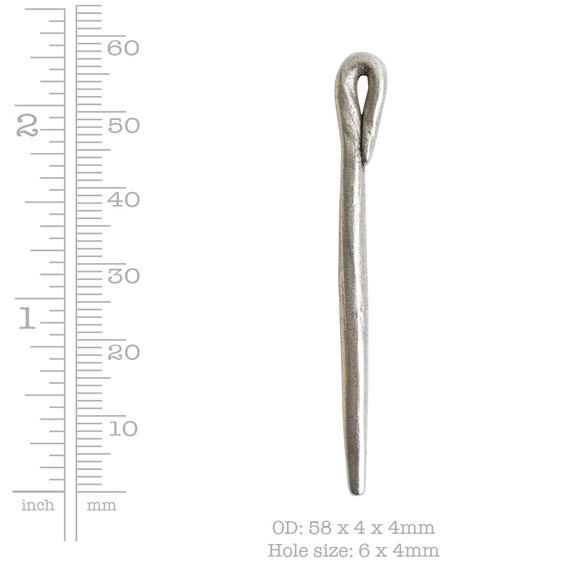
Drop Organic Large (dols)
Other Supplies:
Wet wipes
Toothpicks
Business Cards
Small Plastic Bags
![]()
Step 1:
Follow the manufacturer’s instructions for the handling and mixing of the Epoxy Clay. For mixing the Epoxy Clay, it is best to wear gloves. Pinch off two equal sized balls of Part A and Part B, each approximately the size of a large blueberry.
Step 2:
Blend the clay together until it is no longer marbled and is uniform in color. You have approximately 90-120 minutes of working time before the clay starts to harden, so take your time. Once the clay is thoroughly mixed, remove your gloves to make it easier to work with the clay. This should be enough clay for several charms.
Step 3:
Pinch off a small ball the size of a small pea and roll the mixed -Epoxy Clay thoroughly between your palms until it forms a smooth round ball.
Step 4:
Create a small flat patty with the Epoxy Clay using your fingertips.
Step 5:
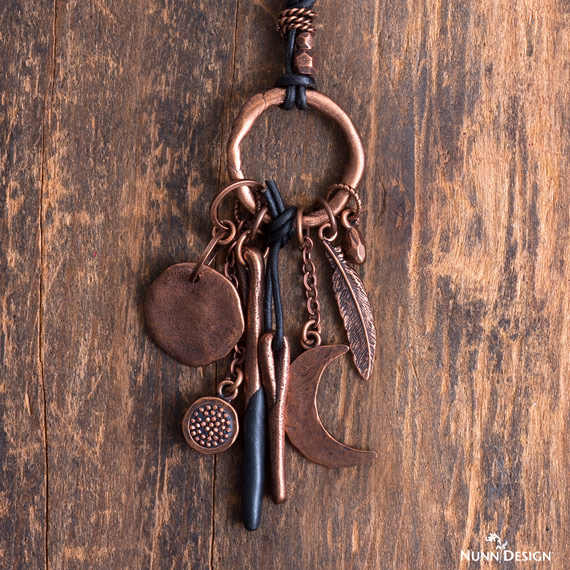
Place the small flat patty of the Epoxy Clay onto the Nunn Design Charm where you desire the color accent to be. In the example necklace above and in the video, I used a Nunn Design Drop Organic Large charm.
Pat the clay with your fingertips, sculpting it onto the charm. If you have too much clay, you can pinch off the excess and pat smooth.
Step 6:
Using a wet-wipe, clean up any excess Epoxy Clay that might have been left on the jewelry finding. The Epoxy Clay hardens like cement, so cleaning it up now and being tidy as you go makes the process easier and the results so much nicer.
Step 7:
I tend to work in a small area (typically my kitchen table), so I like to work on a surface that projects can be easily moved around and not disturbed. Place some business cards or some heavy card stock onto your work surface, making it easy to move the charms without disturbing them. You might also want to cover your business card with packing tape or a small plastic bag. This will prevent the Epoxy Clay from sticking to the surface of the business card.
Step 8:
Lay the Epoxy Clay covered charms onto the plastic to let them cure. Make sure to rotate the charms during the first 120 minutes, making sure that the clay doesn’t stick to the plastic. If it does, peel away the charm, pat the clay until it is smooth again. Place the charms back onto the plastic surface to cure. The clay will be hard to the touch within 120 minutes, but will continue to cure for the next 48 hours.
Step 9:
Assemble into something awesome!!
Shop Supplies:
Shop the Supplies Retail:
- Nunn Design Products at Artbeads.com
- Nunn Design Organic Drops at Artbeads.com
- Nunn Design Organic Hoops at Artbeads.com
Shop the Supplies Wholesale!
Visit this necklace in our gallery to see all the items used to create it!
Watch the Facebook Live
Watch the Artbeads Facebook Live to see me adding Epoxy Clay onto one of our Nunn Design Organic Drops. It is a fairly quick and easy technique to explore and a great way to add color accents!

If you enjoyed reading this post,
please subscribe to our blog.
Here are 10 Reasons Why to Subscribe
and a place to do so!
Shop Nunn Design Wholesale
Nunn Design has been supplying jewelry artists with findings for over 20 years. Shop wholesale jewelry findings for creative jewelry makers.
Shop Nunn Design!How to Purchase Wholesale?
If you are interested in becoming one of the many designers who trust their jewelry to Nunn Design Findings, please join us by registering to become one of our wholesale customers!
Please visit our Where to Buy Page for a listing of online stores that sell Nunn Design Findings retail.
If you enjoyed reading this post, please subscribe to our blog. Here are 10 Reasons Why to Subscribe and a place to do so!