


Tutorials
Haylee’s Crystal Point Necklace & Ring Tutorial
![]()
![]()
Haylee, a Nunn Design Team Member, created this amazing Crystal Point Necklace and Ring Set. It was one of the most popular samples at our To Bead True Blue Tradeshow Booth in 2018.
Crystal Points vary in size, so no two pieces of jewelry will come out the same. This technique really requires a personal touch to make it your own.
For the main tutorial, let me walk you through the steps of creating the crystal point necklace.
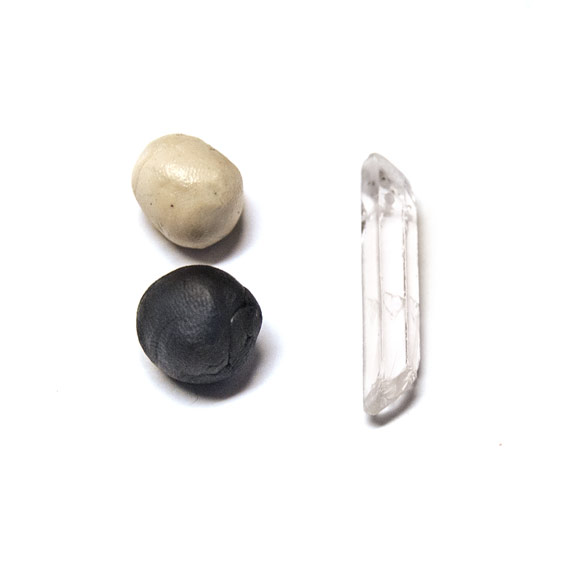
Supplies for the Crystal Point Necklace:
Nunn Design Supplies:
- Open Bezel Channel Deep Large Circle Single
- 5-6 Crystal Points
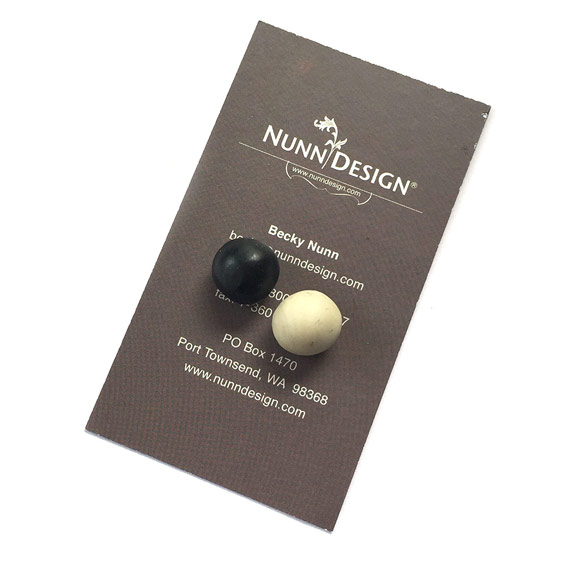
- Crystal Clay-Black • PearlEx Powders-Gold
- 24” 1.5mm Leather Cord-Black
Other Supplies:
- Wet wipes
- Paintbrush
- Toothpicks
Prep the Bezel:
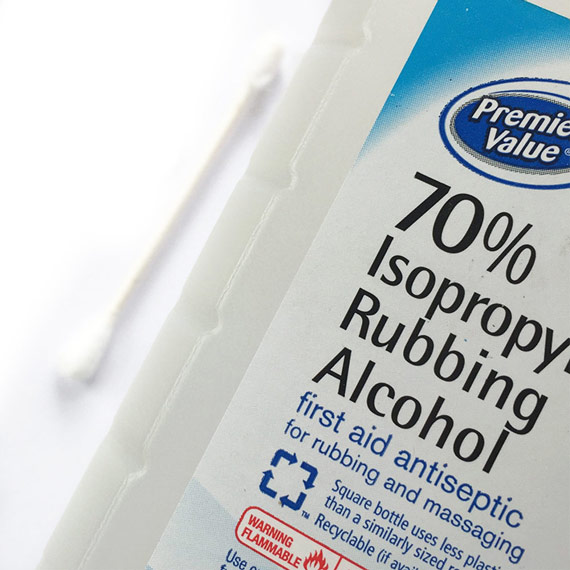
1. The Nunn Design Bezels are oxidized to provide an aged look to the precious metal plating. The oxidization, when it comes into contact with the Crystal Clay, could change the color of the clay. To avoid this, clean the bezel thoroughly prior to embedding the clay into the bezel channel. Dip the tip of a Q-Tip into rubbing alcohol and clean away any of the blackened oxidization from the bezel’s surface.
Crystal Clay, Mix & Press into Bezel:
2. Follow the manufacturer’s instructions for the handling and mixing of the Crystal Clay. While wearing gloves, pinch off two equal sized balls of Part A and Part B and blend together fully until the clay is no longer marbled and uniform in color. You have approximately 90-120 minutes of working time before the clay starts to harden, so take your time. Once the clay is thoroughly mixed, remove your gloves to make it easier to work with the clay.
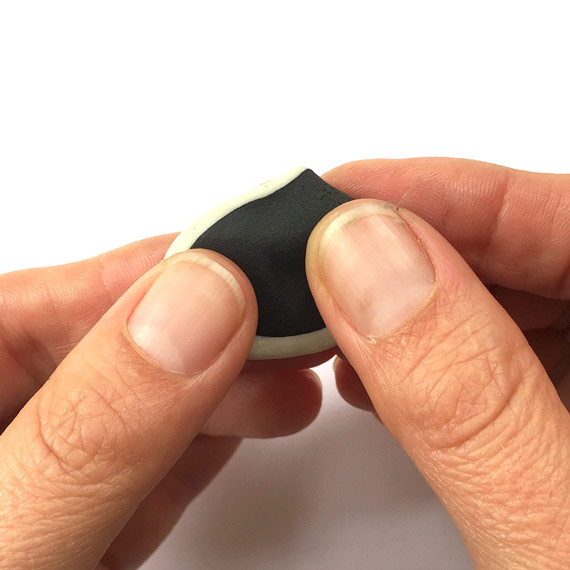
3. Roll the Crystal Clay in the palm of your hands until smooth and round. Any creases in the clay will be more challenging to smooth out later, so roll the clay until it is nice and smooth.
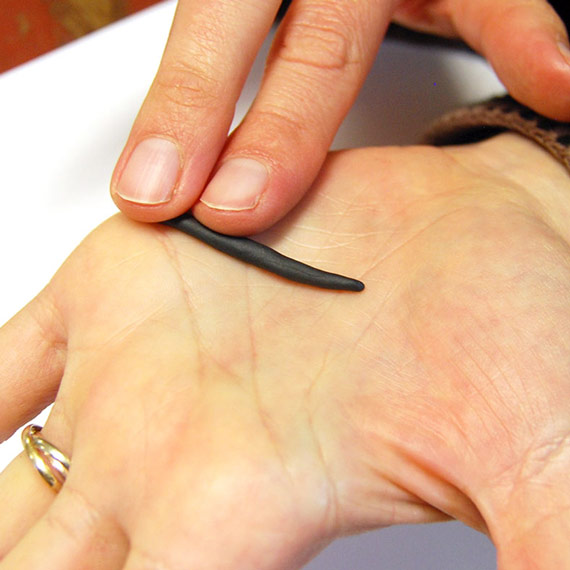
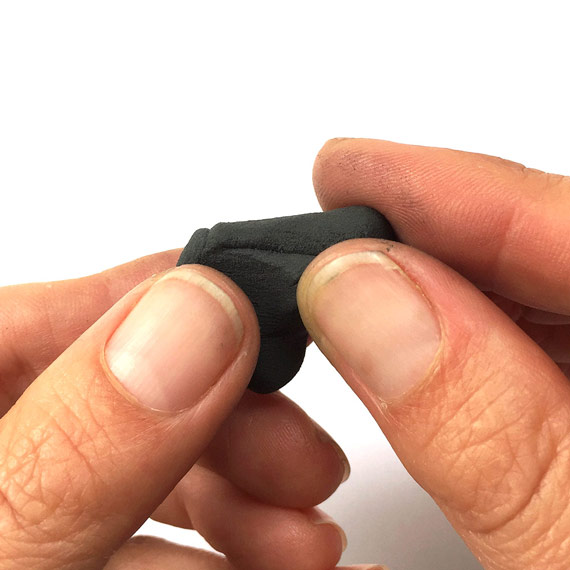
4. Roll the Crystal Clay in the palm of your hand to create a snake like shape. Starting at the looped area of the Open Bezel Deep Channel, start to adhere the Crystal Clay to the bezel. When adhering the clay, I like to use my thumb to push the clay forward and to flatten it toward the edges of the channel. With the other hand, I am laying the Crystal Clay into the center of the channel as I need it. This helps me adhere an even amount of clay in the channel.

5. When the clay is embedded in the channel all the way around the bezel, pinch off your excess Crystal Clay. Use your fingers to pat smooth and blend the start and stop points of the clay. Use a toothpick to make sure that the clay lays flat inside of the loop.

6. Use a wet-wipe to remove any Crystal Clay that may be on your hands or on the sides of the Open Bezel Deep Channel.
Attaching the Crystal Points:
7. Mix another batch of Crystal Clay. Pinch off a pea size mixed ball of the Crystal Clay and roll the clay in the palms of your hands until smooth and round.
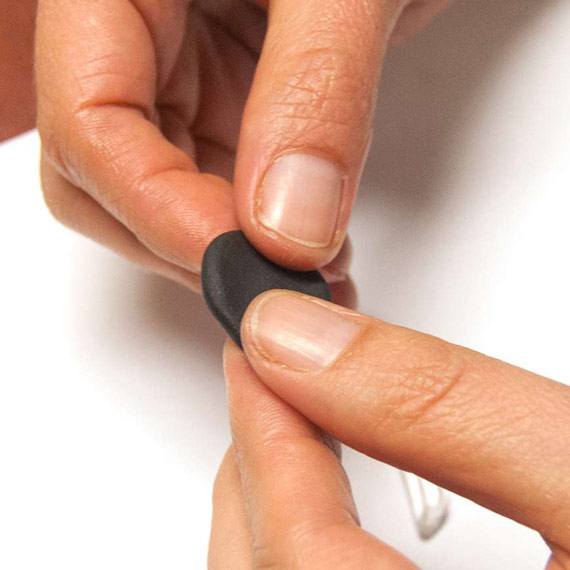
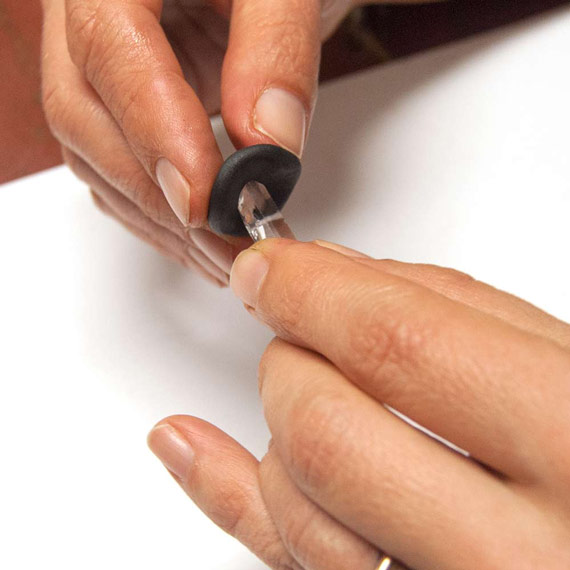
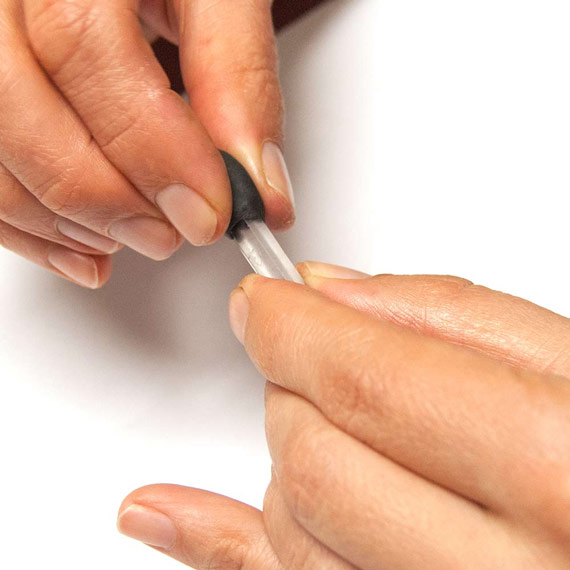
8. Once your ball of Crystal Clay is nice and smooth, use your fingertips to start to shape the ball of clay into a flat patty that is even in thickness. Place the flat patty of Crystal Clay in the center of the end of your crystal point and wrap the clay around the point with your fingers until it is fully attaching to the crystal. Continue until the Crystal Clay is smooth and you have an interesting sculpted look that you like. It will take a bit of playing to get the shape, coverage and thickness that you want when you first start playing with this technique. Give yourself time to explore knowing that you can peel the clay off of the crystal point and start all over if you don’t like how it looks. You have plenty of time to work with the clay before it starts to harden.
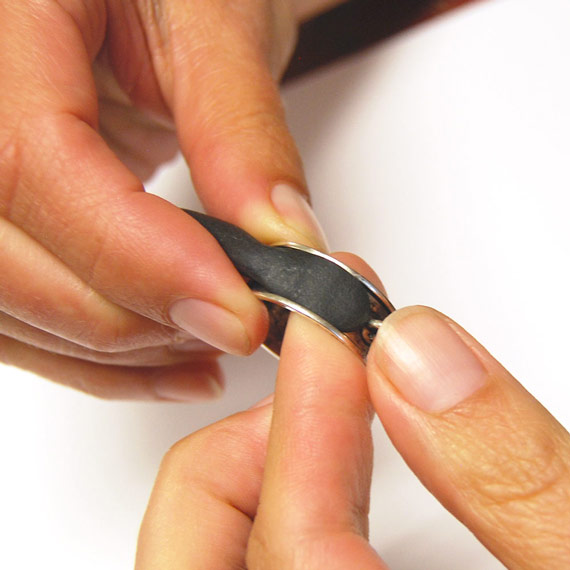
9. Repeat step 8 until you have a cluster of crystal points wrapped with Crystal Clay. Create a cluster by pressing the grouping of Crystal Clay wrapped crystal points together. Once you have a cluster of crystal points that look visually interesting, press the cluster onto the outside edge of the Open Bezel Channel. Your attachment point will be opposite the loop, so the necklace will hang properly.
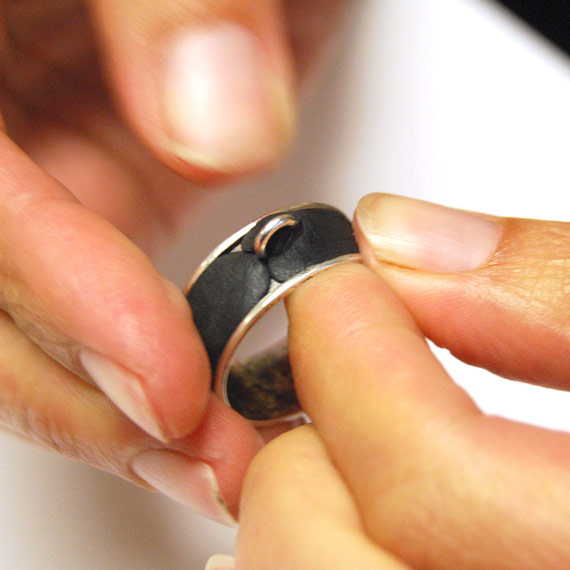
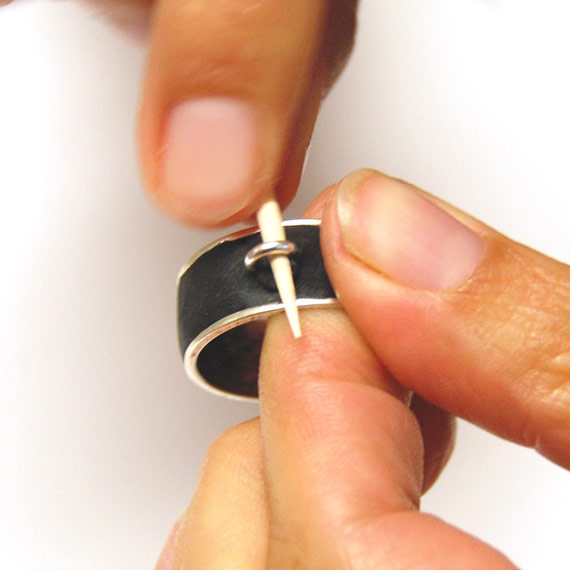
10. To secure the crystal point cluster to the Open Bezel Channel continue to add more Crystal Clay. Use a toothpick to press the clay into the various crevices until you feel the points are secure to the Open Bezel Channel.
11. Use a wet-wipe to clean up any excess Crystal Clay that might have been left on the Open Bezel Channel or crystal points. Crystal Clay hardens like cement, so cleaning it up now and being tidy as you go makes the process easier and the results so much nicer.
Colorize with PearlEx Powder:
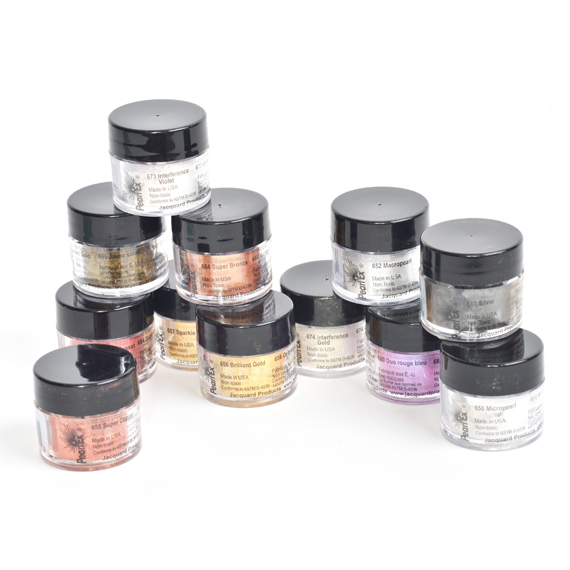
Jacquard Pearl Ex Powdered Pigments Set Series 1 ( jpps1-b)
12. Use a Q-Tip to apply some PearlEx Powder to the surface of the Crystal Clay to create visual interest and highlights to the clay.
13. Allow the Crystal Clay to dry for at least 12 hours.
A Design Option:
![]()
Here is a sample of the crystal points being attached to a Nunn Design Hammered Ring. Same steps! Different finding! Awesome result!
Shop Nunn Design Wholesale
Nunn Design has been supplying jewelry artists with findings for over 20 years. Shop wholesale jewelry findings for creative jewelry makers.
Shop Nunn Design!How to Purchase Wholesale?
If you are interested in becoming one of the many designers who trust their jewelry to Nunn Design Findings, please join us by registering to become one of our wholesale customers!
Please visit our Where to Buy Page for a listing of online stores that sell Nunn Design Findings retail.

If you enjoyed reading this post, please subscribe to our blog. Here are 10 Reasons Why to Subscribe and a place to do so!
Love this project! I have made several – its so fun with all the Nunn design elements. One question, is there something I can apply that will seal the pearl-ex powders on to the pendant so it doesnt rub off ?
Are you applying the Jaquard PearlEx Powders onto the Crystal Clay when the clay is still uncured? We did offer a sealant, but the manufacturer is not longer producing it. I would check into a mat varnish spray, but I do not have a brand that I would recommend. I will research this.
What is the gold clasp used on the cord in the pictures?
Here is a link to this project in the gallery – this lists all of the components used in this necklace: https://www.nunndesign.com/gallery/tomyhoi/
The toggle ring is a ‘toggle ring – antique gold’ and the bar is the ‘toggle bar small hammered – antique gold’ Thank you!