


Making/Using Molds, Nunn Design Online Classes, Tutorials
How to Make a Silicone Mold with a Bezel Registration
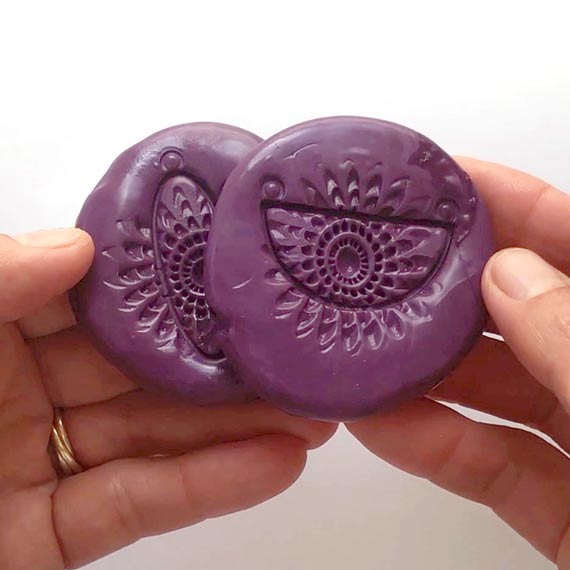
Making an impression, by pressing silicone molds into Epoxy Clay, is a great way to add a design element to your jewelry. It also allows for you to create unique designs for your jewelry brand. This is Class 3 Part 1 of our 2020 Spring Semester of free online classes.
When you are wanting to do production jewelry, it is challenging to get the registration of your silicone mold to be consistent when you press your Epoxy Clay filled bezel down into the mold. This result in inconsistent result and can be frustrating.
This tutorial will cover how you can make a silicone mold using EasyMold Silicone Putty and a bezel to create a perfect registration with each pendant.
Fast Tutorial Video:
Watch this Fast Video For a quick overview of the process and then read the full tutorial below!
Learn How!
Supplies:
EasyMold Silicone Putty
Nunn Design Charm, Brass Stamping or Button
Nunn Design Bezels
Other Supplies Needed:
Wet wipes
Q-tip
Olive or baby oil
Glass Dish
Ziploc Bag or piece of plastic
Tools:
Flush Cutters
Cutting the Charm Loop
Step 1. With a pair of flush cutters, trim away the loop off of the Nunn Design Charm.
Making the Silicone Mold
Step 2. Easy Mold Silicone Putty has a 3-minute working time. For best results and maximum window of being able to work with the putty, make sure your room temperature in brought up to 70 degrees.
Step 3. Lay a piece of plastic, such as a small Ziploc Bag, onto your work surface. Pinch off a small grape-sized ball of Part A and Part B of the Easy Mold Silicone Putty. Getting the knack for mixing just the right amount of putty will take some practice. You might mix too much or too little putty the first time. Try your best to guess the amount of putty you will need to have approximately 1/8” putty around the outside edge of your bezel’s rim. You will also want the thickness of the silicone putty to be approximately 1/8”.
Step 4. To avoid the charm from sticking to the silicone molding putty when making the impression, apply some olive or baby oil onto a Q-Tip and rub it on the Nunn Design Charm. We will be pressing the charm into the mixed putty and pulling it out very quickly. The olive or baby oil on the charm will help it release and not damage the mold.
Step 5. The working time of the silicone molding putty is only 3 minutes, so you will need to work quickly. Take a moment to make sure you have the following supplies. Laying out everything on your work surface prior to mixing will provide more ease.
- Nunn Design Charm
- Nunn Design Bezel
- Wet-wipes
- A flat surface to press the silicone putty into a flat disk
- A Ziploc Bag or piece of plastic
Step 5. Knead both part A and part B together until the putty is blended completely and is uniform in color.
Step 6. Roll the fully mixed Easy Mold Silicone Putty into a smooth round ball that is free of creases. Place the mixed putty onto a piece of plastic. If you have creases, try your best to have the smoothest side of the mixed silicone ball facing up.
Step 7. Use one of the lids from the containers of Easy Mold Silicone Putty or a flat surface, such as a glass bowl, to press down into the silicone putty. Creating a nice round and evenly flat disk with the silicone putty. You will want the putty to be fairly thick, or thick enough to have the item you are embedding be pressed into it and not hit and poke through the bottom of the mold.
Step 8. Press the slightly oiled Nunn Design Charm into the molding putty right away (it sets up really fast!). Use the lid of the putty or a flat surface to press the faceted charms firmly and evenly down into the Easy Mold Silicone Putty.
Step 9. Remove the Nunn Design Charm and press the rim of the bezel into the mold very lightly. Leave the bezel in the putty while it sets-up.
TIP: If you press too hard, you will damage the impression of the charm.
Step 10. The Easy Mold Silicone Putty will start to set and be firm to the touch after 20 minutes. Remove the bezel from the putty.
Step 11. You are ready to start making impressions! Mix up a batch of Epoxy Clay, fill a bezel and have fun creating!
Get Notified of Next Series of Online Classes!
If you would like to know when our next series of online classes will begin, please sign-up to be notified. All class supplies are available both wholesale and retail. Classes consist of tutorials and videos that can be viewed at any time.
Yes! Please Notify Me when Future Classes are Available!
Shop Wholesale Nunn Design Findings
Shop Nunn Design Wholesale
Nunn Design has been supplying jewelry artists with findings for over 20 years. Shop wholesale jewelry findings for creative jewelry makers.
Shop Nunn Design!How to Purchase Wholesale?
If you are interested in becoming one of the many designers who trust their jewelry to Nunn Design Findings, please join us by registering to become one of our wholesale customers!
Please visit our Where to Buy Page for a listing of online stores that sell Nunn Design Findings retail.

If you enjoyed reading this post, please subscribe to our blog. Here are 10 Reasons Why to Subscribe and a place to do so!