


Dried Flowers & Resin, Tutorials
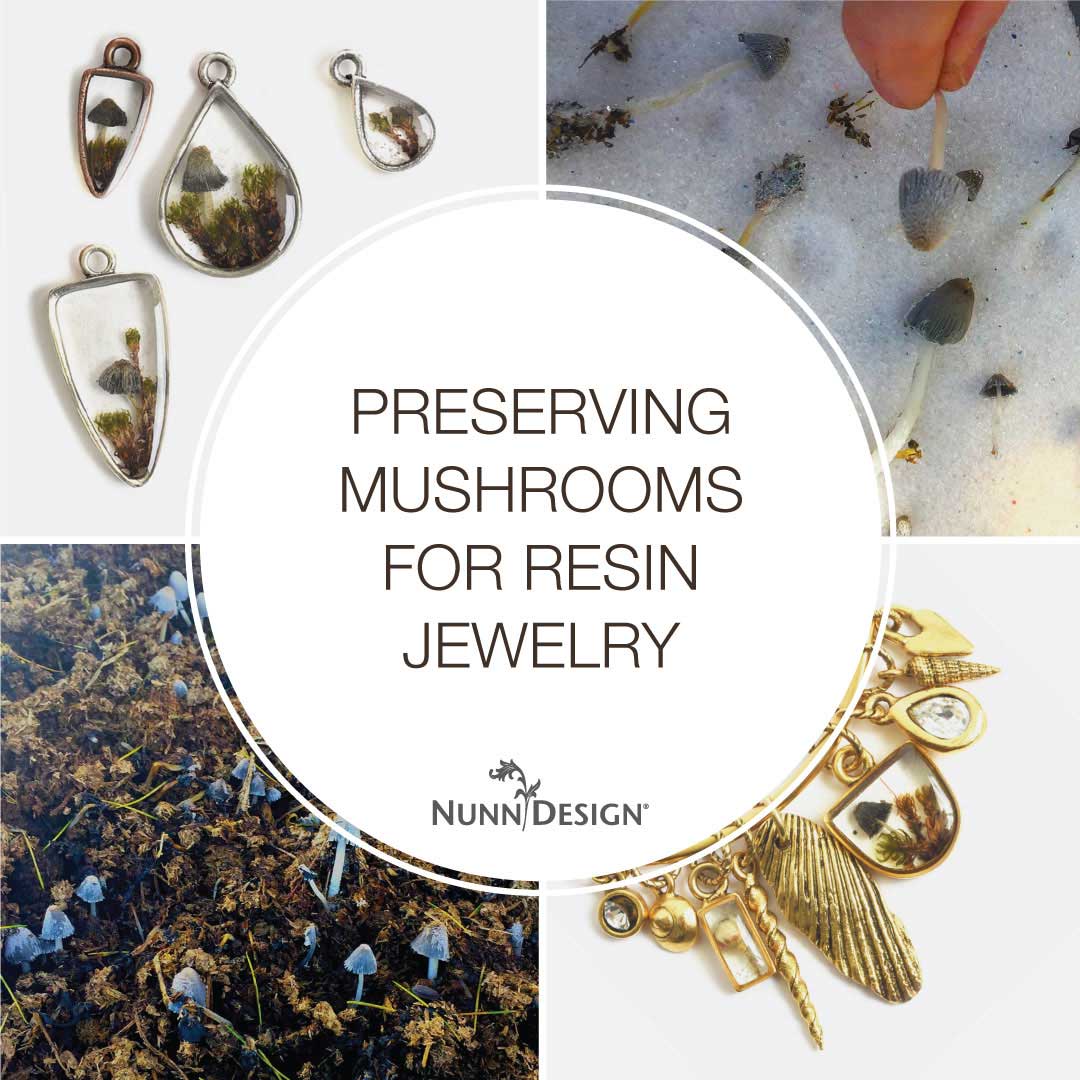
Preserving Mushrooms for Resin Jewelry
The more organics that I preserve, the more I learn. But honestly, in the big scheme of all there is to know on this subject, I have to admit, I know very little. I’m embracing the fact that I’m learning as I go along and am committed to share what I learn.
One of the things so addictive for me, about working with organics, is the hunt of the treasure. Finding a patch of mushrooms or fiddleheads in nature is equal to hitting the mother-load at a garage sale. The same sort of adrenaline courses through my body. Those who have come across a patch of tiny little mushrooms know exactly what I’m speaking about, don’t you?
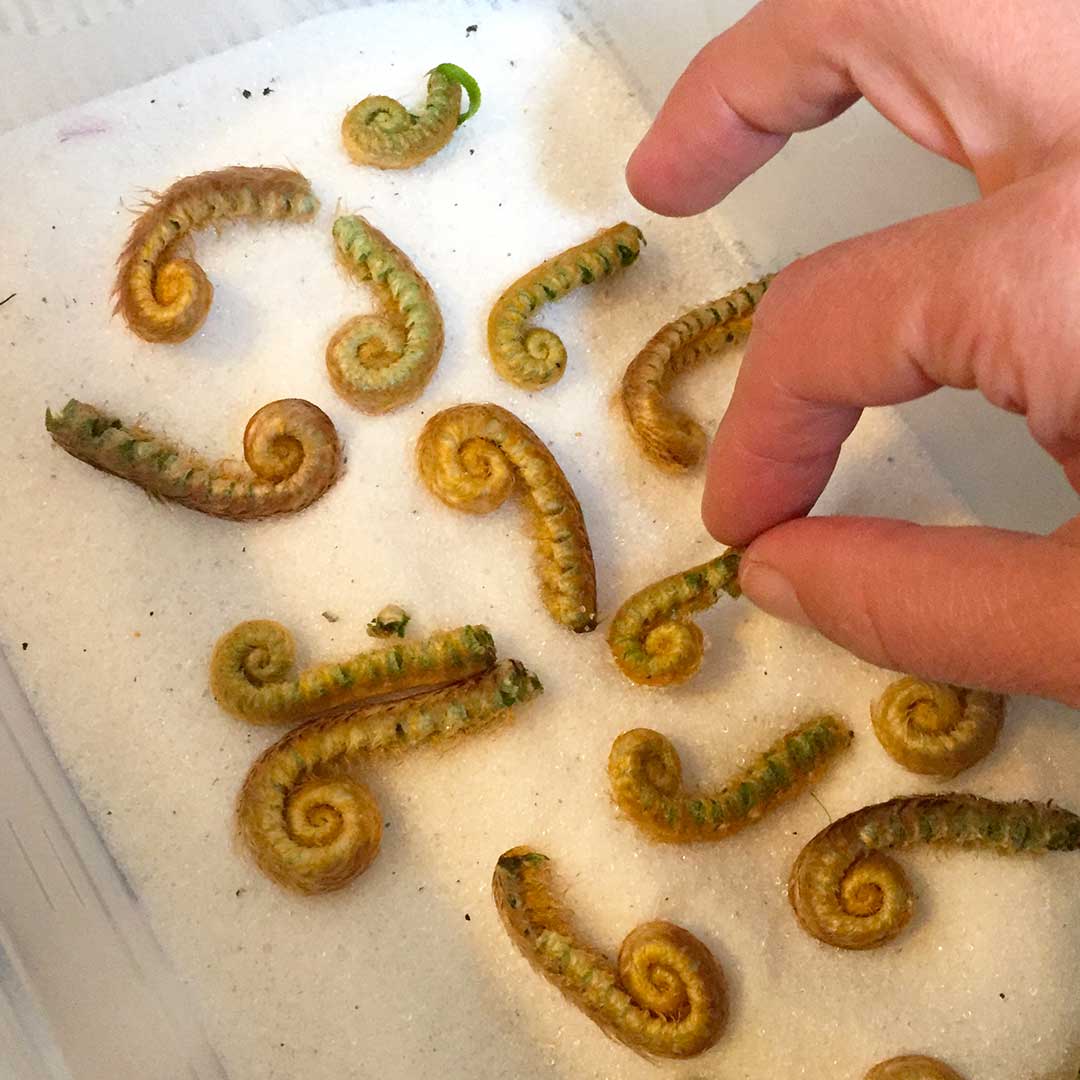
Here are examples of preparing mushrooms and fiddleheads using silica gel.
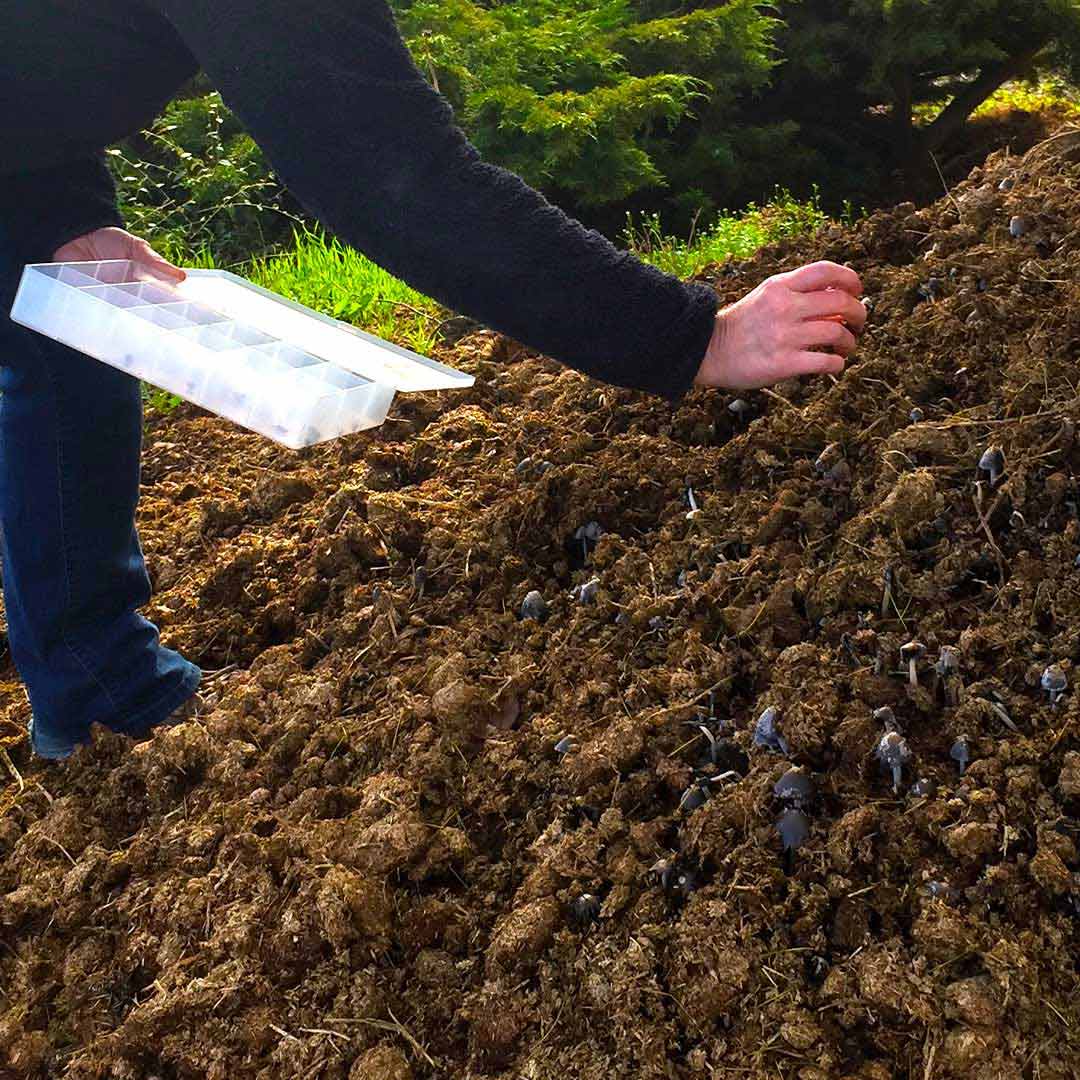
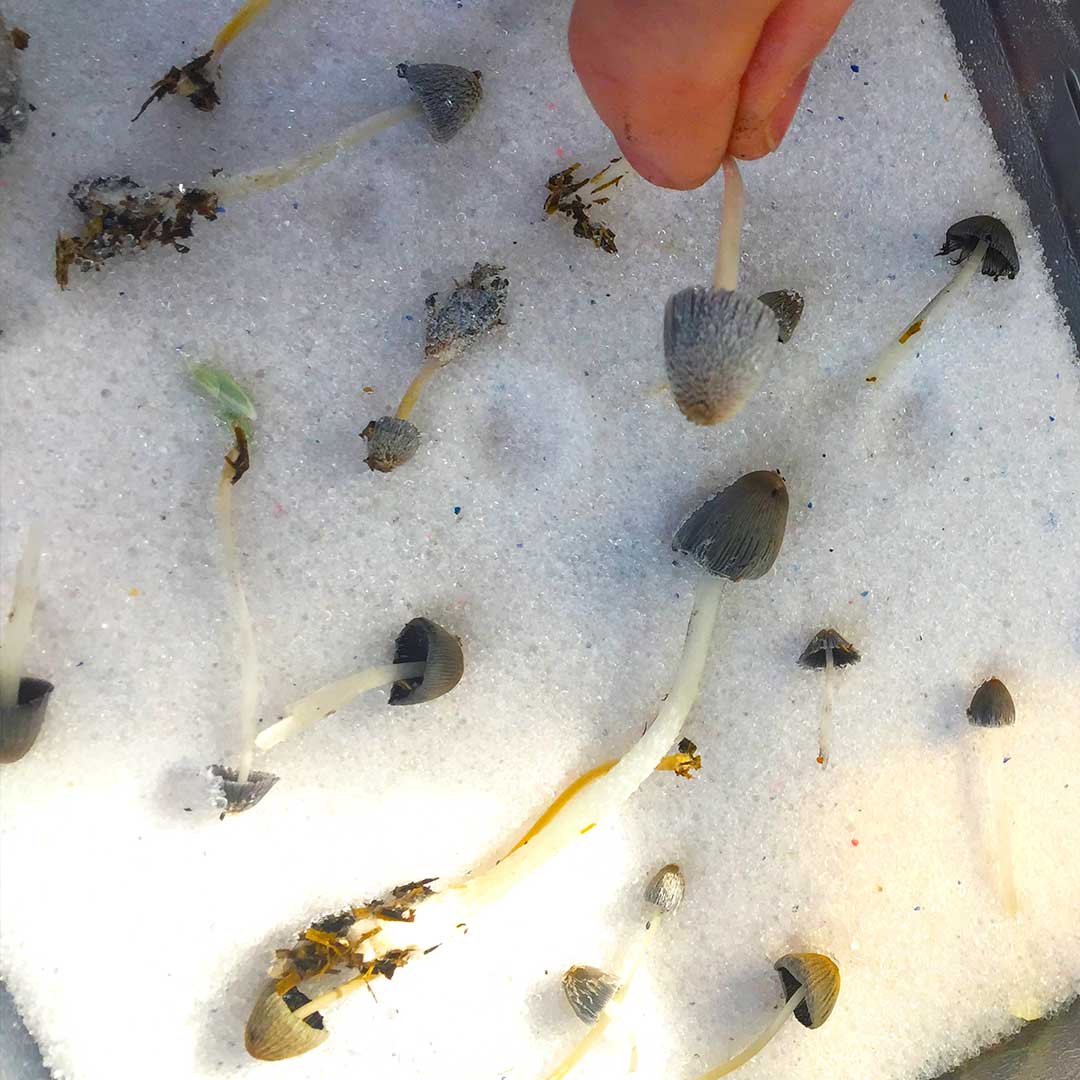
Harvest your Mushrooms, Flowers or other Organics
Step 1 is harvesting your organic treasures! These pictures are from a mushroom harvest a few years back with Katheryn, who works with us at Nunn Design. She sells dried mushrooms in her Etsy store.

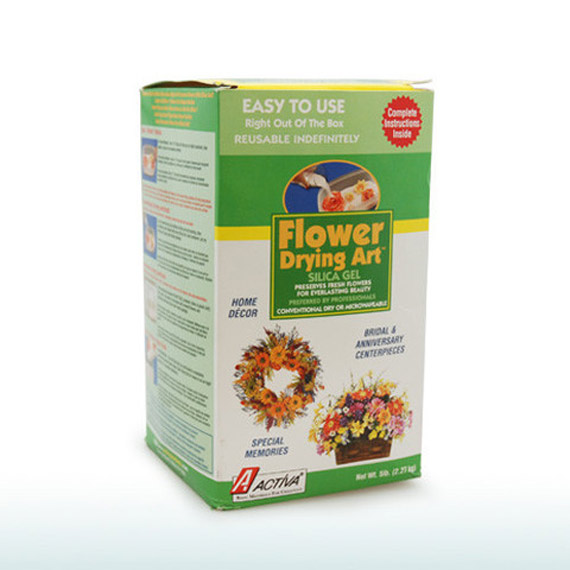
About Silica Gel for Flower Drying Art
Drying your organics with a silica gel allows the moisture in the flower or plant to be removed without altering the color. Bubbles that occur in 2-part resin are often caused by moisture in the organics.
This is the silica gel that I would recommend using. You can find it online by searching “flower drying art silica gel.”
Most flowers can be dried within 2-5 days (there is a chart included in the package of silica gel that states how long various flowers take). The instructions also include methods for speeding up the drying time by placing the silica gel in the microwave. Silica gel is non-toxic and very fine so it doesn’t damage your organics. And it is reusable!
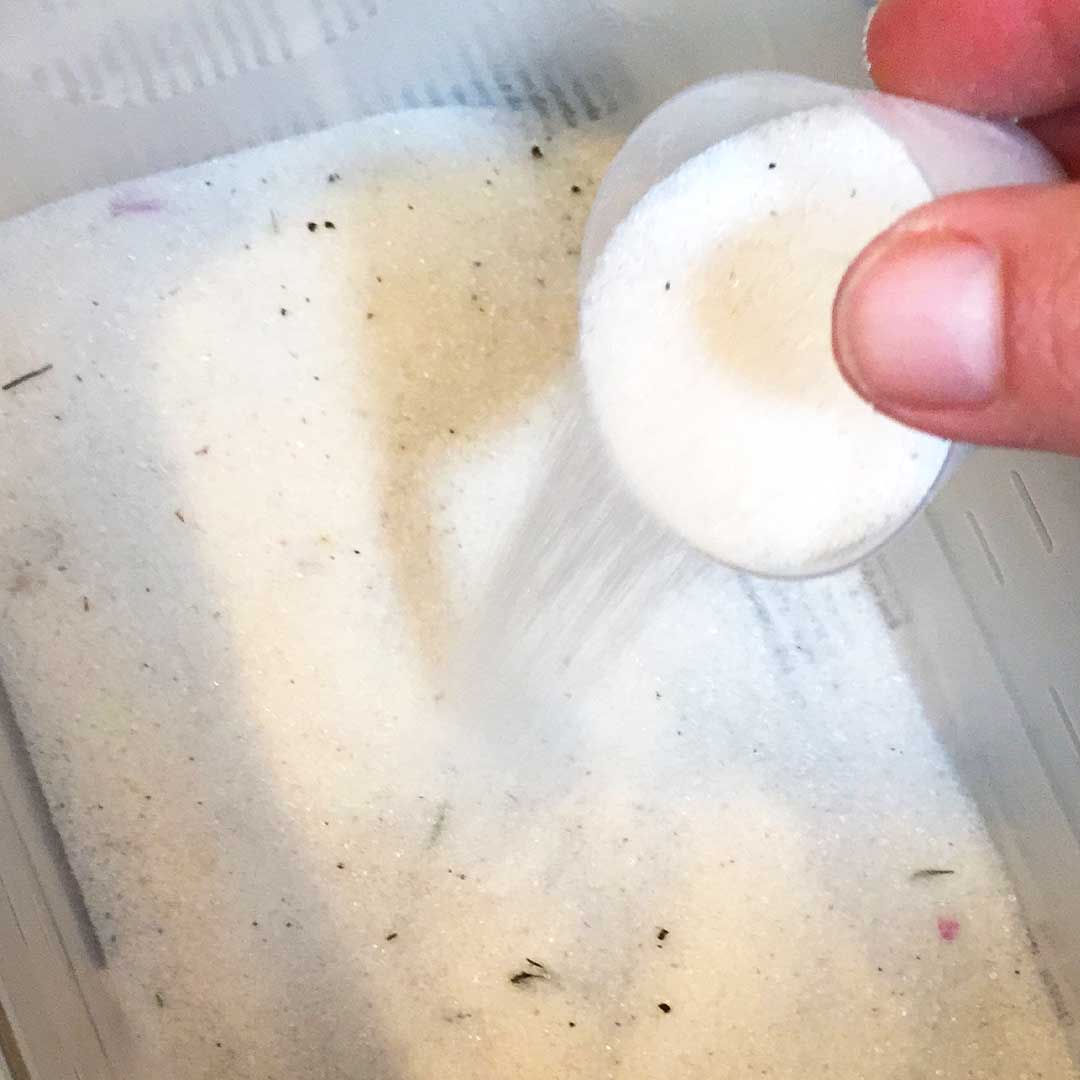
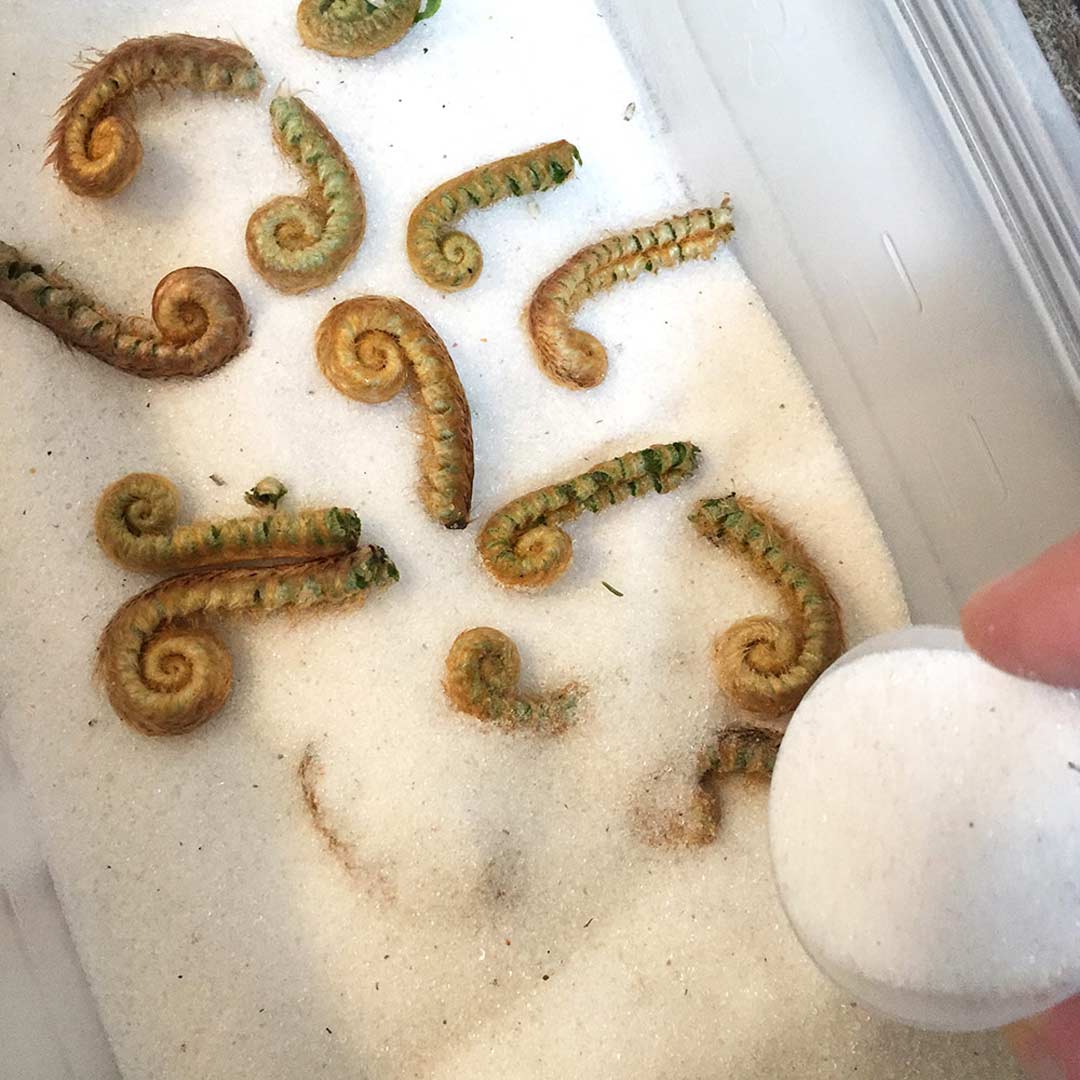
Dry your Organics with the Silica Gel
In a Tupperware container, I sprinkle a layer of silica gel into the base. (If you are seeing stuff in the gel, there were little bits of organics left over from my last batch I dried).
Next I place the organics into the silica gel, leaving space in-between each item.
I continue to sprinkle the silica gel, creating multiple layers. Once all of the organics were covered, I place the lid onto the container.
Let Dry
I place my container under my bed and let it sit for the recommended amount. Well, actually, I tend to forget about them for a week or so. I don’t think there is any time listed on the silica chart on how long fiddleheads take to dry. I figure extra time couldn’t hurt.
Sift and Store
Once the organics have had their time, I sift through the silica gel to find all the dried mushrooms and fiddleheads. The silica gel is very fine. It can be a challenge to get all the gel off the tiny mushrooms. I gently blow on the mushrooms and fiddleheads to try to remove the silica gel. I had no noticeable side effects from the gel still being in the crevices when I poured the resin.
(TIP: I saw this video where someone placed tulle in their container before the silica gel and organics. That way when they were dried, they just pulled the tulle up and it sifted the organics from the silica gel in one go!)
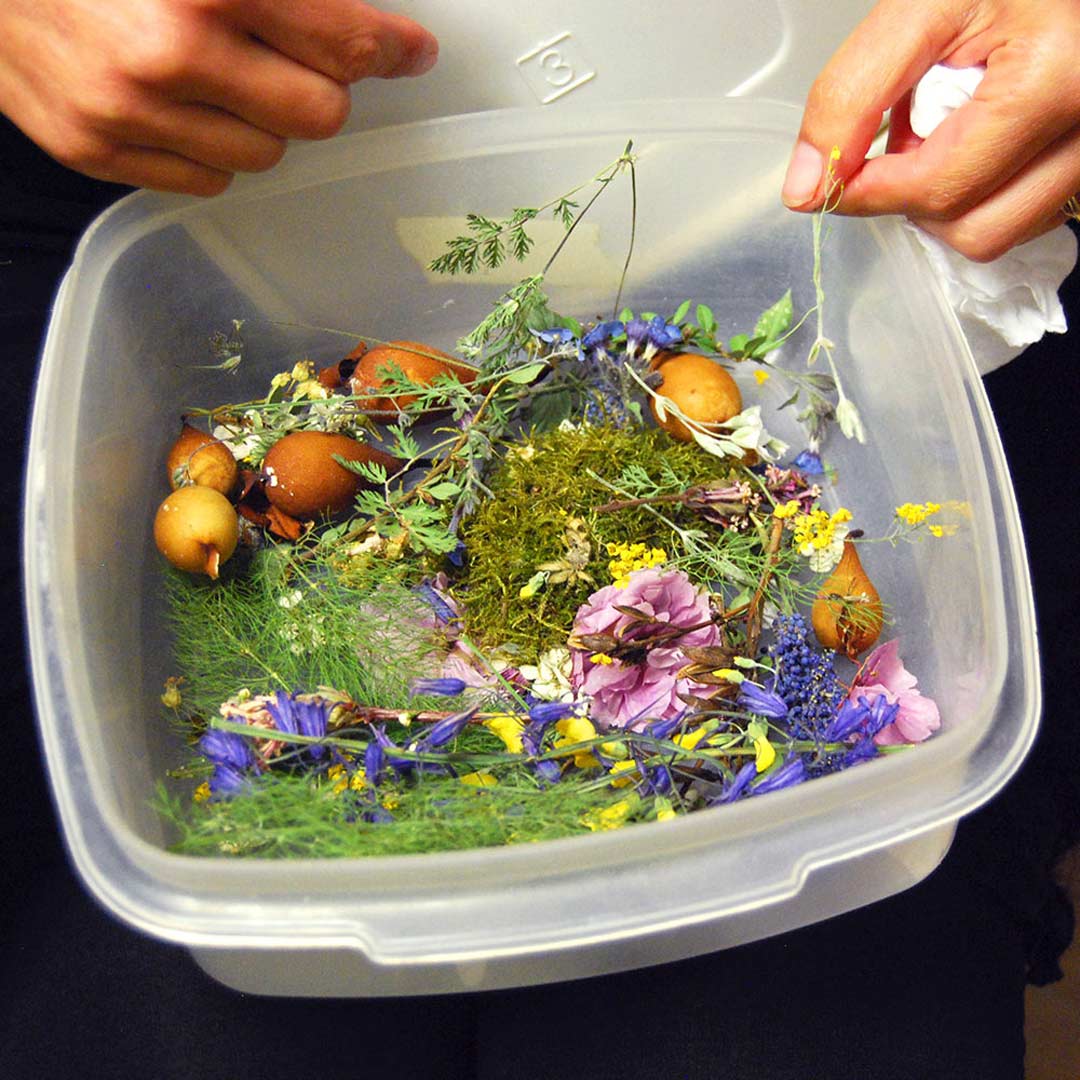
This is one of the Tupperware containers I use to store my organics once they are dry.
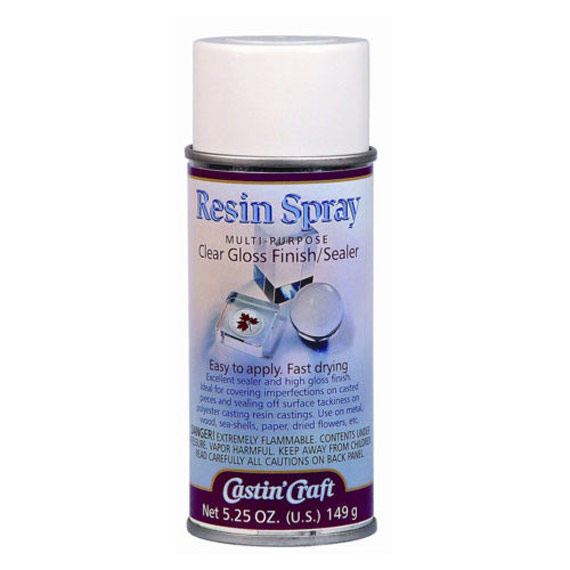
Option: Spray your Organics with a Resin Spray
I have gotten in the habit of spraying all my organics that I embed in resin. I’m not really sure if this is totally necessary, but honestly, if I’m going to spend a bunch of time mixing and pouring resin, I want to take any and all precautions to make sure I have great results. I place my organics in a cardboard box with high sidewalls and head outside when it is time to spray. The Resin Spray is very fast drying, easy to apply and will seal your organics nicely.
- Sealing the organics will prevent the resin from absorbing into the organics, causing the flowers to darken.
- Sealing with Resin Spray can also prevent any moisture from coming in contact with the 2-Part Resin. We know what moisture does! It causes bubbles!
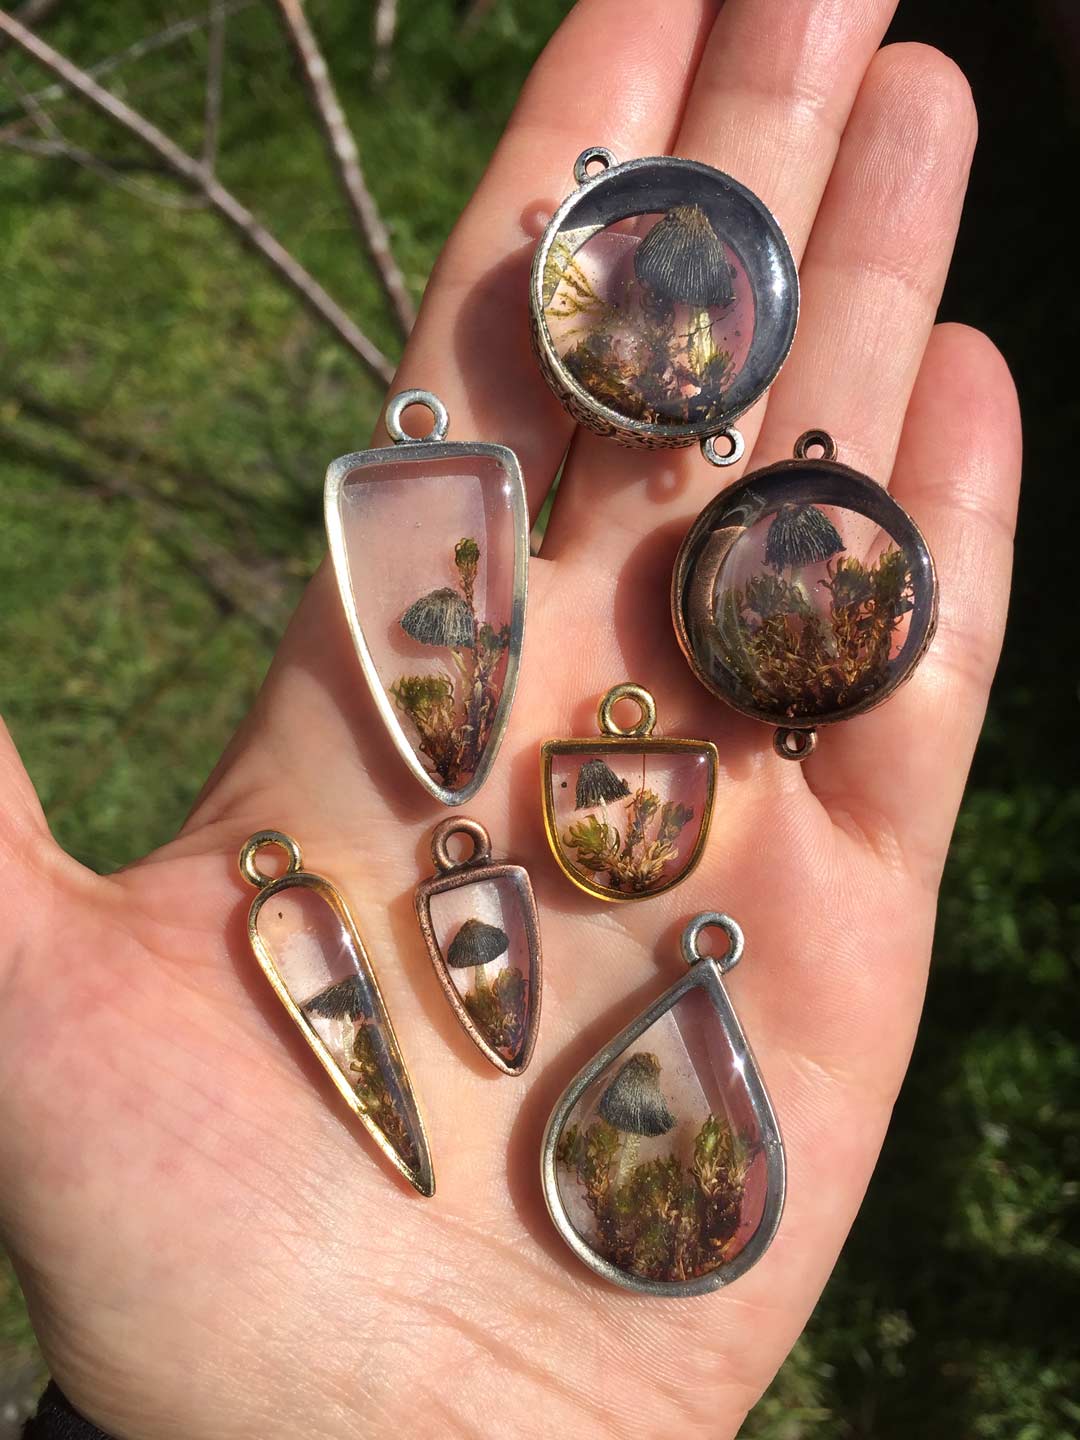
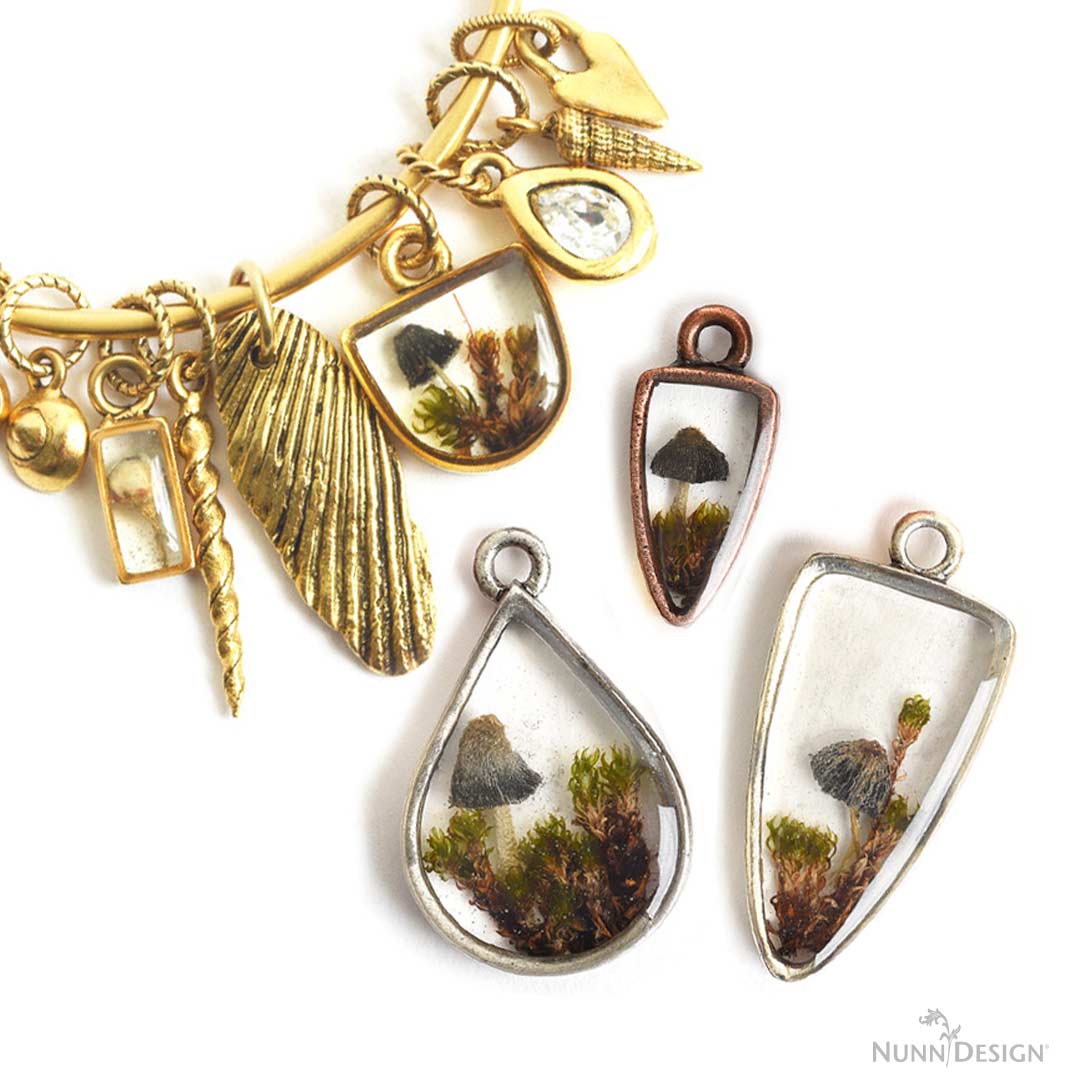
Finished Pieces
Here are my finished pieces in some resin!
It really was a lot of fun. I did have little tiny bubbles that occurred. Next time I will explore placing the resin filled bezel in my vacuum tank to remove the bubbles. Does anyone know if that will work?
Learn More:
To read a tutorial on how to embed organics into resin check out our blog category: Dried Flowers & Resin
Shop Nunn Design Wholesale
Nunn Design has been supplying jewelry artists with findings for over 20 years. Shop wholesale jewelry findings for creative jewelry makers.
Shop Nunn Design!How to Purchase Wholesale?
If you are interested in becoming one of the many designers who trust their jewelry to Nunn Design Findings, please join us by registering to become one of our wholesale customers!
Please visit our Where to Buy Page for a listing of online stores that sell Nunn Design Findings retail.

If you enjoyed reading this post, please subscribe to our blog. Here are 10 Reasons Why to Subscribe and a place to do so!
Thank you for this very detailed tutorial. I have been thinking about trying to do “natural” items in a resin mold that I have. Figure if nothing else it will make a cute desk item. I wasn’t sure how to retain color though. The silica gel makes perfect sense.
Is it possible to just run a lighter over the resin to rid it of bubbles? I know a lot of people do that, but I wasn’t sure if this would possibly mess with the organic within the resin
I have read in several places to never place an open flame near epoxy, so I don’t promote it in my tutorials.
What I can say is that it works.
Becky
Do you think it’s possible to cast a whole hot pepper in this method? Any tips? I’ve been trying and have had minimal success.
Yes the vacuum chamber should work for the bubbles, however, some types of resin work better in a pressure chamber, others in the vacuum chamber, there’s a great tutorial on you tube where he goes over both. Yes, lighters or better yet, a variable temp heat gun or even a hair dryer is also fairly effective, be careful with the heat gun, to much heat too quickly can really speed up the curing process, in my experience, my little globe was very, very warm for a long time right after I poured it and used the heat gun allot (cause I had lots of bubbles) and it was cured solid in 1/4 of the time it said on the bottles. Also using a heating mat while you’re mixing the two parts can help decrease the bubbles but hardly anyone I’ve seen uses that method so I don’t know how will it actually works.