


Inside Nunn Design, Tutorials
Steps to Designing an Indoor Trade Show or Craft Fair Booth – Part 4

There are many decisions to be made when designing a trade show or Craft Fair Booth. In this 4 part blog series, I have broken down the designing process into these 7 steps:
Step 1: Trade Show Booth Side Walls
Step 2: Signage
Step 3: Trade Show Tables
Step 4: Lighting
Step 5: Displays
Step 6: Floor
Step 7: Shipping
In Part 1 of this 4 part blog post series we covered the steps of designing and creating the booth’s sidewalls and addressed the signage. In Part 2, we covered the designing and building of the trade show tables. In Part 3, we covered the lighting of the trade show booth. In this final post, Part 4, we will be covering displays, flooring and shipping.
Here are links to the other parts in this series:
- PART 1: Steps to Designing an Indoor Trade Show or Craft Fair Booth
- PART 2: Steps to Designing an Indoor Trade Show or Craft Fair Booth
- PART 3: Steps to Designing an Indoor Trade Show or Craft Fair Booth
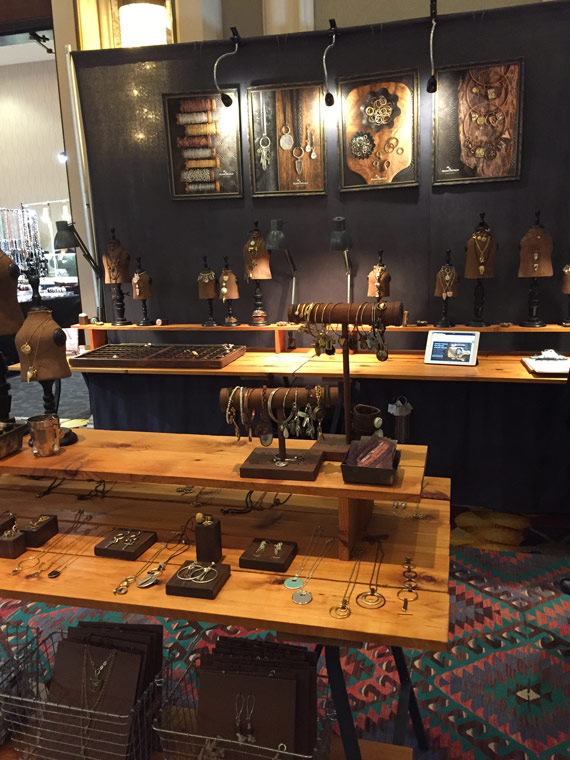
5. Displays
I have an abundance of displays from past trade shows. What I knew I wanted with this new booth design was a really simple and clean look. Trade shows like the To Bead True Blue Show are often overwhelming. I wanted our booth to be the calm in the storm.
Here are several design options for displaying jewelry and other items in your trade show or craft fair booth.
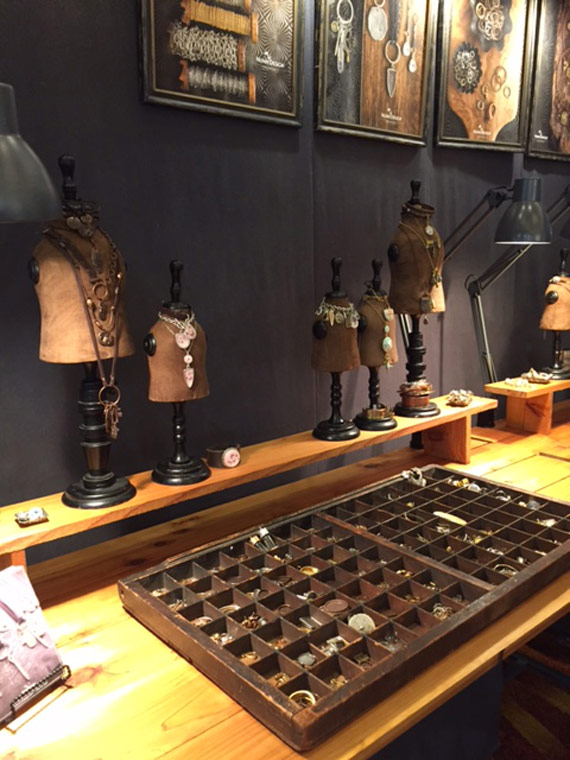
Mannequins
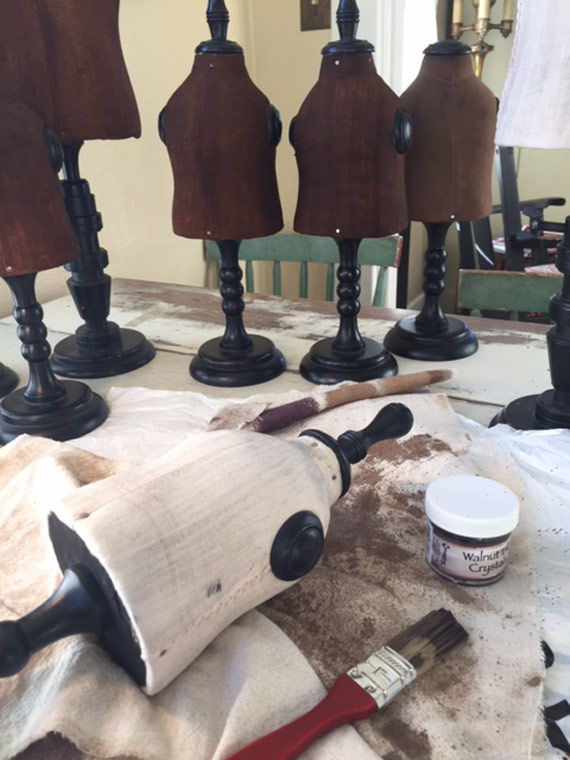
Mannequins lined the back wall of the booth on risers, offering a stair stepped visual while the front display held only two. I purchased these mannequins many years ago from a company called Creative Co-Op. They are no longer available (sorry!).
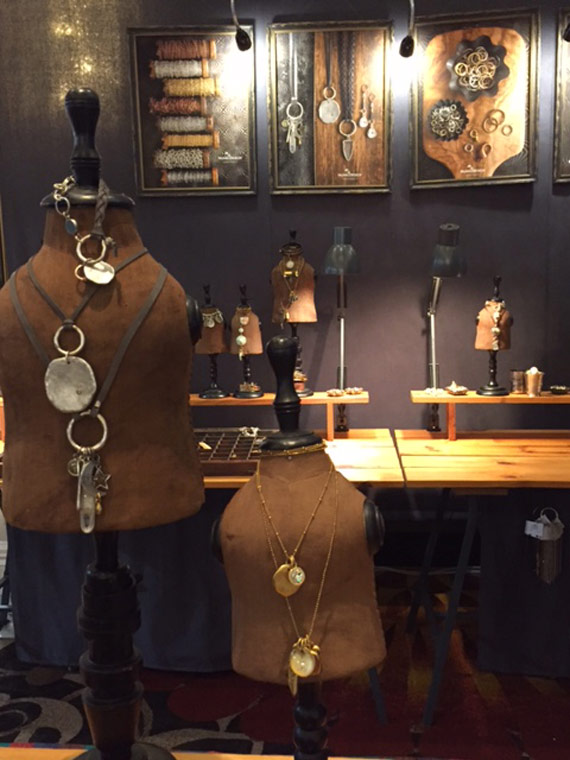
The original mannequins from Creative Co-Op were covered in muslin colored fabric. The look worked great for our past trade shows booth design, but for this booth I wanted a more contemporary look.
After doing some research and consulting with mixed media artists, I decided to try staining the muslin fabric with Walnut Ink. I tested the ink on some scraps of muslin before taking the leap. I loved the look of the Walnut Ink so I stained all of the mannequins that I had.
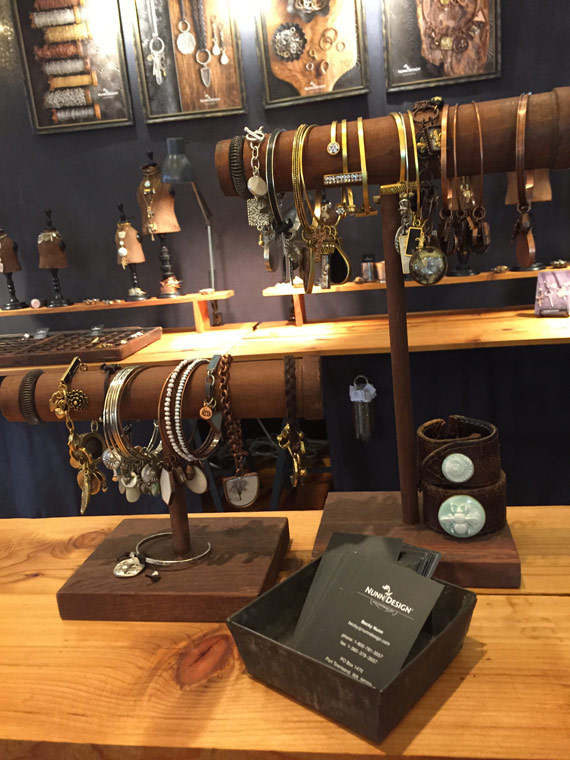
Spinner Display
People love to be able to touch the jewelry samples to feel the quality of the findings. I wanted to be able to show a lot of samples in a small area, so I included this Spinner Display (also purchased from Creative Co-Op). Sorry! This too has been discontinued!
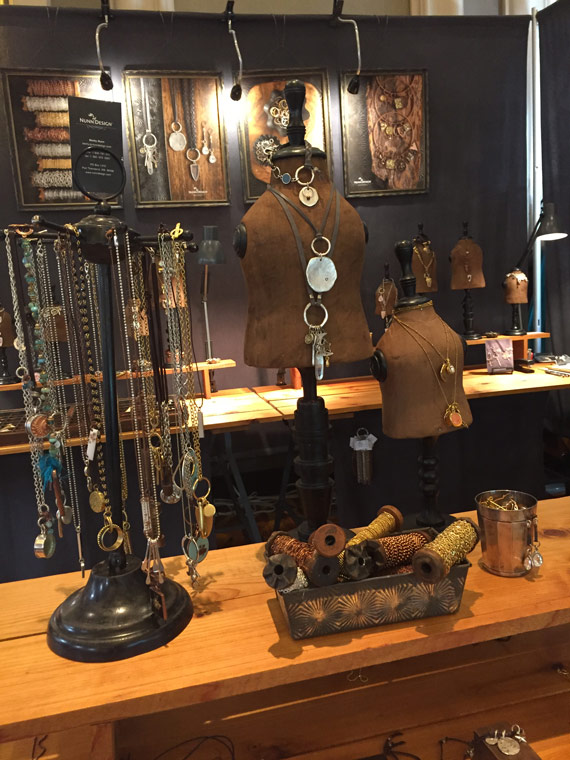
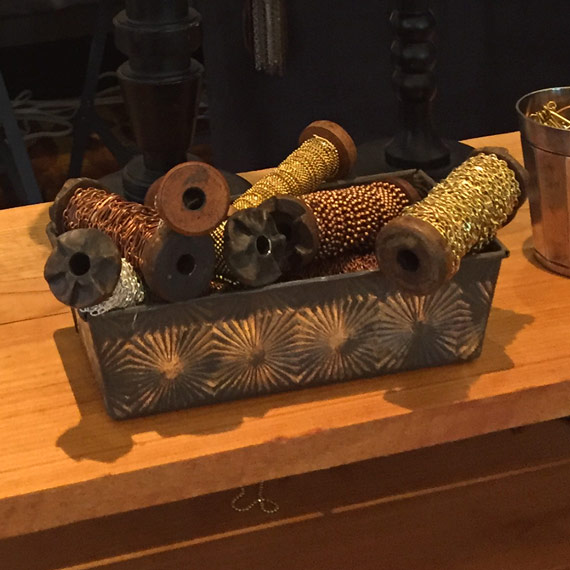
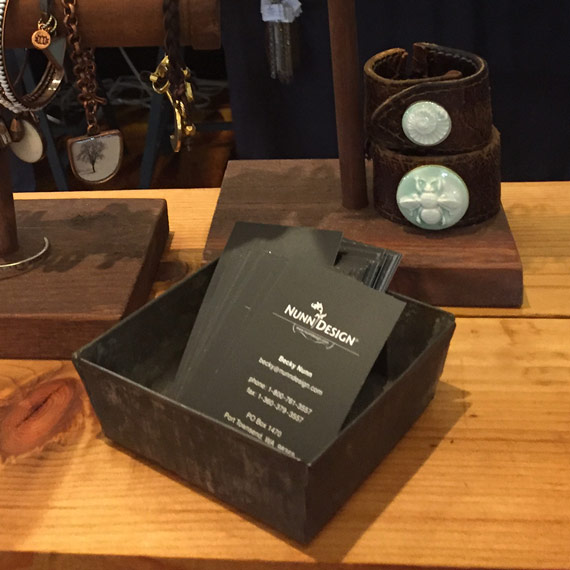
Vintage Tins
Another way to display spools of chain and business cards is with vintage Ovenex Tins.
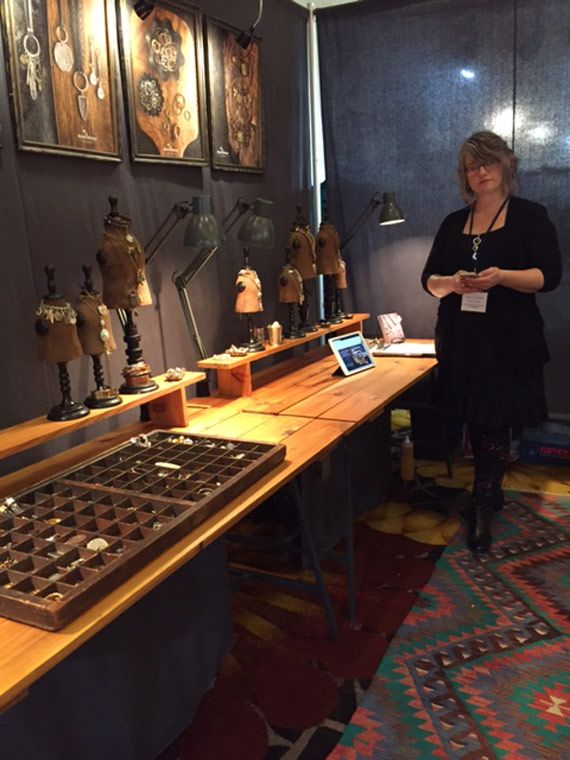
Vintage Type Tray Display
For displaying the 100’s of products we offer, we used an original vintage type tray display I had picked-up years ago at a garage sale. These displays are still fairly easy to purchase. Search your local antique shop or do a Google search.
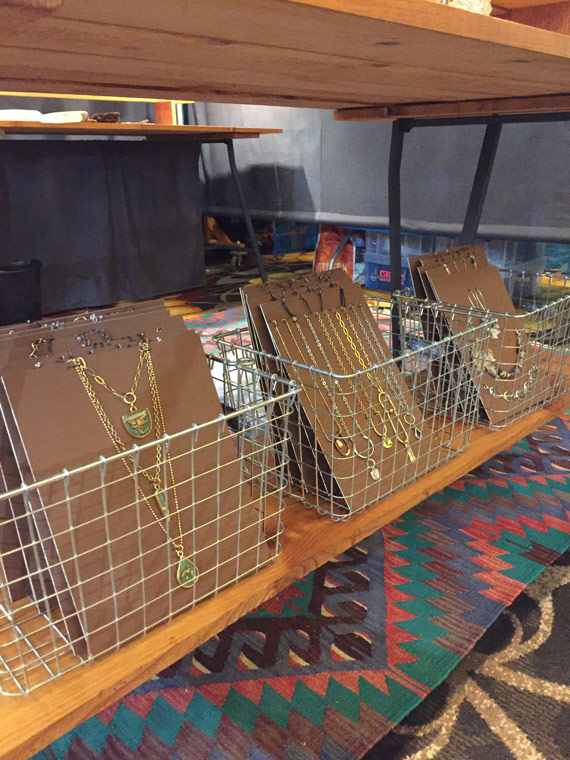
Wire Baskets
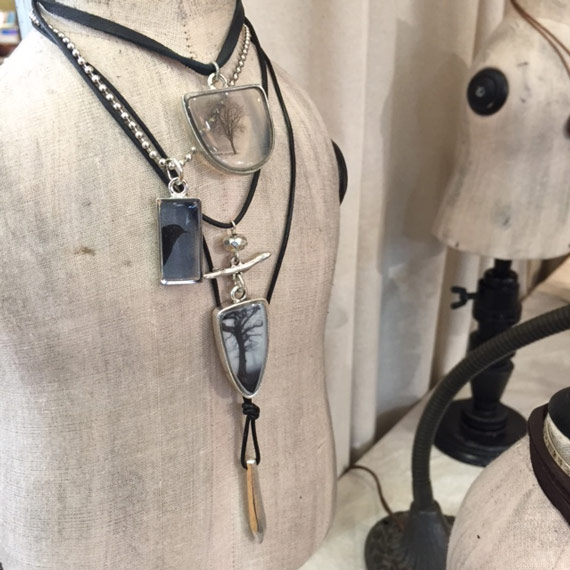
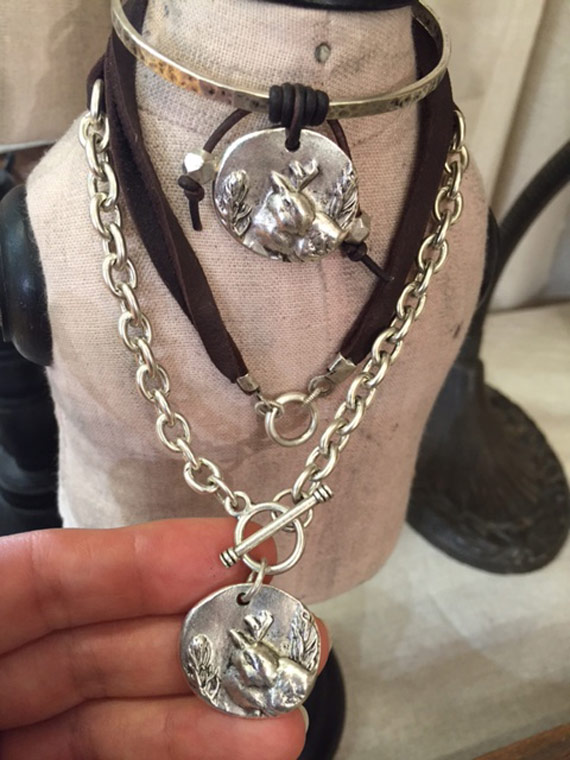
Underneath the front table I had baskets with display boards including dozens of samples. The jewelry was mounted on brown matte boards, sorted by technique. This allowed me to easily pull additional samples to inspire customers as I was selling.


Wooden Stacking Displays
I found these wooden stacking displays by USAVECO on Etsy a couple years ago. Sure, we could have made them, but why? They are great and fairly inexpensive!

Repurposed Bracelet Display
I really like the displays created by Thee Letter Q Handmade! These repurposed bracelet displays are great for showing a large variety of bracelet options.
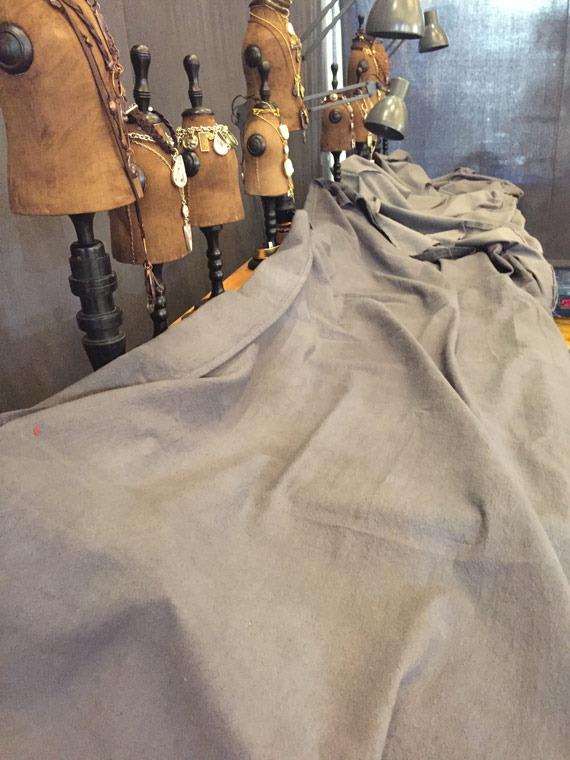
Covering the Displays After Hours
It is always a good idea to cover up your displays in the evening. I had Kathryn dye some panels of muslin so that even our nightly cover-up could be stylish!
6. Flooring
To be honest, I had this Turkish Kilim rug in my past trade show booth stash. I bought it over 25 years ago from a friend who was importing them direct. Sometimes I think about how crazy it is that I bring such nice things to trade shows, but heck, I’m into using things that I have!

7. Shipping
I discussed shipping a wee bit in Part 2, but here is some additional things to consider when shipping your trade show booth to your show.
Shipping UPS or with a Freight Company
I live in Port Townsend, WA, so shipping our booth on pallets or in a crate with a freight company is out of the question. It is outrageously expensive to ship from Seattle to Port Townsend and we would need a loading dock. So, we don’t ship our show samples this way. But for some of you, this will be a great option! It allows you to ship all of your boxes on a pallet that is shrink wrapped together. Items tend to ship well and there is very little damage.
Drayage Fees
Depending on the show that you are exhibiting in, there can be extra expenses in drayage. Drayage is the cost that the show charges from the shows loading dock to your booth. If the show does charge drayage (and it is expensive!!) it is ideal to ship your items to your hotel or friends house and haul it all in yourself.
For the To Bead True Blue Show, we were able to ship UPS Ground and not worry about drayage.
What to Buy!
- Walnut Ink
- Vintage Type Tray Displays
- Wire Baskets
- Matte Board
- Wooden Stacking Displays
- Repurposed Bracelet Display
There You Have It!
There you have it! That covers all 7 steps to designing an indoor trade show or craft fair booth! Please share with us any additional tips that you have found to be helpful in setting up your unique booth!
Here are links to the other parts in this series:
- PART 1: Steps to Designing an Indoor Trade Show or Craft Fair Booth
- PART 2: Steps to Designing an Indoor Trade Show or Craft Fair Booth
- PART 3: Steps to Designing an Indoor Trade Show or Craft Fair Booth
Shop Nunn Design Wholesale
Nunn Design has been supplying jewelry artists with findings for over 20 years. Shop wholesale jewelry findings for creative jewelry makers.
Shop Nunn Design!How to Purchase Wholesale?
If you are interested in becoming one of the many designers who trust their jewelry to Nunn Design Findings, please join us by registering to become one of our wholesale customers!
Please visit our Where to Buy Page for a listing of online stores that sell Nunn Design Findings retail.

If you enjoyed reading this post, please subscribe to our blog. Here are 10 Reasons Why to Subscribe and a place to do so!
Beautiful execution! Thanks for sharing your very clear thinking on how to have the booth you desired. It looks amazing, love the gray and walnut together – so rich. Thank you for all of your inspiration.
Did I already mention I have a tortoise cat too?
Andrea from Glenwood Springs
Thank you Andrea. I’m glad you found it helpful. Love that you have a tortoise cat too. Is she/he as big as Sparky?
Thank you for your detailed explanations of how you set up for a show.
Love your smooth fabric walls. If you are at a show where there is no pipe and drape – how do you achieve the look?
I also have another question. I noticed you have lit the tables in the back and the signage, but no lights on the front table…. is this because of running an extension cord across the booth – would be a hazard, unsightly or not allowed at the show?
Olive
The pipes and drapes for this show weren’t included in the booth of this show either. We actually rented them. It was a huge consideration in the design of the booth prior to going this route. I did a lot of research on how to build out my own walls, and that seemed like way too much work and expensive to ship. I do have a vision of building out our own metal structure, but my husband couldn’t get to it this year. Maybe next year.
In regards to the lights in the front, you are spot on in asking that question. I didn’t have lights in the front because of all of the reasons that you listed. The power strips were in the back of the booth, making it hard to wire items in the front. For this year, I purchased several lights that have battery packs. I’ll keep you posted on how that turns out!