


Product Releases
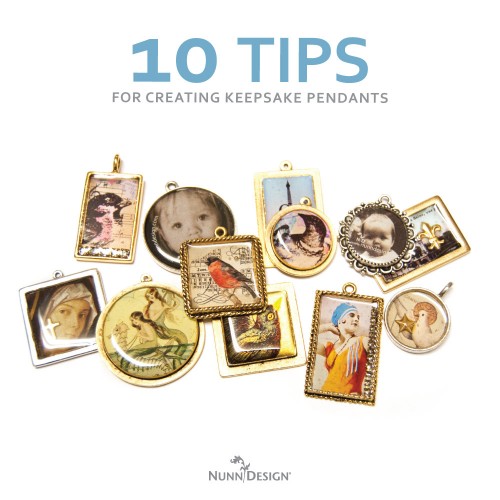
10 Tips for Creating Buy & Try Keepsake Pendants
10 Tips for Creating Buy & Try Keepsake Pendants
Creating your own unique keepsake pendants can be intimidating and scary for newbies as well as experienced resin crafters. Those who forged ahead without the knowledge of proper preparation of the images for resin can easily be frustrated by inks running on collage sheet images, vibrant collage sheet colors darkening to a gray when the resin was applied or maybe bubbles forming in the resin. With a wee bit of education, tools and the right products, we believe that creating keepsake pendants can be very rewarding and fun.
Here are 10 tips to help you succeed in creating Keepsake Pendants:
1. Be Patient! I hate to be so obvious right up front, but resin takes time and patience. If you take short cuts, the results will show it.
2. Glue your image. Not all glues are created equal. The Nunn Design Glue is a silicone-based glue. Why I like this is because it doesn’t add extra moisture into the image (moisture can causes bubbles).

3. Seal your image. Creating a strong barrier between a collage sheet or any type of porous paper, is a must. Otherwise the ink can run and the resin can absorb into the paper and discolor. So make sure to seal your image really well prior to pouring the mixed resin.
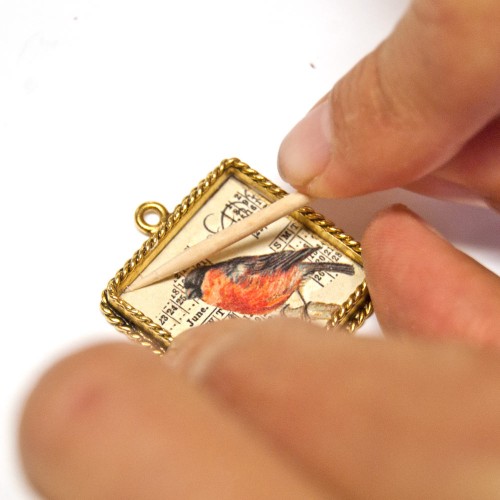
4. Secure your image. The bubble and discoloring hot spots will occur where the edges of the paper don’t have a 90-degree contact. Air can easily get trapped under the paper, causing bubbles, and the resin will absorb into the paper discoloring it. Using a toothpick, gently go along the edges making sure that you have the paper flush with the edge and not running up the sides.
5. Level your bezel. It is important to make sure your image is level prior to pouring your resin. Here are some tips on what to use for various findings:
- For pendants with bails, place a couple coins under the pendant.
- For button shanks and brooches, use a couple of business cards to create two equal stacks. Slightly create a gap in between the equal stacks to rest your button’s shank or brooches stem and catch.
- For rings, thread a piece of tape through the rings shank and tape it to your working surface.

6. Create movable space. I like to place my bezels onto business cards prior to pouring resin. This way I can easily move them around and decrease the risk of bumping or touching the resin.

7. Under pour your resin. It is super tempting to dome your resin when initially pouring resin into your bezel, but it is best to under pour the resin. By under pouring the resin, you allow for wiggle room to stick a headpin in and move bubbles over to the sides to pop. So, under pour, cure, then add more resin later if you want a high domed effect.
8. Pop the bubbles. Bubbles will happen, I can pretty much guarantee this. Just accepting this will help you not to freak-out, but be delighted when it doesn’t! If bubbles do occur, use a headpin to drag the bubble to the side. If it doesn’t pop, you can pull it out of the bezel and wipe away any resin that might have flowed over (see, don’t over pour!).
9. Cover and cure. Dust and cat hair are big success busters around my house. I like to place some sort of protective cover over my piece to prevent this as much as possible. Make sure that there is still airflow under your protective cover. I’ve had a piece turn cloudy when it didn’t have that flow of air.

10. Start simple. If you really want to have a great experience with resin, start off with using the Nunn Design Raised Tags and Transfer Sheets. The Raised Tags have no sides, so there is no risk of air getting trapped (see tip #2).
Shop Nunn Design Wholesale
Nunn Design has been supplying jewelry artists with findings for over 20 years. Shop wholesale jewelry findings for creative jewelry makers.
Shop Nunn Design!How to Purchase Wholesale?
If you are interested in becoming one of the many designers who trust their jewelry to Nunn Design Findings, please join us by registering to become one of our wholesale customers!
Please visit our Where to Buy Page for a listing of online stores that sell Nunn Design Findings retail.

If you enjoyed reading this post, please subscribe to our blog. Here are 10 Reasons Why to Subscribe and a place to do so!
When I pour resin, I like to stick my bezels in place using Blu Tack. It’s especially good for holding rings, cuff links and other things that don’t have a flat base.
Great suggestion. I’ll have to google search Blu Tack.
I know that this is picky but pendant is not spelled correctly in your graphic. I know that I am finicky but it does detract from the professionalism of your posts.