


Tutorials
Paper Bead Hollow Form Tassel Tutorial.


Over the next two weeks you will have the chance to learn about creating unique tassels, beadcaps and lightweight beads using Crystal Clay, paper beads, chain and jumprings.
Here is the first tutorial, of three, using Paper Bead Hollow Forms.
Learn How!
Tutorial #1 Paper Bead Hollow Form Tassel Tutorial
Supplies Needed:
Crystal Clay
Paper Bead Hollow Form
2.5” Ball Chain
2.5” Faceted Bead Chain
2.5” Rhinestone Chain 14pp
2.5” Rhinestone Chain 24pp
3 Jumpring Grande Rope
24” Deerskin Lace 3 or 5mm
Tools Needed:
Flush Cutters
Pair needle nose pliers or tweezers
Wet wipes
Toothpicks or headpins
Gloves
A small wooden skewer
Glue
Part 1: Making the Hollow Bead Form
Step 1: Follow the manufacturer’s instructions for the handling and mixing of the Crystal Clay. While wearing gloves, pinch off two equal pea sized balls of Part A and Part B and blend together fully until the clay is no longer marbled and uniform in color. You have approximately 90-120 minutes of working time before the clay starts to harden, so take your time. Once the clay is thoroughly mixed, remove your gloves to make is easier to work with the clay.
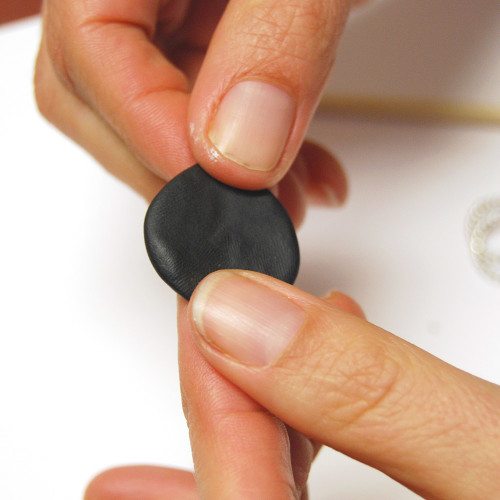
Step 2: Roll the thoroughly mixed epoxy clay between your palms until it forms a smooth round ball. Press the ball of Crystal Clay into a round flat patty and wrap the clay around the Paper Bead Hollow Form. I like to put my Paper Bead Hollow Form onto a small wooden skewer when doing this part to free up both hands. If you have a tear in the clay or if you don’t have enough clay, mix up a wee bit more and add to your existing clay. You can lightly wet your fingers with water to make the clay smooth and even.


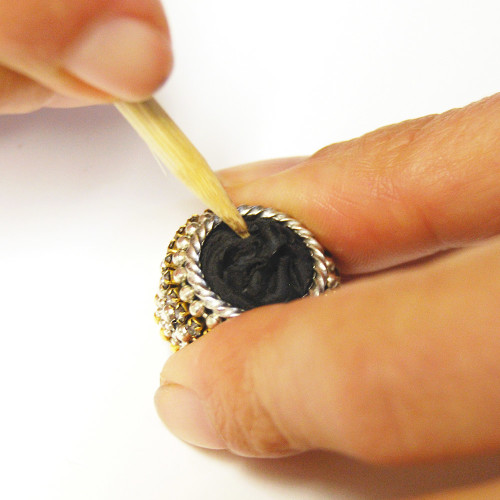
Step 3: Once the Crystal Clay is wrapped ¾ of the way around the Paper Bead, press a Jumpring Grande Rope into the Crystal Clay at the opening where the small wooden skewer is. You will want to make sure that your jumpring is flush and there isn’t a gap in the opening. Clean away any excess Crystal Clay around the Jumpring Grande Rope with a headpin or toothpick.


Step 4: Placing the jumpring from Step 3 provides a base to start wrapping your chain. In this step you will need to design how you would like your chain on your tassel hollow form to look. Once you have an idea of how it will look, start to embed your chain into the wet Crystal Clay. Once you wrap all the way around the bead, use your Flush Cutters to trim away the excess so that your ending point is right next to your starting point. Take your time and go slow. The attention to detail will really show in the finished product.

Step 5: After wrapping several rows of chain, embed your second Jumpring Grande Rope into the top of the hollow bead form. This will give you an idea of your stopping point. With your last wrap of chain, select a chain that will fit in the remaining space.


Step 6: Use a toothpick, bbq skewer or headpin to clear away any Crystal Clay around the top and bottom of the hollow bead. Be very gentle during this stage because it is really easy for the bead to get all wonky. Don’t press too hard on the hollow bead form and take your time removing the Crystal Clay.

Step 7: Using a wet-wipe, clean up any Crystal Clay that might have gotten on the Jumpring Grande Ropes or the chain. The epoxy clay hardens like cement, so cleaning it up now and being tidy as you go makes the process easier and the results so much nicer. Allow the epoxy clay to dry for several hours or until hard to the touch.

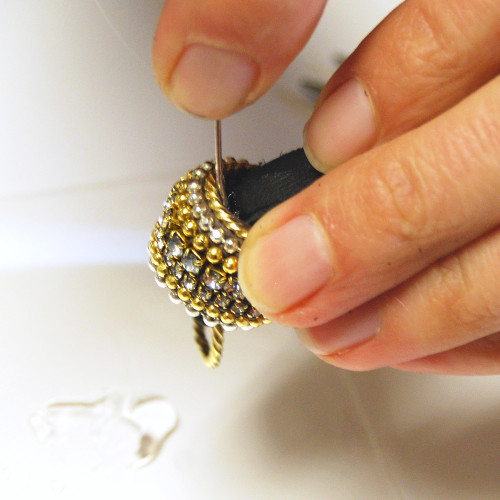
Step 8: Once the Hollow Bead Form is hard to the touch, apply a couple drops of water onto the paper bead in the center. Use needle nose pliers or tweezers to pull the wet paper out of the center of the Hollow Bead Form. Keep removing until all of the paper is removed (well, some bits will still be in there and that is fine).


Part 2: Making the Tassel
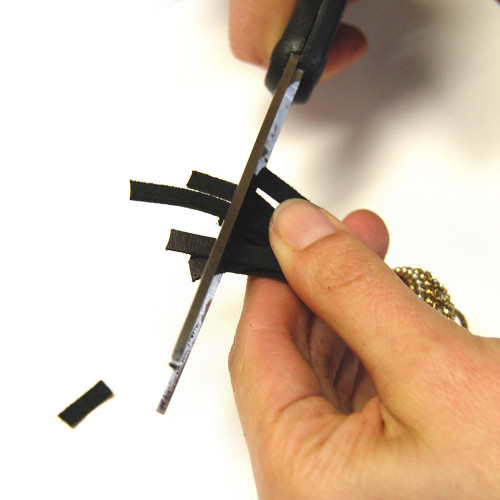
Step 9: Cut the Deerskin Lace Leather 5mm Chocolate into 4 separate 6” lengths.


Step 10: To make it easy to thread the tassel through the hollow bead form, fold the Deerskin Lace at the center and thread through a scrap of Deerskin Lace. This will make it easier to pull the tassel through the hollow bead form. If the tassel is not snug and tight within your hollow form, pull the Deerskin Lace out and add another 6” length, giving your tassel more body.

Step 11: Remove the scrap of Deerskin Lace and thread on a Grande Rope Jumpring using two pairs of needle nose pliers.

Step 12: To keep the hollow bead form from sliding up or down on the Deerskin Lace tassel, insert some glue under the bottom rim of the hollow bead form to prevent it from sliding. If you have any excess glue on the hollow bead form or the leather, use a wet-wipe to clean.

Step 13: Trim the bottom of the Deerskin Lace on the tassel if desired.
Step 14: Once you get good at this, you can try making the Hollow Bead Form without the Jumpring Grande Rope at the top and bottom. This will allow you a lot of variation on how you wrap the chain. For ease when starting, I recommend using the jumprings to provide a base.
Shop Nunn Design Wholesale
Nunn Design has been supplying jewelry artists with findings for over 20 years. Shop wholesale jewelry findings for creative jewelry makers.
Shop Nunn Design!How to Purchase Wholesale?
If you are interested in becoming one of the many designers who trust their jewelry to Nunn Design Findings, please join us by registering to become one of our wholesale customers!
Please visit our Where to Buy Page for a listing of online stores that sell Nunn Design Findings retail.

If you enjoyed reading this post, please subscribe to our blog. Here are 10 Reasons Why to Subscribe and a place to do so!