


Tutorials
Holiday Ornament Tutorial!
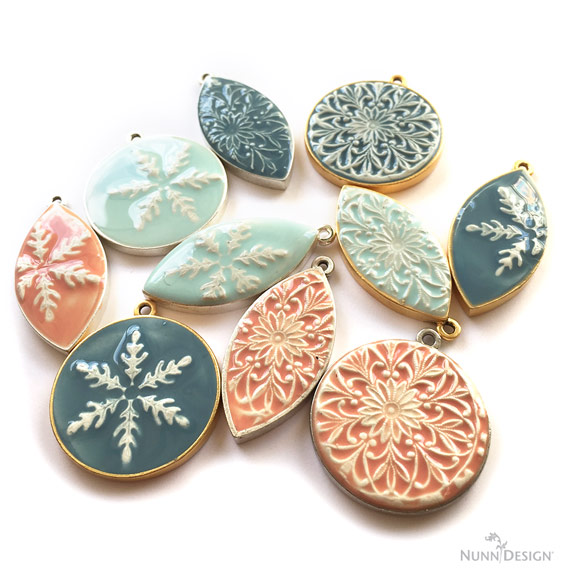
This is a repost from our holiday ornament workshop that we taught online last year. I can’t wait to unpack my holiday ornaments because all of these samples are now within those boxes and I’m looking forward to seeing them.
What colors will you make? We’ve also updated our Pantone Cheatsheet with new 2020 color formulas!
Here is what you will learn in this tutorial:
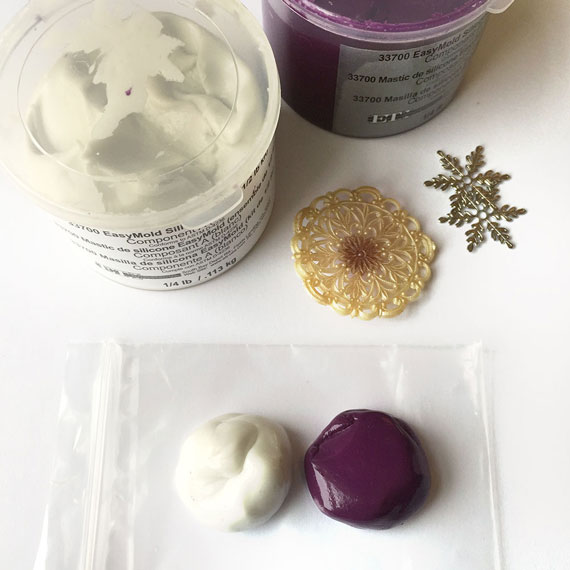
- How to create molds using Easy Mold Silicone Putty
- How to mix and sculpt Crystal Clay
- How to mix and colorize Nunn Design Resin with Castin’ Craft Opaque Pigments
- How to apply the colorized resin to the Crystal Clay Ornaments.
Nunn Design Supplies Needed:
- Easy Mold Silicone Putty
- Brass Metal Stamping or Vintage Button
- Epoxy Clay-Crystal Clay
- Nunn Design 2-Part Resin Kit
- Castin’ Craft Opaque Pigments
- Nunn Design Grande Pendant Navette
- Nunn Design Grande Pendant Circle
- Ornament Hooks
- Jumprings
Other Supplies Needed:
- Wet wipes
- Toothpicks or headpins
- Gloves
- Timer
- Plastic Bag
- Business cards or card stock
- Q-tips
- Rubbing Alcohol
Tools Needed:
- Needle Nose Pliers
Watch Video from a previous Facebook Live!
Last year we did a Facebook Live tutorial walking through the whole process. Watch the video tutorial while you make your holiday ornaments!
Learn How:
Making of the Molds:
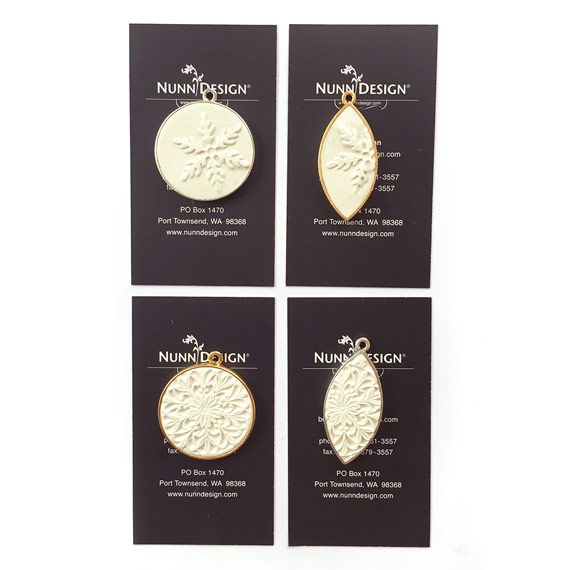
1. Select a Nunn Design Brass Stamping or a vintage button. Brass Stampings or found objects with a lot of relief make the best molds. For this tutorial, I used both a vintage button and a plated brass stamping of a snowflake. Both of these molds are available to purchase or you can create your own molds by following steps 2-6.

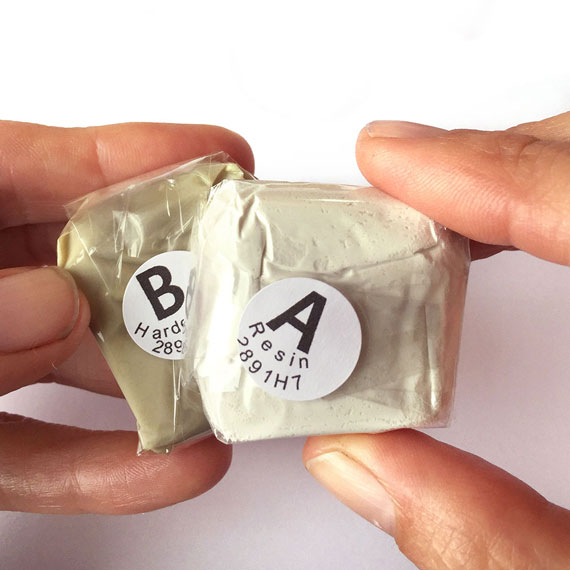
2. Pinch off two equal-sized balls of Part A and B of the Easy Mold Silicone Putty. Getting the knack for mixing just the right amount of putty will take some practice. You might mix too much or too little putty the first time. Try your best to guess how much putty you will need to have approximately 1/8” putty around the outside edge of your bezel’s rim. You will also want the thickness of the silicone putty to be approximately 1/8.”


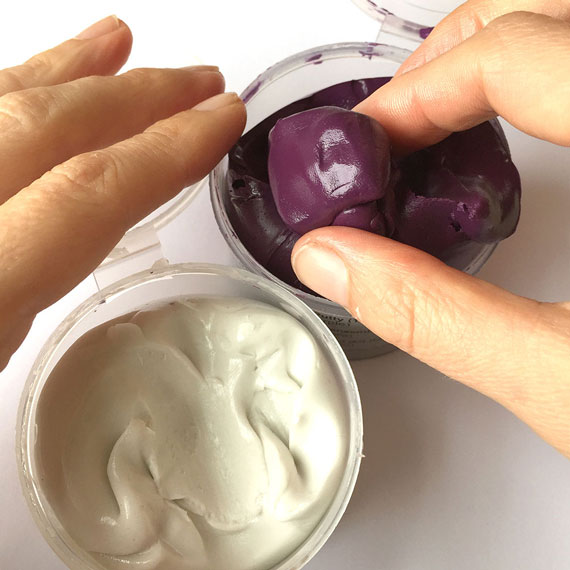
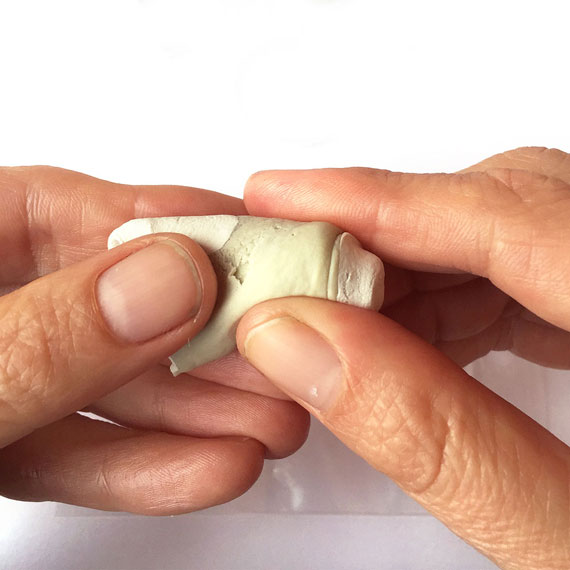
3. The Easy Mold Silicone Putty has a 3-minute working time before it begins to harden and not take the impression. Knead both part A and part B together until the putty is blended completely and has a uniform color.


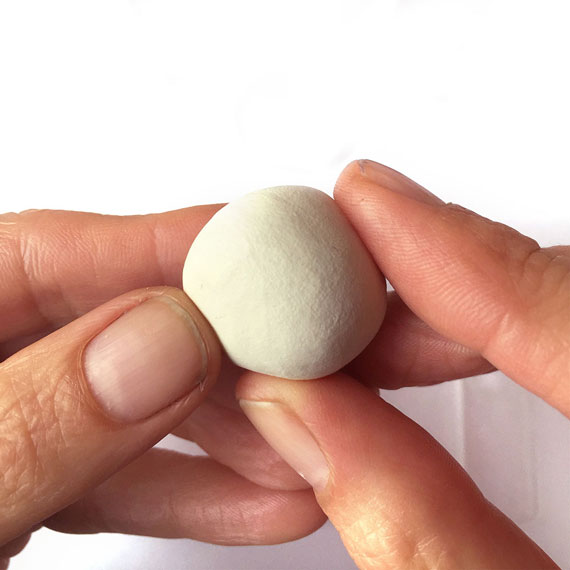
4. Roll the fully mixed Easy Mold Silicone Putty into a round ball and flatten slightly. Make sure the putty is smooth and not wrinkled (the creases in the putty will show up in the mold).
I like to use the lid of the Easy Mold Silicone Putty to create a nice flat smooth disk. Place the mixed silicone ball onto a small plastic bag and press the lid evenly down into the putty.

Remove the putty from the lid of the container and press the button or brass stamping into the silicone putty, but not so far into the putty that you hit the bottom. Leave the button or brass stamping in the putty for 5 minutes or until the putty is hard to the touch.


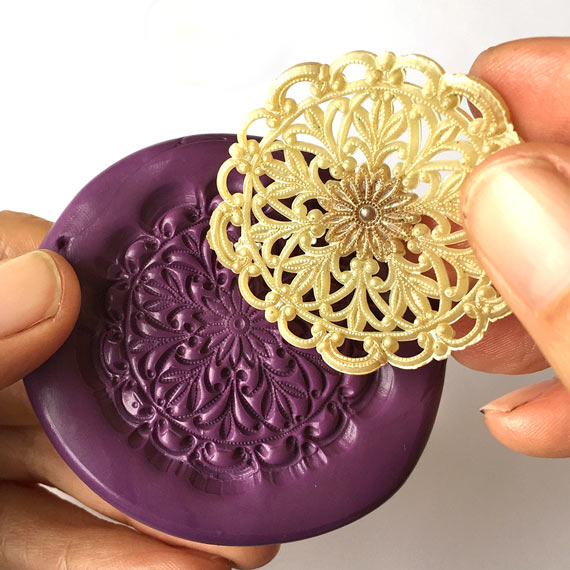
5. Once the molding putty is hard to the touch, bend the sides and remove the button.

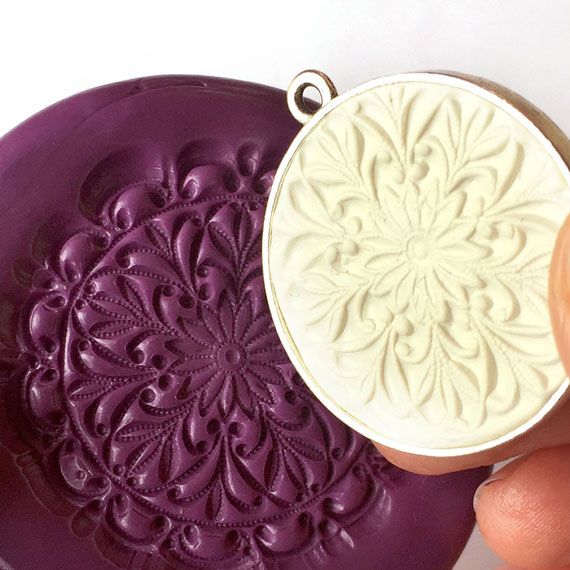
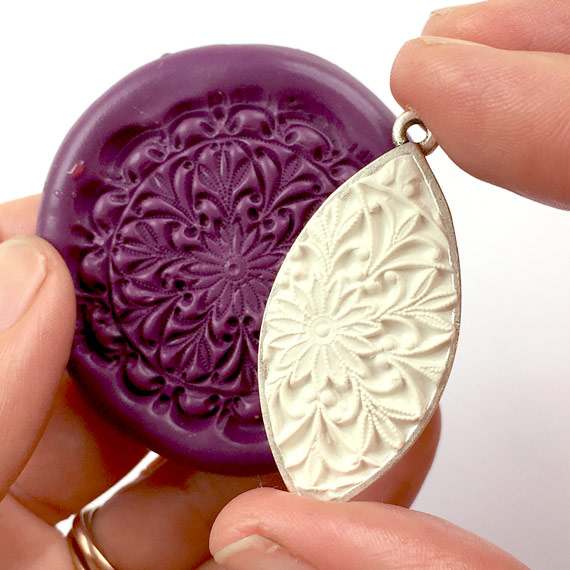
6. Here is what it looks like to create a mold using the brass stamping.


Creating the Impression
7. The Nunn Design Findings are oxidized to provide the aged look to the precious metal plating. The oxidization, when it comes into contact with the Crystal Clay could change the color of the clay. To avoid this, clean the findings thoroughly prior to applying the clay. Get the tip of a Q-Tip wet with rubbing alcohol and clean away any of the blackened oxidization on both sizes of the bezels.

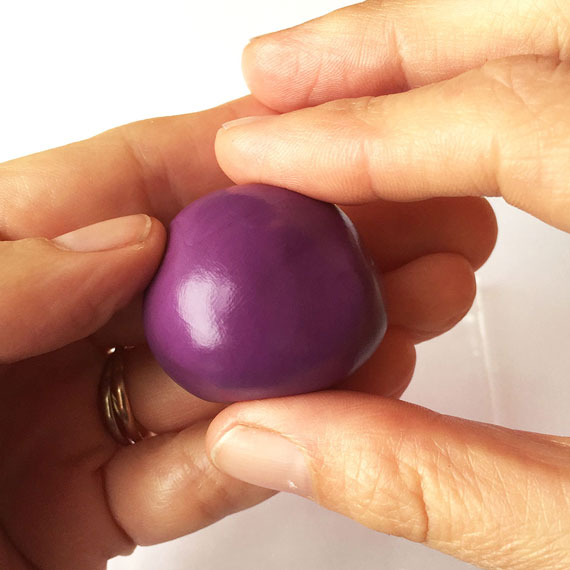
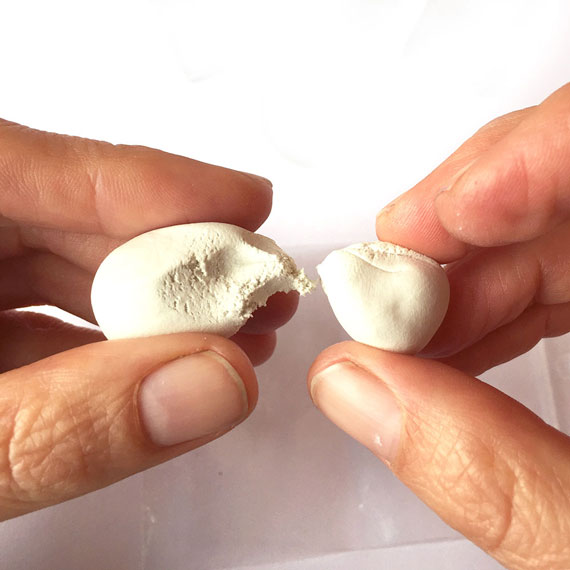
8. Follow the manufacturer’s instructions for the handling and mixing of the Epoxy Clay-Crystal Clay. While wearing gloves, pinch off two equal-sized balls of Part A and Part B and blend together fully until the clay is no longer marbled and uniform in color.

You have approximately 90-120 minutes of working time before the clay starts to harden, so take your time. Once the clay is thoroughly mixed, remove your gloves to make it easier to work with the clay. For this tutorial, I mixed a Whopper Malted Milk Ball size of both Part A and B of clay because I wanted to create multiple ornaments.
For each ornament I pinched off a large blueberry ball of clay.
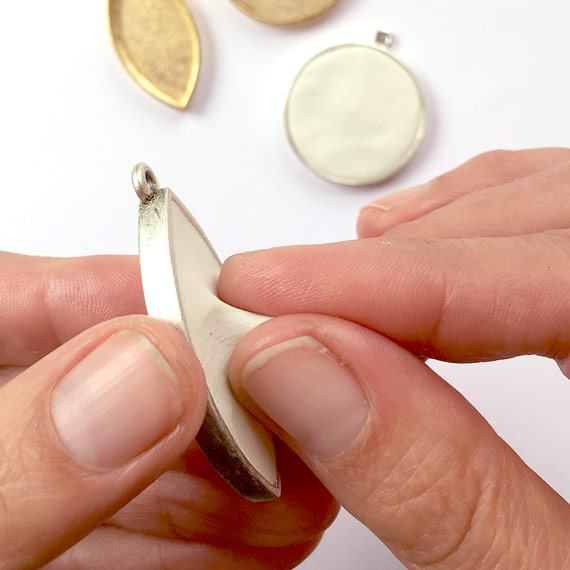
9. Roll the thoroughly mixed Epoxy Clay-Crystal Clay between your palms until it forms a smooth round ball. I like it to be smooth because it prevents from having creases once the impression is made.

Press the ball into your bezel with your fingers to create an even smooth surface in the clay.

TIP: It is easy to get little fibers mixed into the clay. Use a toothpick to remove them from the clay and pat the surface smooth again
10. If you put too much clay inside the bezel it will squish out the sides and you will have excess clay to clean up. If you don’t put in enough, you might not get a good impression in the clay from the mold. Regardless, both are easy things to fix, so it might take a little experimenting to get it just right. If the Crystal Clay is not flush with the edge of the bezel you can add more or pinch off excess.
Tip: If filling the corners with Crystal Clay is challenging on the square and rectangle-shaped bezels, use a toothpick to press the clay up into the corners of the bezel. Pat down the toothpick marked clay with your fingers until smooth.
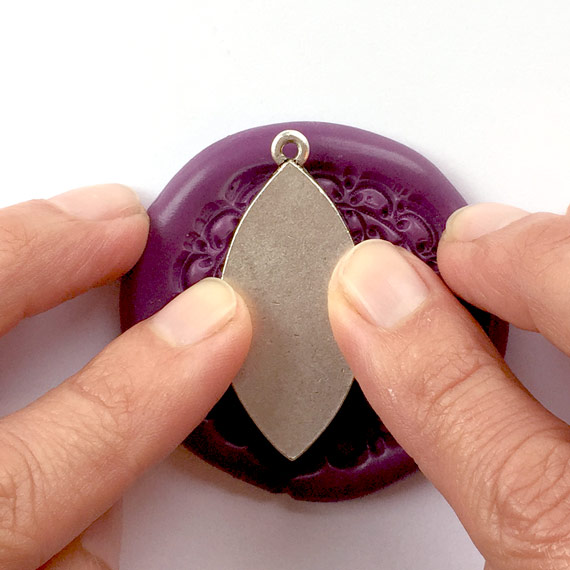
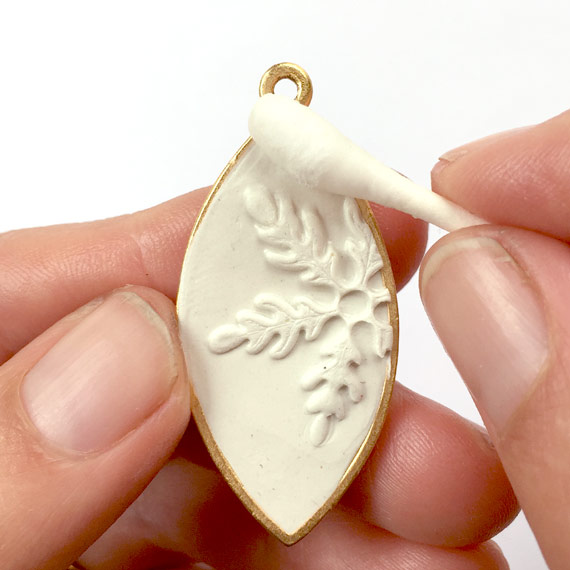
11. Place the Crystal Clay filled bezel face down onto the putty mold and press down evenly. To make sure I have a really good impression, I like to pick up the mold and press the mold into the clay, as well as pressing the bezel down into the mold.

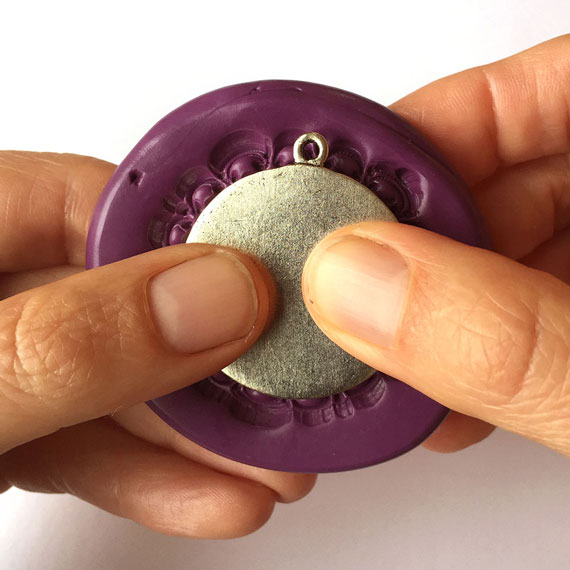
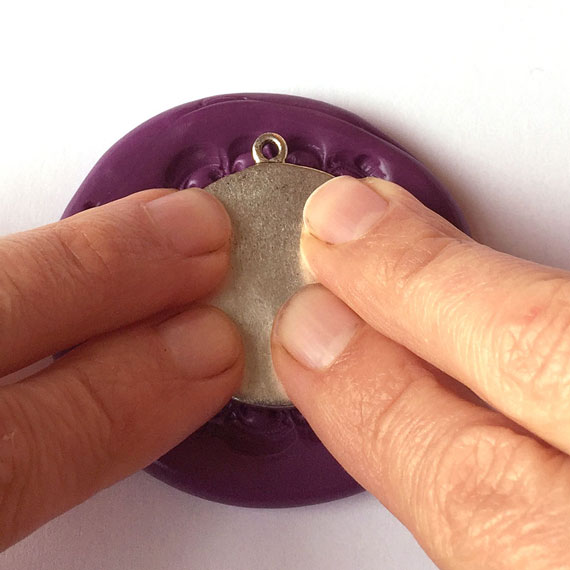
If you don’t like the impression that you make, pat the impression in the Crystal Clay with your fingertips until you have a smooth surface once again and press down into the mold again.


12. Using a wet-wipe, clean up any excess Crystal Clay that might have been left on the bezel. The Crystal Clay hardens like cement, so cleaning it up now and being tidy as you go makes the process easier and the results so much nicer.

If you have indentations in the Crystal Clay, use a Q-Tip to smooth those out.
TIP: I suggest letting the Crystal Clay cure for 2 hours or until firm to the touch before placing on the colorized resin.
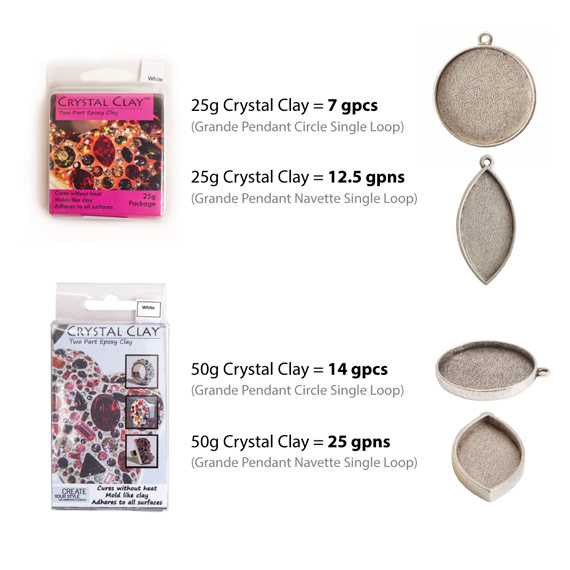
Here is a visual showing the approximate amount of bezels you can fill with 25g or 50g packages of Crystal Clay, putting about 3.3g of Crystal Clay in each bezel. The Grande Pendant Circle Single Loop (gpcs) has an inner diameter of 31.6mm and an inner depth of 2mm. The Grande Pendant Navette Single Loop has an inner dimension of 37 x 18 x 2mm. You can weigh your Crystal Clay with a scale like this.
Mixing Nunn Design Resin
12. Read the resin instructions for safety concerns regarding the Nunn Design Resin.
When I work with resin, I always:
- Place a large plastic bag over my work surface and tape it down.
- I make sure I have ventilation in my workroom.
- I wear gloves.
- I wear glasses (readers because I can’t see anymore. Plus it protects my eyes!).
- I have a pile of wet wipes handy.
- This is a great blog post that covers 20 Habits for Successfully Using Nunn Design 2-Part Epoxy Resin. Even if you are a seasoned resin mixer, this might be worth a read.
13. Place one cup (included in the Nunn Design Resin Kit) onto your table.
For curing purposes, it is very important that the resin be an exact 1 to 1 ratio of Part A and Part B. I suggest getting your eyes level with the resin so you can see the lines on the measuring cup.
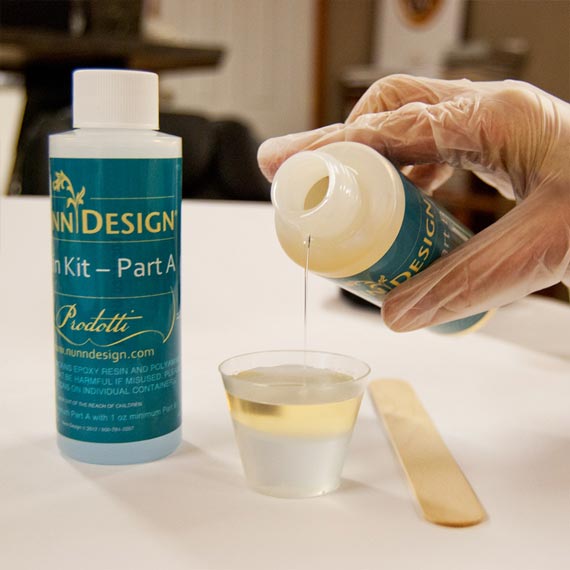
Pour Part A of your resin kit up to the 1 TBS mark on your measuring cup.
Pour Part B of your resin kit into the same cup until it is filled to the 2 TBS mark. It is important to pour Part A first and then Part B. It is some chemical thing about part A being heavier or something.
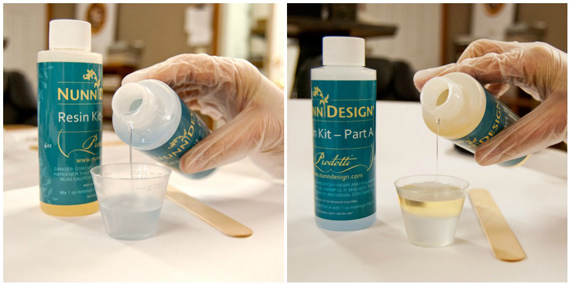
It is important to pour Part A first and then Part B. It is some chemical thing about part A being heavier or something.
14. Set your timer for 2 minutes. Using the stir stick from your kit (a popsicle stick or coffee stir stick will work great too), slowly and carefully stir your resin scraping the sides as you stir. Stir for a minimum of 2 minutes. If your resin is still cloudy continue to mix until clear.
After mixing is complete and your resin is clear, scrape both sides of your stir stick on the edge of your resin filled cup.

Colorizing the Nunn Design Resin
15. To create Pantone Colors, take a look at this chart, Pantone Color Cheat Sheet, to learn how to mix pigments to achieve a variety of colors. We’ve just updated the Cheat Sheet to include our new 2020 Pantone colors, as well as the previous years!
For this tutorial, I colorized my resin with the formulas below using Castin’ Crafts Opaque Pigments:

Pantone Color-14-4620 TPG, Island Paradise
Formula:
- 1 tsp Nunn Design Resin
- 1 tiny toothpick tip Blue
- 1 tiny toothpick tip Yellow
- 4 toothpick tips White

Pantone 15-1247 TPX, Tangerine
Formula:
- 1 tsp Nunn Design Resin
- 1 tiny toothpick tip Red
- 1 toothpick tip White
- 2 toothpick tips Yellow

Pantone 16-3905 TCX, Lilac Gray:
Formula:
- 1 tsp Nunn Design Resin
- 2 toothpick tips Black
- 1 tiny toothpick tip Black
- 3 toothpick tips White
- 1 tiny toothpick tip Blue
- 1 tiny toothpick tip Red
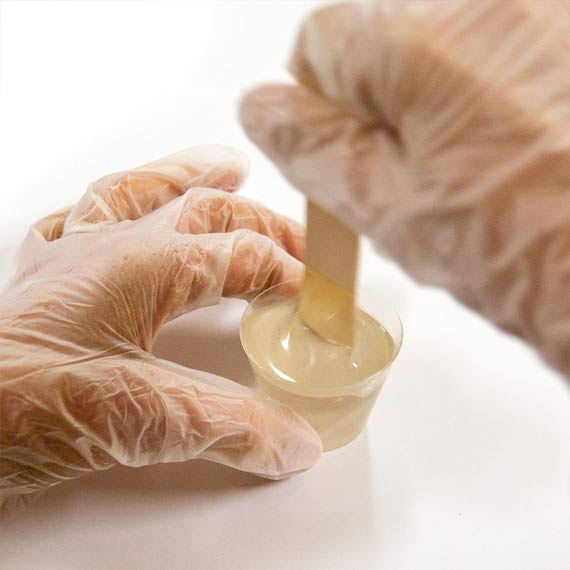
16. To colorize the resin, place another empty resin mixing cup onto your work area.

Pour the clear, mixed resin into the cup, filling it to the 1 TSP mark.

The Castin’ Craft Opaque Pigments are very potent. Let’s define what a “tiny toothpick tip” and a “toothpick tip” amount of colorant should look like. This is not an exact science. If you don’t get the exact amount, your color will still come out fairly close.

A “tiny toothpick tip” should look like this.
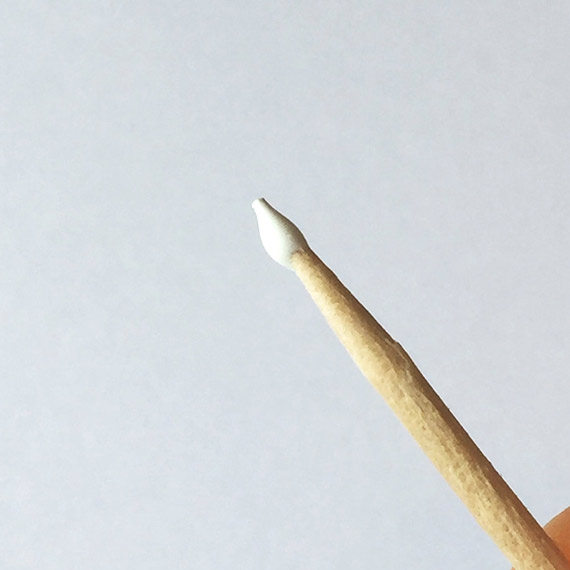
A “toothpick tip” should look like this.
Add in the colorants according to the color formulas and then stir gently until the colorants are fully mixed together. Let resin sit for 5 minutes to let the bubbles rise to the surface and pop.
Tip: Be sure that the colorant does not equal more than 10% of your resin as having more than 10% could cause issues with curing.
Applying the Colorized Resin
17. I tend to work in a small area (typically my kitchen table), so I like to work on a surface that projects can be easily moved around and not disturbed. Place some business cards or some heavy card stock onto your work surface, making it easy to move the pendants without getting any resin on your fingers.
TIP: I would recommend covering the card with glossy packing tape. This will prevent the resin from sticking to the paper.
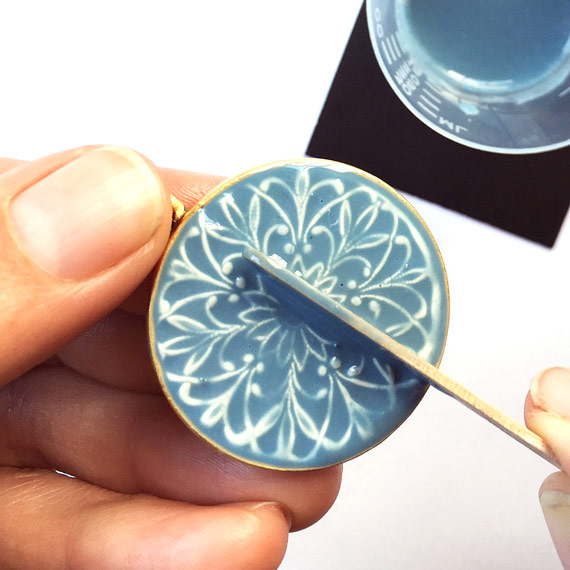
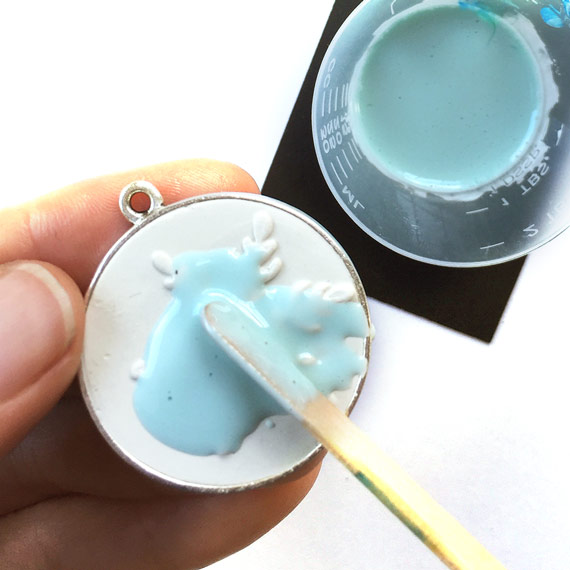
18. Drizzle a small amount of colorized resin onto the surface of your cured and firm to the touch Crystal Clay impression.

Using a stir stick or toothpick drag the resin over to the side edges. You can also use the stir stick to remove excess resin.
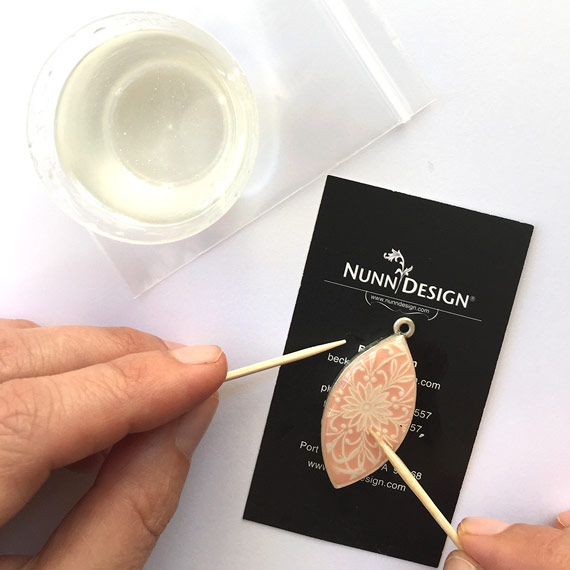
19: Use a wet-wipe to remove the colorized resin for the high points of the impression. Clean off any resin that might be on the sides of the bezel.


20. If you would like to add additional colorized resin in areas that need it, use a toothpick to apply and move the resin around.

21. Let the resin cure for 12-14 hours. It will be hard to the touch, but resin continues to cure for the next 72 hours. Place a small plastic container over the bezels to prevent dust from getting into the resin as it cures.

22. If you have resin that has over-poured or seeped under the bezel and onto the card, wait about 6 hours until the resin is at its “soft cure” phase. Remove the bezel from the card. The resin will still be soft. Use a pair of needle-nose pliers to bend back the resin from the bezel. The resin will easily separate and peel off of the bezel.
23. For a design option on a couple of the pieces, I added clear resin over the top of the cured colorized resin coat to provide it with a high gloss look.


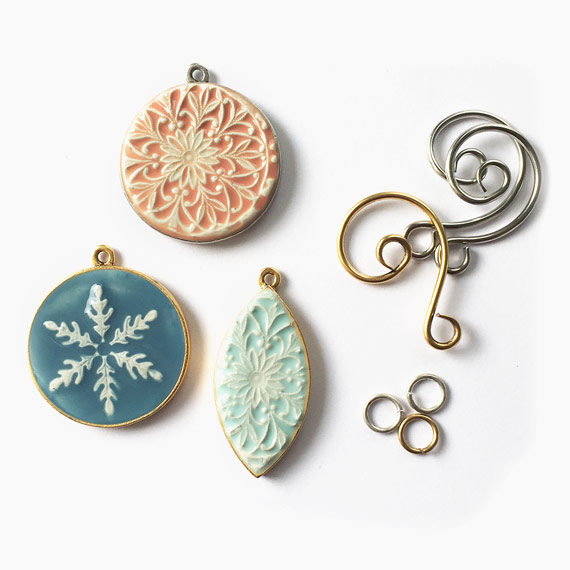
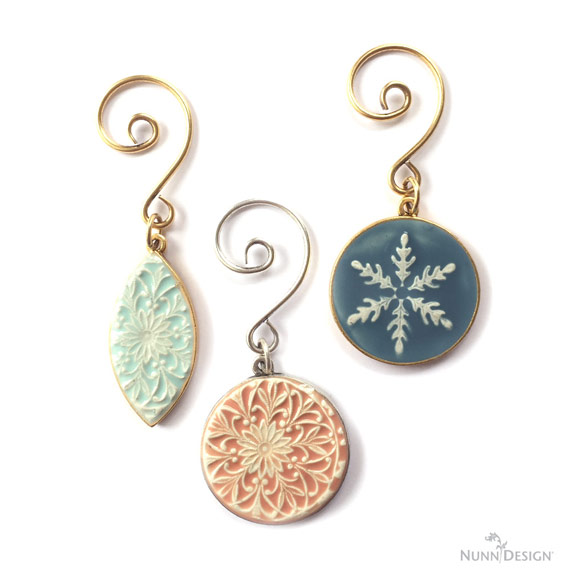
Attaching the Ornament Hook
24. Use two pair of needle-nose pliers to open up one of the Large Jumprings.

25. Thread the Ornament Hook and the cured Holiday Ornament onto the open Large Jumprings.

Use the two pair of needle-nose pliers to close the large jumpring.


Shop Wholesale Nunn Design Findings
Shop Nunn Design Wholesale
Nunn Design has been supplying jewelry artists with findings for over 20 years. Shop wholesale jewelry findings for creative jewelry makers.
Shop Nunn Design!How to Purchase Wholesale?
If you are interested in becoming one of the many designers who trust their jewelry to Nunn Design Findings, please join us by registering to become one of our wholesale customers!
Please visit our Where to Buy Page for a listing of online stores that sell Nunn Design Findings retail.

If you enjoyed reading this post, please subscribe to our blog. Here are 10 Reasons Why to Subscribe and a place to do so!
You are amazing and so are the ornaments! A true labor of love!