


Tutorials
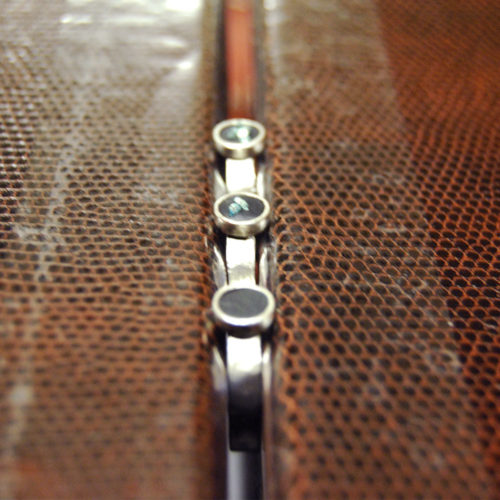
Stacking Rings with Epoxy Clay, Glitter Roxs and Nunn Design 2-Part Resin
![]()
Stacking rings and bangles are still strongly trending within the fashion world. Create a set of stacking rings with Nunn Design Hammered Ring Itsy Circles, Epoxy Clay, Glitter Roxs and Nunn Design 2-Part Resin. Here is the tutorial to show you how.
Be Inspired!
![]()
Learn How!
Materials needed:
- Ring Hammered Itsy Circle (size 6, 7 or 8)
- Epoxy Clay-Black
- Nunn Design 2-Part Resin Kit
- Glitter Roxs
Other:
- Toothpicks
- Wooden Blocks
- Wetwipes

Step 1:
Follow the manufacturer’s instructions for the handling and mixing of the Epoxy Clay. While wearing gloves, pinch off two equal sized balls of Part A and Part B and blend together fully until the clay is no longer marbled and uniform in color. You have approximately 90-120 minutes of working time before the clay starts to harden, so take your time. Once the clay is thoroughly mixed, remove your gloves to make it easier to work with the clay.
Step 2:
Pinch off a small lentil sized ball of the Epoxy Clay and roll it in the palm of your hands until it is smooth. Place it into the Hammered Ring Itsy Circle and pat it down into the bezel creating a flat and even surface. If you have too much Epoxy Clay in your ring bezel, pinch off the excess and pat it with your fingertip to make it smooth and crease free.
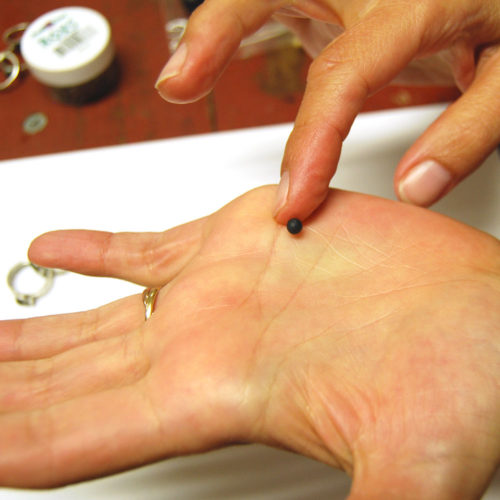
Step 3:
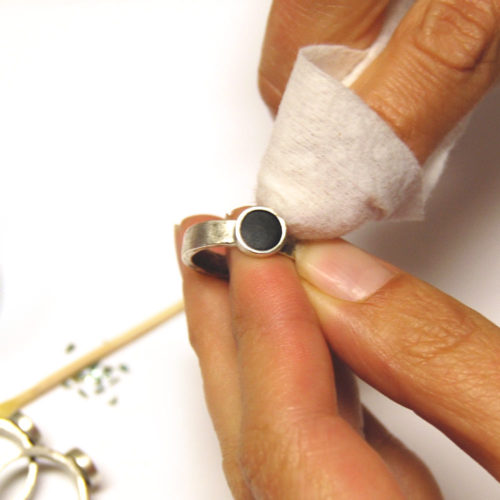
Use a wet-wipe to remove any Epoxy Clay from the ring. When the clay hardens, it is like cement. Cleaning your hands and the metal surface as you go will result in a higher quality finished piece.
Step 4:
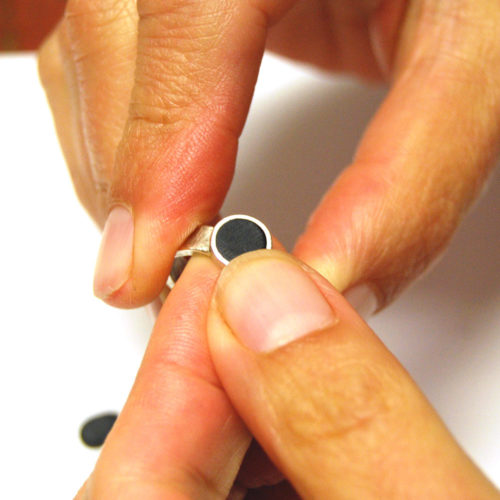
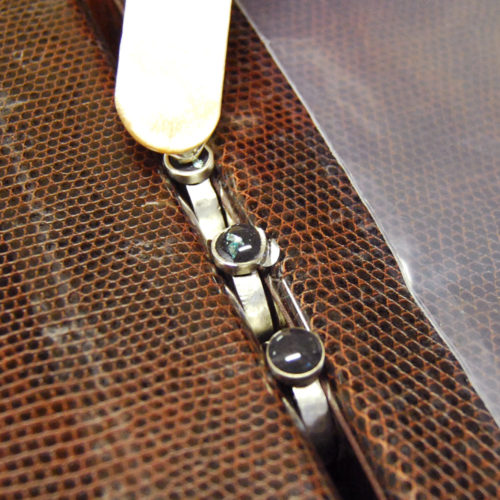
Once the Epoxy Clay is placed in the Hammered Ring Itsy, place a couple Glitter Roxs flakes on the uncured Epoxy Clay. I’m using a beeswax-covered toothpick that is included in the Epoxy Clay Kit. Let the clay set for 2 hours or until hard.
Step 5: Mix Your Resin!
Read the resin instructions for safety concerns regarding the Nunn Design Resin. When I work with resin, I always:
1. Place a large plastic bag over my work surface and tape it down.
2. I make sure I have ventilation in my workroom.
3. I wear gloves.
4. I wear glasses (readers because I can’t see anymore. Plus it protects my eyes!).
5. I have a pile of wet wipes handy.
Step 6:
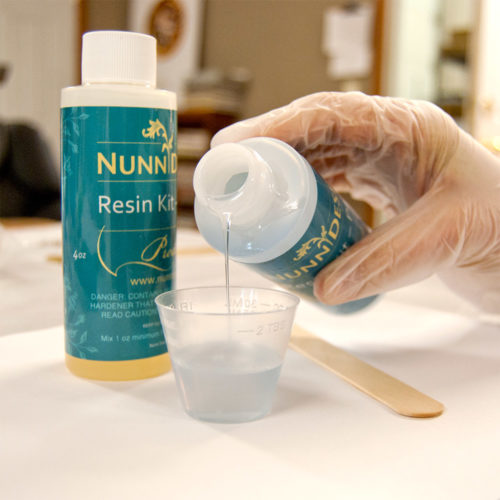
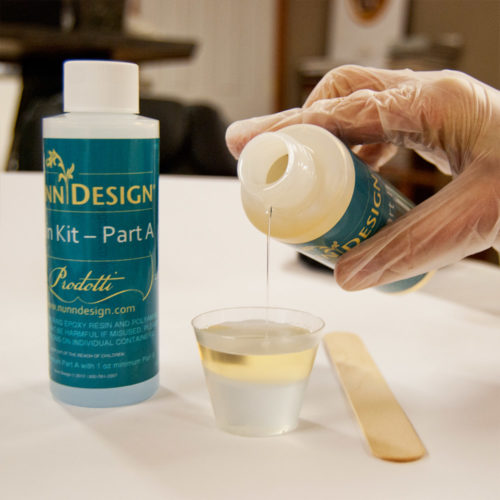
Place one cup (included in the Nunn Design Resin Kit) onto your table. For curing purposes, it is very important that the resin be an exact 1 to 1 ratio of Part A and Part B. I suggest getting your eyes level with the resin so you can see the lines on the measuring cup. Pour Part A of your resin kit up to the ½ fluid ounce mark on your measuring cup. Pour Part B of your resin kit into the same cup until it is filled to the 1 fluid ounce mark. It is important to pour Part A first and then Part B. It is some chemical thing about the part B being heavier or something.
Step 7:
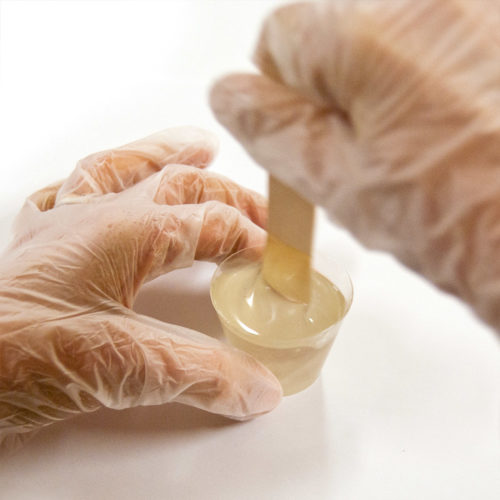
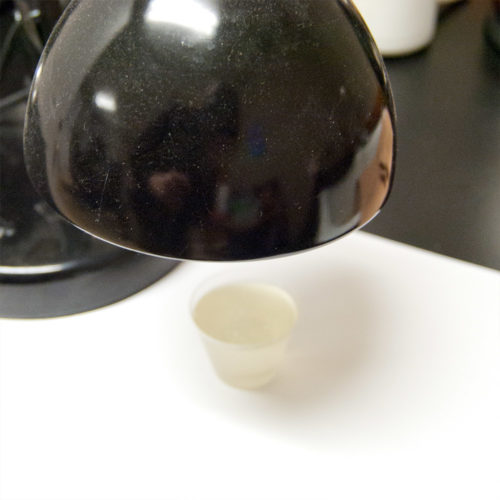
Set your timer for 2 minutes. Using the stir stick from your kit (a popsicle stick or coffee stir stick will work great too), slowly and carefully stir your resin scraping the sides as you stir. Stir for a minimum of 2 minutes. If your resin is still cloudy continue to mix until clear. After mixing is complete and your resin is clear, scrape both sides of your stir stick on the edge of your resin filled cup. Set the mixture under a warm lamp for 5 minutes. I like the lamps with the adjustable arms that can get right down next to the resin. This aids the air bubbles in the resin to rise to the surface and pop.
Step 8:
Place your Hammered Ring Itsy Circle in between two surfaces to make sure that they are level. You can use wooden blocks or stir sticks. I like to apply tape onto the surface to prevent the resin from sticking if there is any overflow.
Step 9:
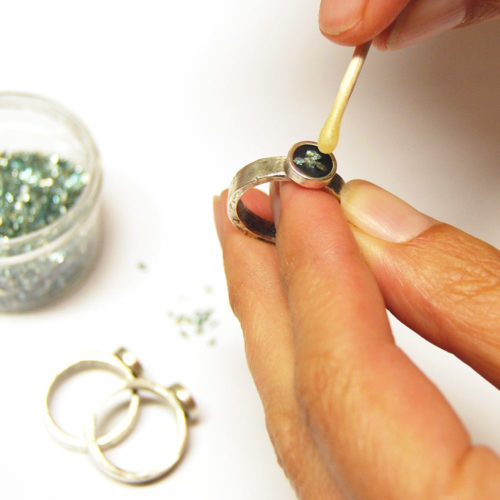
Drizzle a wee bit of resin onto the surface of the Hammered Ring Itsy Circle. Add just enough resin to create a slight dome. Use a toothpick to move the resin around so that there is a full even coverage. If you do have any overflow, use a wipe to clean up any resin. Let cure for up to 72 hours.

Step 10:
Once your piece has fully cured, it is easy to remove any resin that might have overflown. Use a pair of needle nose pliers to gently detach the resin from the ring. Once you are able to remove a little bit of the resin, it is fairly easy to peel away the rest of the resin that had spilled. Be patient and your clean up efforts will be rewarded.
Shop the Supplies:
- Ring Hammered Itsy Circle (size 6, 7 or 8)
- Epoxy Clay-Black
- Nunn Design 2-Part Resin Kit
- Glitter Roxs
Shop Nunn Design Wholesale
Nunn Design has been supplying jewelry artists with findings for over 20 years. Shop wholesale jewelry findings for creative jewelry makers.
Shop Nunn Design!How to Purchase Wholesale?
If you are interested in becoming one of the many designers who trust their jewelry to Nunn Design Findings, please join us by registering to become one of our wholesale customers!
Please visit our Where to Buy Page for a listing of online stores that sell Nunn Design Findings retail.

If you enjoyed reading this post, please subscribe to our blog. Here are 10 Reasons Why to Subscribe and a place to do so!