





Tutorials
Creating Resin Filled Pendants with Wire Frames

In this tutorial, learn how to hammer flat a Nunn Design Wire Frame, prepare the Wire Frame to use with Nunn Design 2-Part Resin, mix Nunn Design 2-Part Resin and then colorize it. All of these steps will lead you to creating unique pendants or earrings that are translucent and nearly glass like.
Be Inspired!
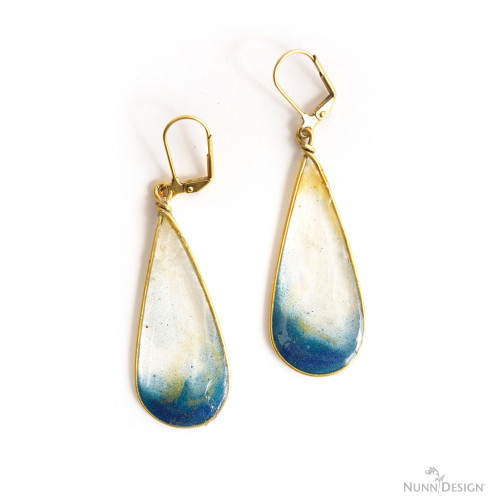
Credit: Kristine Kennedy
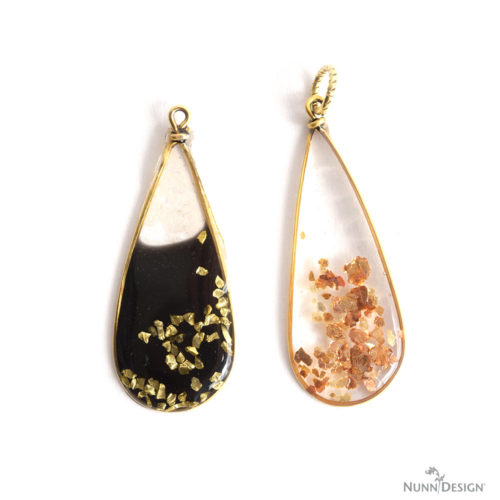
Credit: Add some Glitter Rox!
Learn How!
Materials needed:
Optional:
Tools:
Others:
- Packing Tape
- Scissors
- Toothpicks
- Wet-wipes
Step 1:
The Wire Frame Large Drop doesn’t lay flat, so it can be a little challenging to fill with mixed resin. To create a flat surface on the Wire Frame use a hammer and bench block to slightly flatten the wire. Place the Wire Frame Large Drop on the bench block, keeping the looped area off the side of the block. Slightly hammer the wire all the way around. On the top looped area, slightly tap to flatten this area too.

Step 2:
Cut a piece of packing tape and place it sticky side up on your work surface. Place your Wire Frame onto the tape. Press down and rub your hammered wire frame back and forth on your work surface, burnishing the tape onto the backside of the frame. Trim away any excess of the packing tape to avoid it from getting attached to anything while you are pouring or letting your piece cure. Trust me…it happens!
Tip: Check to see that your packing tape is clear and there is no residue or mottling in the adhesive. If there is, it will show up in your finished resin piece when you remove the tape once the resin is cured. Try to use an area of the tape that does not have blotches or marks.


Step 3:
Place your Wire Frame attached to the packing tape back on the bench block and make sure that all edges are in full contact with the packing tape. Placing it on the bench block will help even those areas around the loop and make contact.

Step 4: Mix Your Resin!
Read the resin instructions for safety concerns regarding the Nunn Design Resin.
When I work with resin, I always:
- Place a large plastic bag over my work surface and tape it down.
- I make sure I have ventilation in my workroom.
- I wear gloves.
- I wear glasses (readers because I can’t see anymore. Plus it protects my eyes!).
- I have a pile of wet wipes handy.
- This is a great blog post that covers 20 Habits for Successfully Using Nunn Design 2-Part Epoxy Resin. Even if you are a seasoned resin mixer, this might be worth a read.
- You can also watch this great video on How to Mix Nunn Design Resin
Step 5:
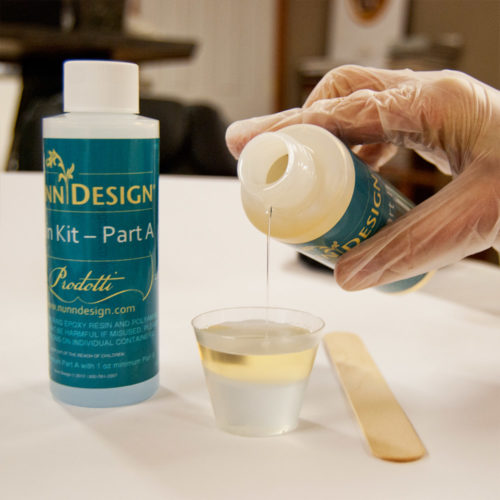
Place one cup (included in the Nunn Design Resin Kit) onto your table. For curing purposes, it is very important that the resin be an exact 1 to 1 ratio of Part A and Part B. I suggest getting your eyes level with the resin so you can see the lines on the measuring cup. Pour Part A of your resin kit up to the ½ fluid ounce mark on your measuring cup. Pour Part B of your resin kit into the same cup until it is filled to the 1 fluid ounce mark. It is important to pour Part A first and then Part B. It is some chemical thing about the part B being heavier or something.
Step 6:
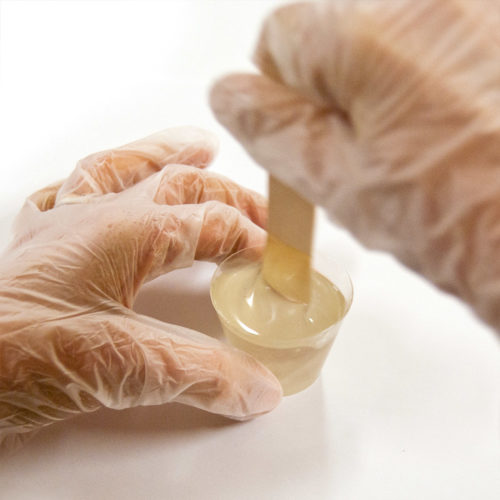
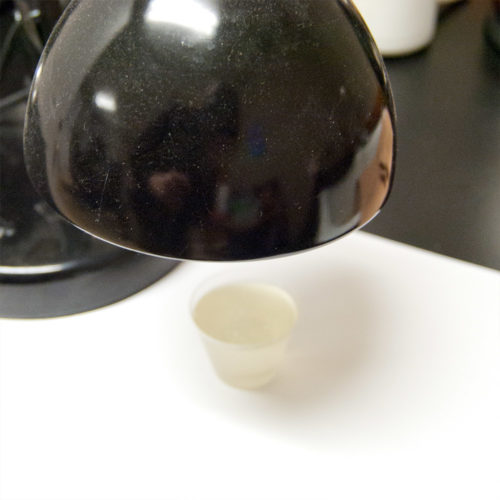
Set your timer for 2 minutes. Using the stir stick from your kit (a popsicle stick or coffee stir stick will work great too), slowly and carefully stir your resin scraping the sides as you stir. Stir for a minimum of 2 minutes. If your resin is still cloudy continue to mix until clear. After mixing is complete and your resin is clear, scrape both sides of your stir stick on the edge of your resin filled cup. Set the mixture under a warm lamp for 5 minutes. I like the lamps with the adjustable arms that can get right down next to the resin. This aids the air bubbles in the resin to rise to the surface and pop.
Step 7:
I tend to work in small area (typically my kitchen table), so I like to work on a surface that projects can be easily moved around on and not disturbed. Place some business cards or some heavy card stock onto your work surface, making it easy to move the bezels without getting any resin on your fingers.
Step 8:
Using a stir stick, start to slowly pour the mixed Nunn Design 2-Part Resin into your Wire Frame. Pour slowly, it is easier to keep adding more resin than it is to over pour and have to clean up. I tend to pour the resin in the center of the wire frame to start and use a toothpick to move the resin around over to the edges of the Wire Frame. Pour in enough resin to have the full center area of the Wire Frame covered, but not too much that the resin is highly domed.


Step 9:
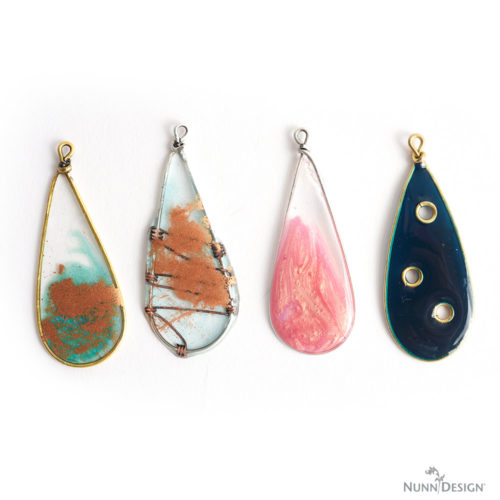
To add color to your piece, you can sprinkle in some PearlEx Mica Powder into the resin and then blend it together with a toothpick. You can also mix the mica powders into resin on the side and then add it to the Wire Frame. Each piece will come out unique.


Step 10:
Once you have added your PearlEx Mica Powders and blended them, if you would like to create a higher resin dome, drizzle on an additional amount of mixed 2-part resin into the Wire Frame. Let the Wire Frame pieces dry until cured (up to 12 hours). Tip: Use Castin’ Craft’ Opaque Pigments to colorize your 2-part resin or Glitter Roxs to add a colorful accent.
Step 11:
To finish your Wire Frame, remove the packing tape from the backside once fully cured. If you have any excess residue from the packing tape on the backside, use the tape to remove it like you would when you are removing lint or animal fur from your clothes. Keep touching the packing tape onto the sticky surface until it is no longer sticky.
Tip: I’d recommend tapping to see if your resin is hard and cured on the backside where the packing tape is, otherwise you could risk touching wet resin on the front.

Step 12:
If you had some seepage of resin that flowed out from under the Wire Frame, use a pair of scissors or needle nose pliers to remove the resin.
Step 13:
Add a jumpring to make a pendant or some earwires to create a pair of earrings. Enjoy!
Credit: Here are other fun ways that you can use this technique
Watch the Video!
[youtube]https://youtu.be/TdC4pdD4xiM[/youtube]Here is a video showing you just how easy this process is. The hardest part will be gathering the supplies!
Shop the Supplies:
- Nunn Design 2-Part Resin Kit
- Wire Frames Large Drop
- Mica Powders
- Castin’ Crafts Opaque Pigments
- Glitter Roxs
Shop Nunn Design Wholesale
Nunn Design has been supplying jewelry artists with findings for over 20 years. Shop wholesale jewelry findings for creative jewelry makers.
Shop Nunn Design!How to Purchase Wholesale?
If you are interested in becoming one of the many designers who trust their jewelry to Nunn Design Findings, please join us by registering to become one of our wholesale customers!
Please visit our Where to Buy Page for a listing of online stores that sell Nunn Design Findings retail.

If you enjoyed reading this post, please subscribe to our blog. Here are 10 Reasons Why to Subscribe and a place to do so!

Love these earrings! I don’t work in resin, but these are so pretty, I might be tempted to try it out! I hope you don’t mind, I shared your tutorial on my FB page and blog too!
http://bit.ly/2nMyXtf
Thank you. I like that people are educating each other about resin on your post!
Love this. Saw another version making this resin pendant with polymer clay. Wish i could handle this resin DIY project.