


Tutorials
Rustic Wire Bezel Necklace by Sharon Borsavage
![]()
Former Innovation Team Sharon Borsavage continues to support the Nunn Design Mission of inspiring and nurturing creativity with her latest tutorial, Rustic Wire Bezel Necklace. I love how Sharon used wire and resin to create a unique handmade bezel.
“I often try to combine my love of jewelry making with unusual elements. In this case instead of buying a pre made bezel, I made one myself for one of my favorite saved images. You can do this with any copyright free image or your own artwork and create a gorgeous bezel with paper, wire and resin.” – Sharon
Learn How!
Materials Needed:
Nunn Design Resin Kit (reskit)
Large Jumprings (8mm)
Grande Jumprings (12mm)
1 Charm Mini Arrow
1 Charm Primitive Heart
2 Charm Feathers
4mm seed beads
9 feet 22 gauge copper wire
3 feet 24 gauge copper wire
4” 14 gauge copper wire
5 mm copper jump rings
1 large feather
1 small feather
found image or copyright free image
Tools Needed:
Round nose pliers
Flat nose pliers
Flush cutters
Hole punch pliers
Steel bench block
Chasing hammer
Rawhide mallet or nylon mallet
Bail making pliers
Other Supplies:
Inexpensive paintbrushes
foam brush
white garbage bag
metal tray
pan to cover metal tray
latex gloves
Black sharpie
![]()
Step 1:
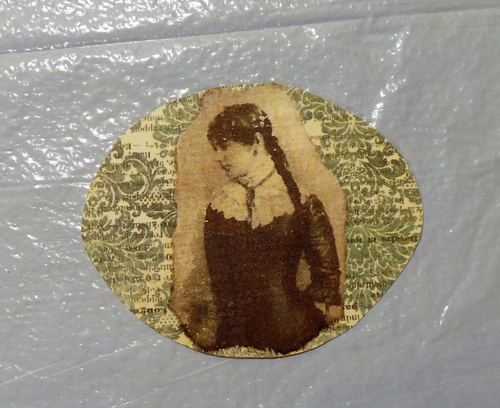
Choose your image for the bezel and lay it out on a garbage bag. Lay all of this on a tray. This is to ensure that everything is safe in case there is some spillage, and also that the image will not to stick and will easily release.
Step 2:
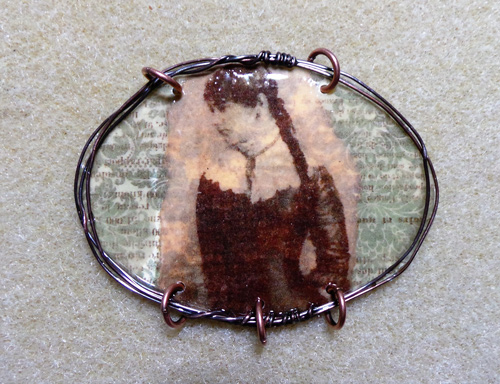
Cut 4’ of 22 gauge wire and make a free form oval the best you can around your image. Take your time and try to get the shape as close as you can to the shape of your image.
Step 3:
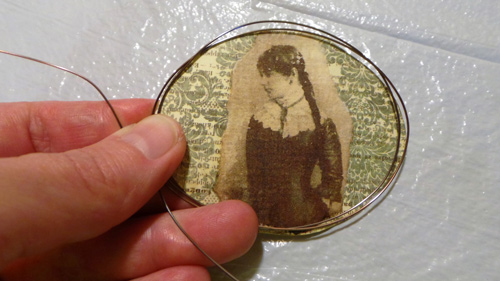
When you your shape as close as possible, wrap one tail around the center top as tight as you are able, not too many wraps though, maybe 3 or 4, and cut the excess wire off. Repeat for the bottom.

Step 4:
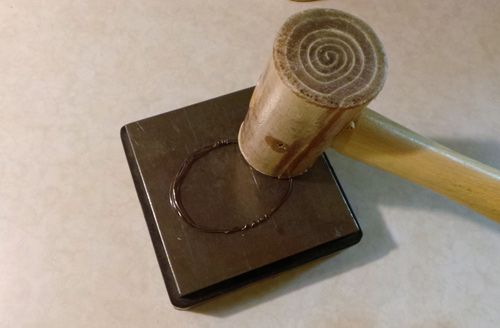
Hammer your wire form firmly on the bench block with a rawhide or nylon mallet. Hammer firmly but not too hard as too bend it out of shape, however, you do want to flatten it slightly. Trim your image to the exact size of your wire frame, you do not want any paper hanging underneath.
Step 5:
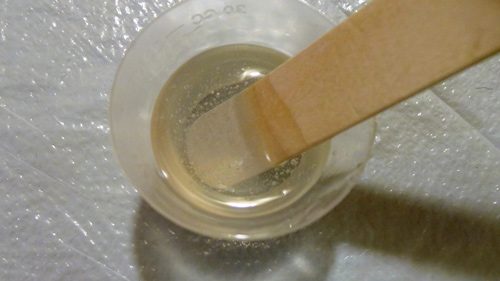
Wear latex gloves. Mix resin kit according to manufacturer’s directions, making sure to follow them carefully so your resin hardens completely.
Step 6:
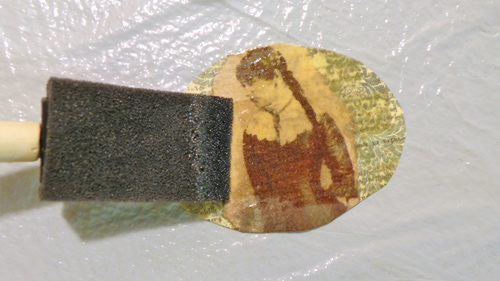
Lay your image on a garbage bag so it doesn’t stick later on and you are able to peel it up. Wear latex gloves. Dip your small foam brush in the resin and coat the paper image. You do not need to flood it, but give it a good coat going over it a few times. Let the bubbles settle out of it for a few minutes. Press your wire frame onto the image. It will not necessarily stick, but just keep it there for a few minutes until it starts to feel a bit tacky in places.
Step 7:
Using a small inexpensive paintbrush, dip into the resin and gingerly go around the perimeter of the bezel you just made and build up a bit with the resin. You may see that some areas will build up and some may leak a tiny bit. If they leak, wipe away what you can and do not worry. The next day the excess can be peeled away or cut off easily.

Step 8:
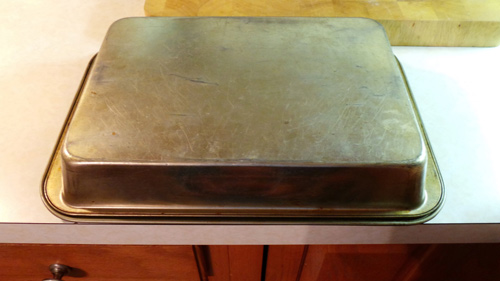
Cover your image with a pan to ensure that dust or anything else does not stick to the resin. In three days your piece will be completely cured and safe to work with.
Step 9:
Mark guides on your image with a sharpie to indicate where to punch holes for jump rings and dangles. Punch holes using a hole-punch.
Step 10:
Attach 8mm jump rings.
Step 11:
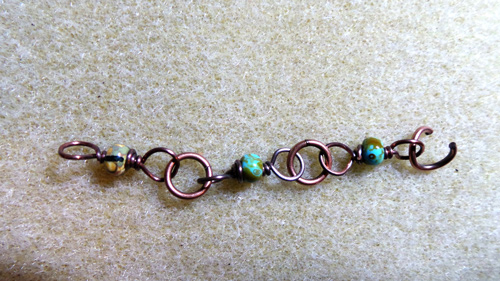
Using a 15” piece of 22 gauge copper wire, form a simple loop, string on 3 seed beads.
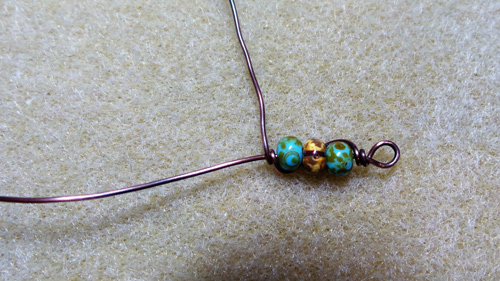
Step 12:
Continue to make a length of wire wrap that is 1” long, ending in another simple loop.
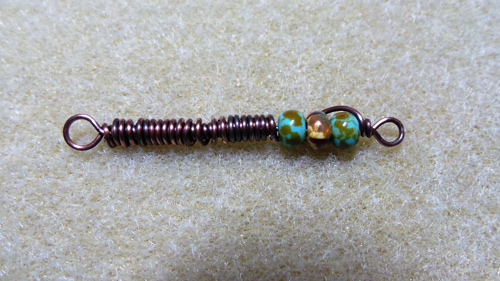
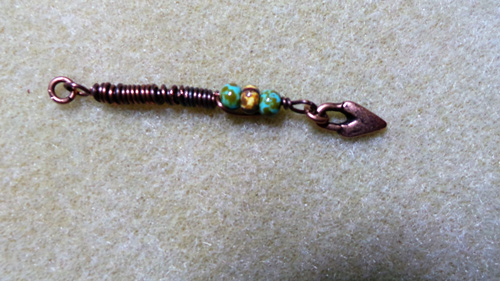
Step 13:
Attach the small copper heart charm to the simple loop at the bead end of the wrapped link. Repeat steps 10 and 11 again and make another link and attach a small arrow charm at the bottom. Set aside for later.
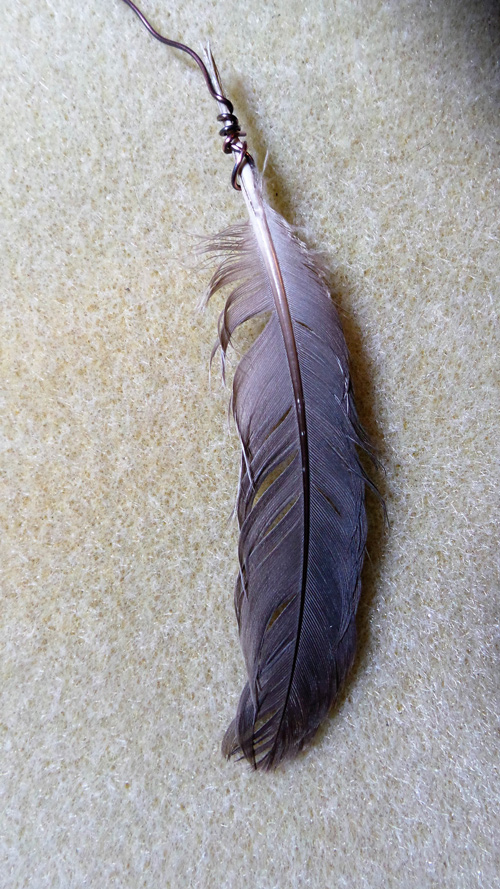
Step 14:
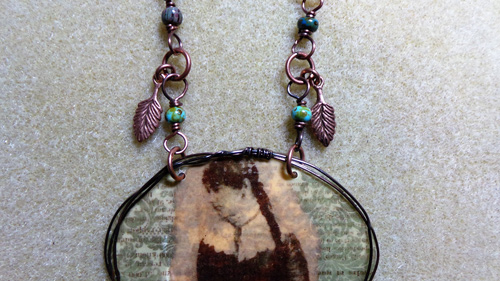
Using a 15” piece of 24 gauge copper wire, firmly brace the end of your feather underneath with your thumb, and begin wrapping the feather about 1/2” down from the tip, wrap back down tightly and back up, string three seed beads, and make a simple loop at the top. Set aside. Do the same with the small feather putting only a small wrap at the base of the feather and a 1/2 wrap at the top.
Step 15:
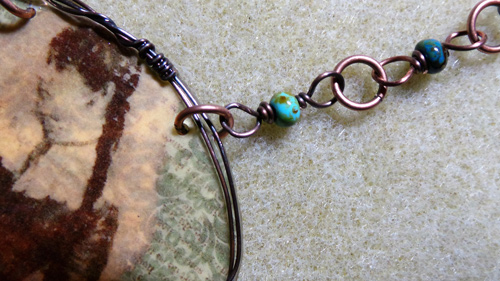
Attach the feather beaded links to the center jump ring of the resin bezel using a 5mm jump ring, and attach the heart charm and arrow charm links to the outer jump rings of the bezel using the same 5mm jump rings.
Step 16:
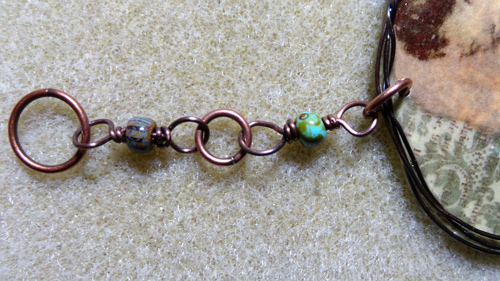
Make a chain of simple loops with one seed bead, connected together with the 8mm jump rings. Make a length of 12 simple loops connected with 12 jump rings. Make another length of 2 loops connected with 1 jump ring.
Step 17:
Starting on the top right side of the bezel, connect the chain of 12 loops to the 8mm jump ring, and connect the chain of 2 loops to the top left of the resin bezel. Set this aside for now.
Step 18:
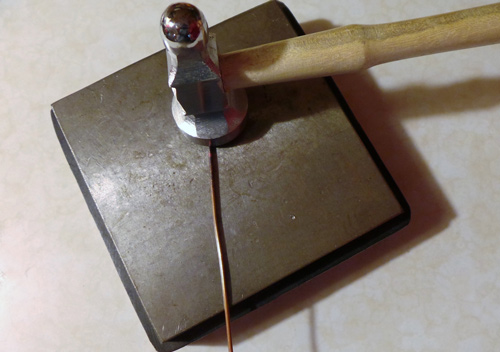
Using a 4” piece of 14 gauge copper wire, hammer both ends flat with a chasing hammer.
Step 19:
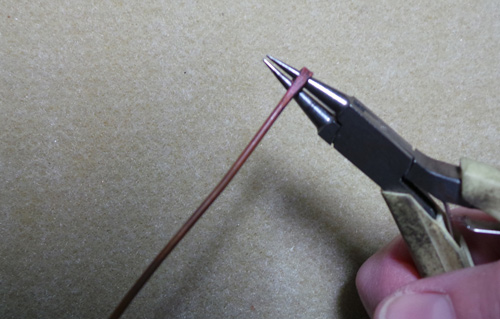
Firmly grip one end of the wire in the center of your round nose pliers and turn your wrist forward to start to make a spiral at one end of the wire.
Step 20:
Remove your round nose pliers and using your flat nose pliers grip the spiral at the end and continue to roll the spiral to 3/8”.

Step 21:
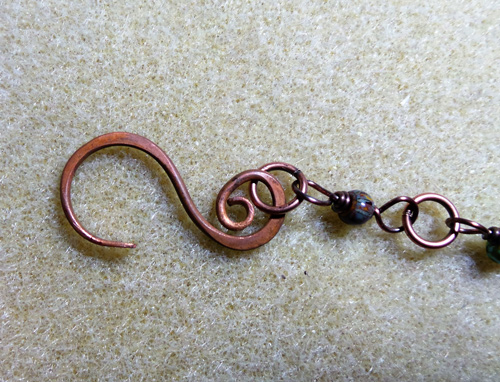
Grip the opposite end of the wire in the smallest barrel of your bail making pliers and roll in the opposite direction as the other end until you make a nice hook shape for the clasp.
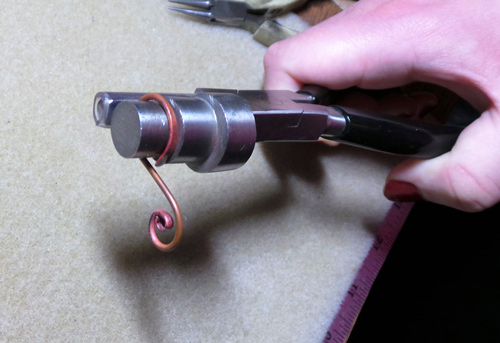
Step 22:
Using an 8mm jump ring connect the clasp to the end of the long beaded chain on the right side of the bezel.
Step 23:
Connect the 12mm jump ring to the short beaded chain on the left side of the bezel.
Step 24:
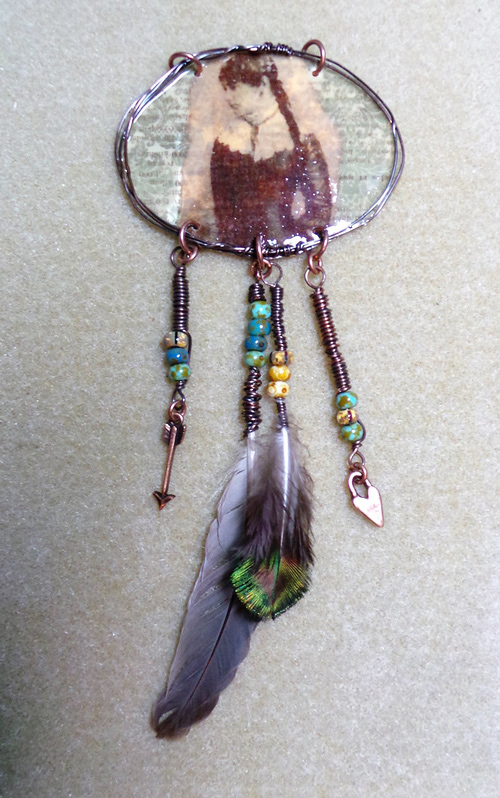
Attach 2 copper feather charms to the first 8mm jump rings on the beaded chain above the bezel using 5mm jump rings.
Super fun, isn’t it!
![]()
To see more of Sharon’s work, visit her at:
Livewire Jewelry Facebook
Sharon Borsavage Facebook
Livewire Jewelry Etsy
Shop The Supplies:
- Nunn Design Resin Kit (reskit)
- Large Jumprings (8mm)
- Grande Jumprings (12mm)
- 1 Charm Mini Arrow
- 1 Charm Primitive Heart
- 2 Charm Feathers
Shop Nunn Design Wholesale
Nunn Design has been supplying jewelry artists with findings for over 20 years. Shop wholesale jewelry findings for creative jewelry makers.
Shop Nunn Design!How to Purchase Wholesale?
If you are interested in becoming one of the many designers who trust their jewelry to Nunn Design Findings, please join us by registering to become one of our wholesale customers!
Please visit our Where to Buy Page for a listing of online stores that sell Nunn Design Findings retail.

If you enjoyed reading this post, please subscribe to our blog. Here are 10 Reasons Why to Subscribe and a place to do so!