


Nunn Design Online Classes, Tutorials
How to Mix Epoxy Clay and Apply into Nunn Design Bezels

Learning the basics of using Epoxy Clay will save you a lot of time and help you avoid challenging creative disappointments. With as many hours under my belt working with this medium, I think I can provide a couple of tricks that will “enhance your learning experience.”
You will also see a bonus design option of how to colorize Epoxy Clay using Castin’ Craft Opaque Pigments at the end of this tutorial. Explore the possibilities!
This tutorial is part of a series of posts covering the technique of “How to Rubber Stamp on Epoxy Clay and Apply Colorize Resin”.
Learn How!
Supplies :
Nunn Design Bezels
Epoxy Clay – White
Other Supplies Needed:
Q-Tips
Rubbing Alcohol
Wet wipes
Toothpicks or headpins
Gloves
Baby Powder
Fast Tutorial Video:
Watch this Fast Video For a quick overview of the process and then read the full tutorial below!
Long Tutorial Video:
Watch the Long Video to see the complete process!
How to Mix Epoxy Clay

Step 1. Epoxy Clay is a 2-part epoxy. Mixing equal parts of A & B activates the clay. Once the clay is activated you have 90-120 minutes before the clay hardens and you can no longer sculpt or embed into it. Prior to mixing the 2 parts, it is recommended by the manufacturer to wear gloves when handling. Once the clay is mixed it is activated and is neutral and gloves are no longer necessary.
The gloves that are included in the Epoxy Clay Kits are not my favorite. They are way too big for my hands and I have a heck of a time mixing and colorizing the clay while wearing them. If you are having the same challenge try a different brand. If you do not have a latex allergy, I recommend using a pair of industrial, powder-free, 5 mil, latex glove sized to fit your hand snugly.
I use my latex gloves over and over again to prevent waste. To get the most usage out of the gloves, place baby powder generously over your hands prior to putting the gloves on.
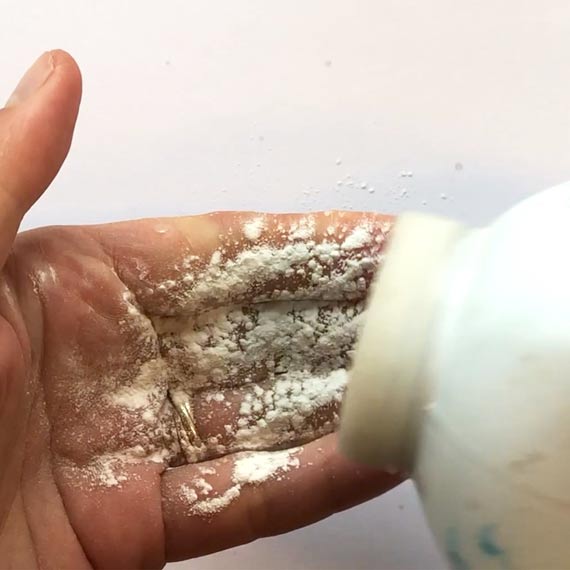
This will make it easier to get the gloves off once you are finished mixing and colorizing the Epoxy Clay.
Step 2. With the gloves on, open up the packages of Epoxy Clay and pinch off two equal-sized balls of Part A and Part B. Blend together the 2 parts fully until the clay is no longer marbled and is uniform in color.

Tip: I guesstimate the amount of Epoxy Clay that I will need to fill the bezels for the project I’m working on. I would recommend having plenty of bezels prepped just in case you have excess clay.
Tip: Make sure to wrap up your Epoxy Clay to prevent it from drying out and hardening. Store Part A and Part B in separate Ziploc bags to avoid contamination while it is in storage.
Step 3. Once the clay is mixed, you can safely handle the clay without wearing gloves. Prior to removing the gloves, use a wet-wipe to clean them fully. Store the gloves for your next creative jewelry making project.
Use a wet-wipe to also clean your hands of any baby powder prior to handling the clay.
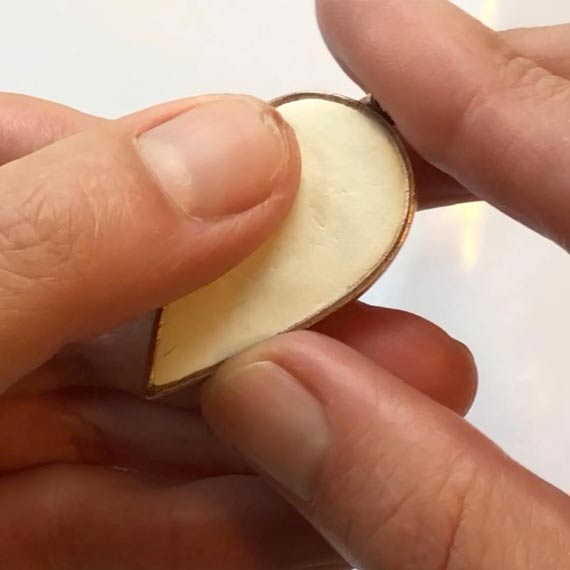
Step 4. Roll the thoroughly mixed Epoxy Clay between your palms until it forms a smooth round ball.
Insert Epoxy Clay into Bezel:
Step 5. Press the ball of mixed Epoxy Clay into your clean bezel using the tips of your fingers. Since I plan to use these filled Epoxy Clay bezels to rubber stamp on, I wanted the Epoxy Clay to be flush to and level with the sides of the bezel.

If you have too much clay, you can pinch off the excess and pat down until smooth again, or remove it from the bezel altogether to remove the excess.

If filling the corners with Epoxy Clay is challenging, use a toothpick to press the clay up into the corners of the bezel. Pat the toothpick marked clay with your fingers until smooth.
Step 6. Use a wet-wipe to clean-up any excess Epoxy Clay that might have been left on the jewelry finding. The Epoxy Clay hardens like cement, so cleaning it up now and being tidy as you go makes the process easier and the results so much nicer.

Insert Epoxy Clay into an Open Bezel:
Step 7. Clean and apply a piece of packing tape onto the backside of the Nunn Design Open Back Bezels.

Step 8. Roll a ball of Epoxy Clay in the palm of your hand until it is smooth without any creases. Press the clay into the bezels, using a toothpick for the hard to insert corners.

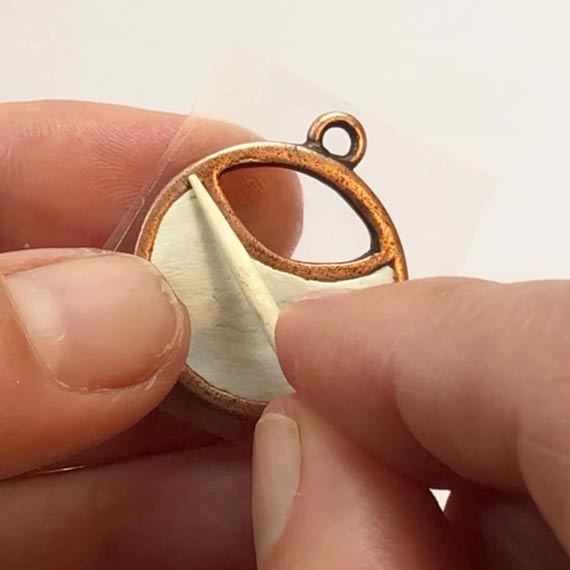

Step 9. Wipe any excess clay from the bezel using a wet-wipe.

Design Option!
How to Colorize Epoxy Clay using Castin’ Craft Opaque Pigments:
Filling a Nunn Design Bezel with Epoxy Clay is a beautiful design option within itself. If you are looking to be challenged, even more, you could even colorize your Epoxy Clay using Castin’ Craft Opaque Pigments. Let’s take a look at how that is done!
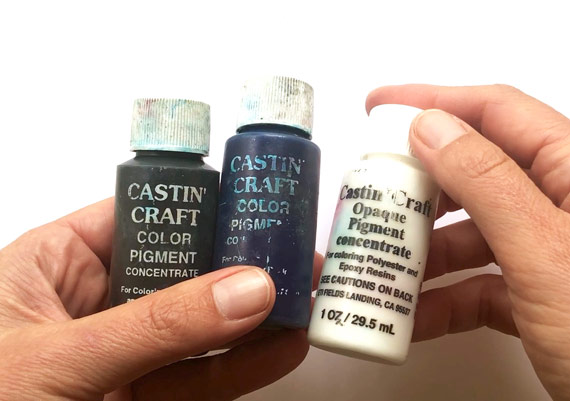
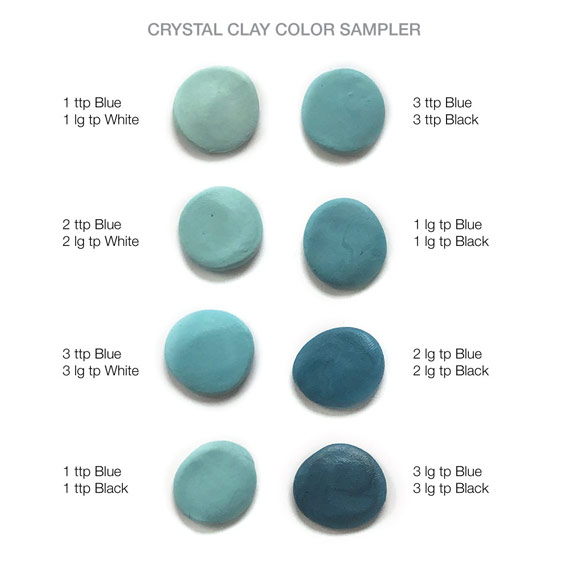
Step 10. To decide on the Pantone color you’d like to create, download the Nunn Design Pantone Cheat Sheet to see the dozens of colors and color formulas that you can choose from. For this tutorial, I’ll walk you through the steps for creating a denim blue color and a sampler of other colors that can be created by tweaking the portions of the Castin’ Craft Opaque Pigment.

By looking through the Pantone Cheat Sheet of color options, I could see that in order to create a deep denim blue color, I would need Castin’ Craft Opaque Pigments in White, Blue, and Black. The color formula was meant for mixing with Nunn Design 2-Part Resin, so I knew there would be a little tweaking that needed to happen, but those 3 colors would get me started in the right direction.
The color formulas call for different portions of Castin’ Craft Opaque Pigments. The portions of the pigment are created using toothpicks. Here is a visual of what the formulas portions look like:
Here is the color sampler with the color formulas that I used to create the various shades of denim.
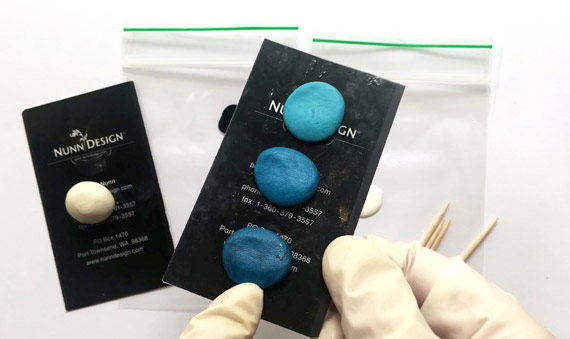
Step 11. To create one of the colors from the sampler, shake the containers of white, blue and black Castin’ Craft Opaque Pigments. Squeeze a heavy squirt of each of the pigments onto a piece of plastic.

Tip: Make sure to apply the lids of the Castin’ Craft Opaque Pigments right after you use them. I can’t tell you how many times I have contaminated my colors by putting on the wrong lids!
Step 12. The formulas are based on applying the colorants to a round ball of mixed Epoxy Clay about the size of a very large blueberry. If you are mixing a larger size of a ball of Epoxy Clay, just adjust your formula appropriately.
Step 13. If you don’t have your gloves on, now is the time to put them back on and let’s colorize the Epoxy Clay! Flatten the large blueberry size ball of Epoxy Clay, creating a nice small patty. Follow the color formula from the colorized Epoxy Clay sampler (or use your own!). Add the right amount of toothpick sizes of colorant to the Epoxy Clay.

I like to place the Castin’ Craft Opaque Pigments onto the flat surface of my large blueberry sized ball with the intention of trying to keep more of the opaque pigments in the clay and less on my gloves when it comes time to mix it! Once the pigments are applied, fold the clay around the pigments like you are folding up a burrito or a crepe (is it lunchtime yet?).
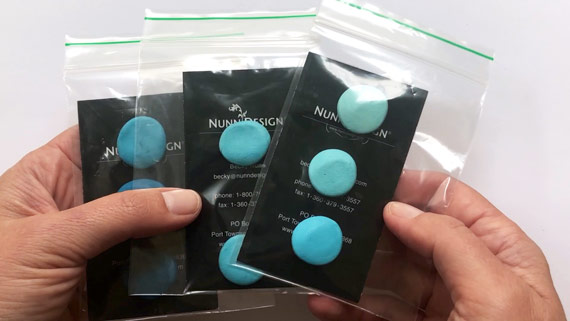
TIP: For this tutorial, I was going to fill a lot of bezels, so I tripled the formula and worked with a ball of Epoxy Clay the size of 3 large blueberries.
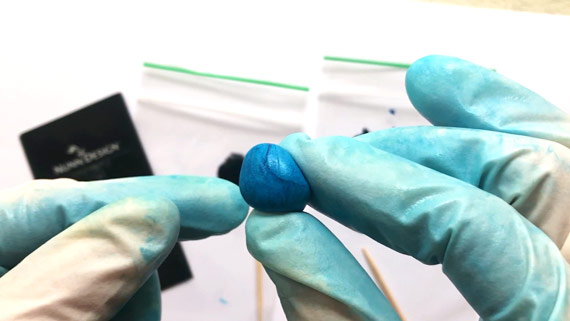
Step 14. Blend the clay and opaque pigments fully until blended. If you want to create a darker color, add more of the blue and black. If you want to create a lighter color, you can add white or more of the non-colorized mixed White Epoxy Clay.
Get Notified of Next Series of Online Classes!
If you would like to know when our next series of online classes will begin, please sign-up to be notified. All class supplies are available both wholesale and retail. Classes consist of tutorials and videos that can be viewed at any time.
Yes! Please Notify Me when Future Classes are Available!
Shop Wholesale Nunn Design Findings
Shop Nunn Design Wholesale
Nunn Design has been supplying jewelry artists with findings for over 20 years. Shop wholesale jewelry findings for creative jewelry makers.
Shop Nunn Design!How to Purchase Wholesale?
If you are interested in becoming one of the many designers who trust their jewelry to Nunn Design Findings, please join us by registering to become one of our wholesale customers!
Please visit our Where to Buy Page for a listing of online stores that sell Nunn Design Findings retail.

If you enjoyed reading this post, please subscribe to our blog. Here are 10 Reasons Why to Subscribe and a place to do so!