


Nunn Design Online Classes, Tutorials
How to Use Epoxy Clay and Gilding Flakes within Nunn Design Bezels and Open Frames

This is a great technique to get you grounded in the basics of using Epoxy Clay with Nunn Design Bezels. There are 4 tutorials total in Class 1. Each tutorial covers the basics in a slightly different way. Here are links to three of the tutorials we posted earlier this week:
- How to use Epoxy Clay within a variety of Nunn Design Bezels
- How to use Epoxy Clay within Open Back Bezels
- How to create a faceted charm mold and how to create a Epoxy Clay faceted insert to place within a Nunn Design Bezel
In this class, we will add some gilding flakes to the Epoxy Clay to create interesting pendants and drops.
Fast Tutorial Video:
Watch this Fast Video For a quick overview of the process and then read the full tutorial below!
Long Tutorial Video:
Watch the Long Video and see the complete process!
Learn How!
Supplies:
Nunn Design Bezels
Nunn Design Open Back Bezels
Epoxy Clay – Black
Gilding Flakes
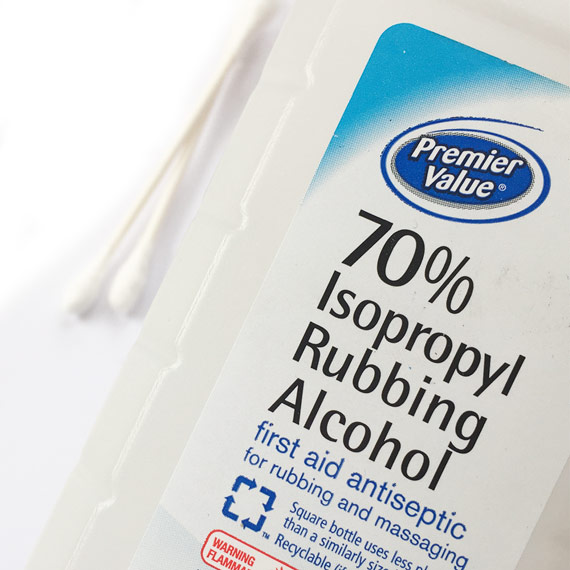
Other Supplies Needed:
Q-Tips
Rubbing Alcohol
Wet wipes
Toothpicks or headpins
Gloves
Preparing Your Nunn Design Bezels:

(Shown here: Grande Pendant Marrakesh & Grande Pendant Oval Narrow)

(Shown here: Open Back Itsy Circles)
Step 1. The Nunn Design Findings are oxidized to provide the aged look to the precious metal plating. The oxidization, when it comes into contact with the mixed Epoxy Clay could change the color of the clay. To avoid this, clean the bezel thoroughly prior to placing the Epoxy Clay within the finding.
To clean, get the tip of a Q-Tip wet with rubbing alcohol and clean away any of the blackened oxidization on all the surfaces of the bezel.
Mixing the Epoxy Clay:

Step 2. Epoxy Clay is a 2-part epoxy. Mixing equal parts of A & B activates the clay. Once the clay is activated you have 90-120 minutes before the clay hardens and you can no longer sculpt or embed objects. Prior to mixing the 2 parts, it is recommended by the manufacturer to wear gloves when handling. Once the clay is mixed it is activated and is neutral and gloves are no longer necessary.

The gloves that are included in the Epoxy Clay 50gr Kits are not my favorite. They are way too big for my hands and I have a heck of time mixing and colorizing the clay while wearing them. If you are having the same challenge try a different brand. If you do not have a latex allergy, I recommend using a pair of industrial, powder-free, 5 mils, latex glove sized to fit your hand snugly.
I use my latex gloves over and over again to prevent waste. To get the most usage out of the gloves, place baby powder generously over your hands prior to putting the gloves on.
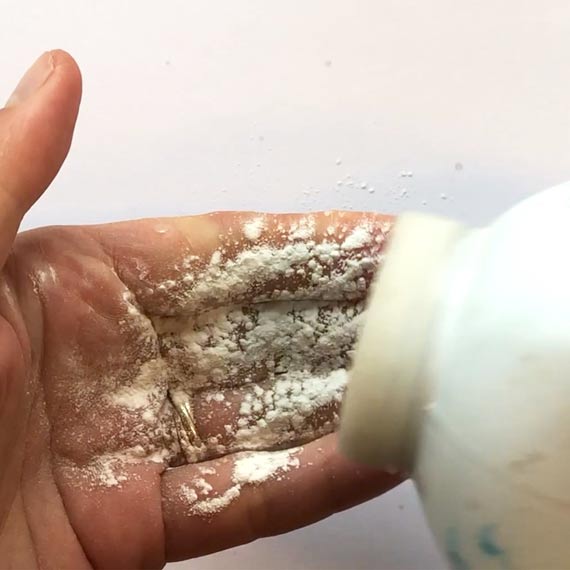
This will make it easier to get the gloves off once you are finished mixing the Epoxy Clay.
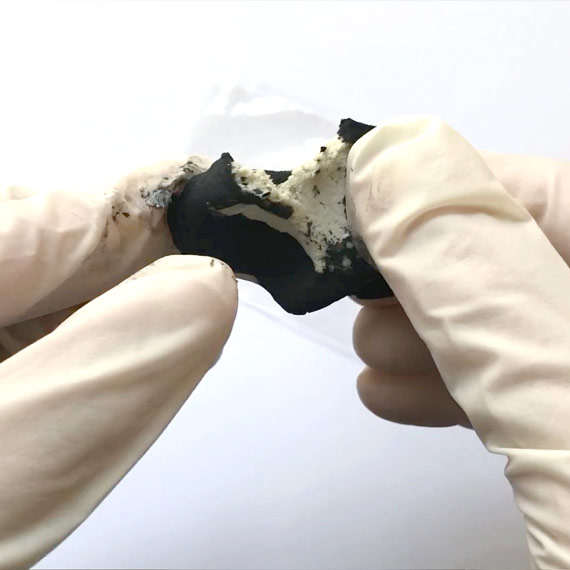
Step 3. With the gloves on, open up the packages of Epoxy Clay and pinch off two equal-sized balls of Part A and Part B. Blend together the 2 parts fully until the clay is no longer marbled and is uniform in color.

Tip: I guesstimate the amount of Epoxy Clay that I will need to fill the bezels for the project I’m working on. I would recommend having plenty of bezels prepped just in case you have excess clay.
Tip: Make sure to wrap up your Epoxy Clay to prevent it from drying out and hardening. Store Part A and Part B in separate zip-lock bags to avoid contamination while it is in storage.
Step 4. Once the clay is mixed, you can safely handle the clay without wearing gloves. Prior to removing the gloves, use a wet-wipe to clean them fully. Store the gloves for your next creative jewelry making project.
Use a wet-wipe to also clean your hands of any baby powder prior to handling the clay.
Step 5. Roll the thoroughly mixed Epoxy Clay between your palms until it forms a smooth round ball.

Step 6. Press the ball of mixed Epoxy Clay into your bezel using the tips of your fingers. For this particular technique, I wanted the Epoxy Clay to be flush to and level with the sides of the bezel.

If you have too much clay, you can pinch off the excess and pat down until smooth again, or remove it from the bezel altogether and remove the excess.


If filling the corners with Epoxy Clay is challenging, use a toothpick to press the clay up into the corners of the bezel. Pat the toothpick marked clay with your fingers until smooth.

Tip: If using an open back bezel – make sure to check the backside to make sure you are getting the Epoxy Clay into all of the crevices and corners of the bezel.
Step 7. Use a wet-wipe to clean-up any excess Epoxy Clay that might have been left on the jewelry finding. The Epoxy Clay hardens like cement, so cleaning it up now and being tidy as you go makes the process easier and the results so much nicer.

Step 8. If you have fingerprints in your clay, or if you want the surface to be smoother than you have, wet your fingers slightly with water and rub the Epoxy Clay. The water will help smooth the clay.
Applying Gilding Flakes

Step 9. Place some Gilding Flake onto your work surface. Wet the end of a toothpick and gently touch the Gilding Flake to pick it up. Place the flake onto the uncured Epoxy Clay and slightly tack it into place.

Step 10. Once the Gilding Flake is released from the toothpick, start to rub the flake into the Epoxy Clay with your fingertips. The Gilding Flakes tear very easily but don’t worry. Just continue to adhere to the clay until you have your desired effect. Gently rub the Gilding Flakes into the Epoxy Clay until it is smooth.


Step 11. Let the Epoxy Clay cure for 12 hours. It will be hard to the touch but will continue to fully cure for another 72 hours.
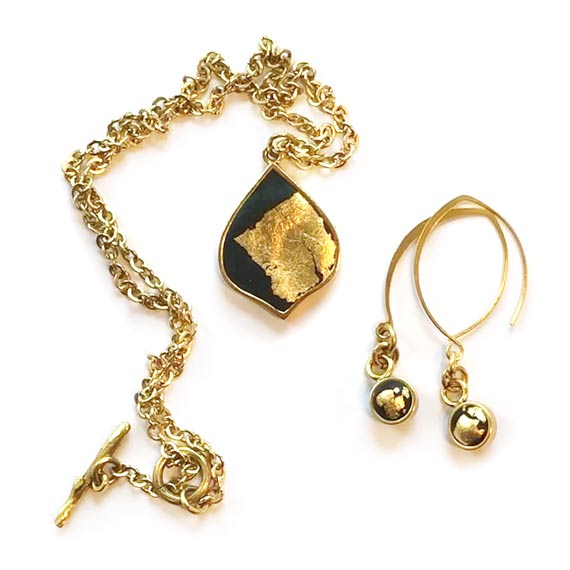
Design Options!
Create a Colorized Epoxy Clay Drop
Step 12. To create a gilded Epoxy Clay drop using the Open Frame Circle, pinch off a small ball of Epoxy Clay and roll it into a smooth round ball using the palms of your hands.

Step 13. To thread the Epoxy Clay into the Open Frame Circle, create an oval shape with the clay. Thread the clay into the circle and use the tips of your fingers to sculpt the clay into place. You are wanting to sculpt the clay so that there are equal amounts of clay on both sides of the Open Frame Hoop.

Step 14. Once you have the clay inserted, roll the clay inserted into the Open Frame Circle around in the palm of your hands using your fingertips. This is doing two things. It is allowing the clay to adhere to the Open Frame Hoop and it is forming a nice round ball.


Step 15. Wipe the Open Frame Bezel with a wet-wipe to remove any excess Epoxy Clay. The clay will harden like cement once cured, so take your time and wipe down the bezel.
Step 16. Repeat Steps 9 and 10 to apply the Gilding Flakes.


Step 17. Once your drop ball is just as you would like it, thread the loop of the Open Frame Circle with a toothpick and suspend the toothpick across a resin mixing cup.

Let the Epoxy Clay Cure for 12 hours.
Shop Wholesale Nunn Design Findings
Shop Nunn Design Wholesale
Nunn Design has been supplying jewelry artists with findings for over 20 years. Shop wholesale jewelry findings for creative jewelry makers.
Shop Nunn Design!How to Purchase Wholesale?
If you are interested in becoming one of the many designers who trust their jewelry to Nunn Design Findings, please join us by registering to become one of our wholesale customers!
Please visit our Where to Buy Page for a listing of online stores that sell Nunn Design Findings retail.

If you enjoyed reading this post, please subscribe to our blog. Here are 10 Reasons Why to Subscribe and a place to do so!