


Making/Using Molds, Nunn Design Online Classes, Tutorials
How to Make a Mold with Organics
Making molds from freshly picked organics is a great way to bring a rich look of texture to resin and clay. Check out this follow-up tutorial to use the mold with resin, Making Molds with Organics to Create Sculpted Resin.
Supplies Needed:
Easy Mold Silicone Putty
Other Supplies:
Freshly picked organics
Wet-wipes
Toothpicks
Plastic Bags
Tools:
Tweezers
Step 1:
Select a leaf or any freshly cut organics. To have a great impression in the mold, you will want the organics to be fresh and not dried. Dried organics can easily break and crack when pressed into the Easy Mold Silicone Putty.


Step 2:
Pinch off two equal sized balls of Part A and B of the Easy Mold Silicone Putty. Getting the knack for mixing just the right amount of putty will take some practice. You might mix too much or too little putty the first time. Try your best to guess how much putty you will need to have approximately 1/8” putty around the outside edge of your bezel’s rim. You will also want the thickness of the silicone putty to be approximately ¼”.

Step 3:
The Easy Mold Silicone Putty has a 3-minute working time at 70° fahrenheit, so you’ll need to work quickly. When it begins to harden it will not take the impression.
Knead both part A and part B together until the putty is blended completely and has a uniform color.

Step 4:
Roll the fully mixed Easy Mold Silicone Putty into a round ball. Place the mixed putty onto a piece of plastic.

Use the lid of the putty to press down, creating a nice round and evenly flat disk of putty.

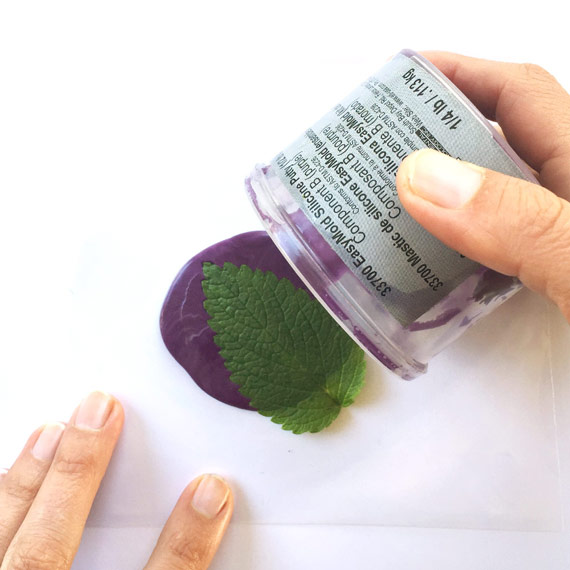
Step 5:
Press the freshly cut organics into the molding putty right away (it sets up really fast!).

Use the lid of the putty to press the organics firmly and evenly down into the Easy Mold Silicone Putty.

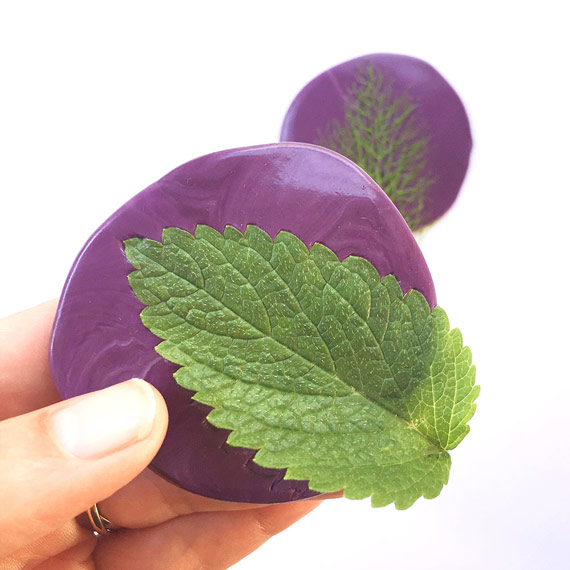
Step 6:
The Easy Mold Silicone Putty will start to set and be firm to the touch after 20 minutes. Remove the organics from the putty.

I had some organics that didn’t easily release, so I used a pair of tweezers to go in and remove the organics that were still stuck in the many crevices of the putty.

Step 7:
Now you are ready to use your mold!
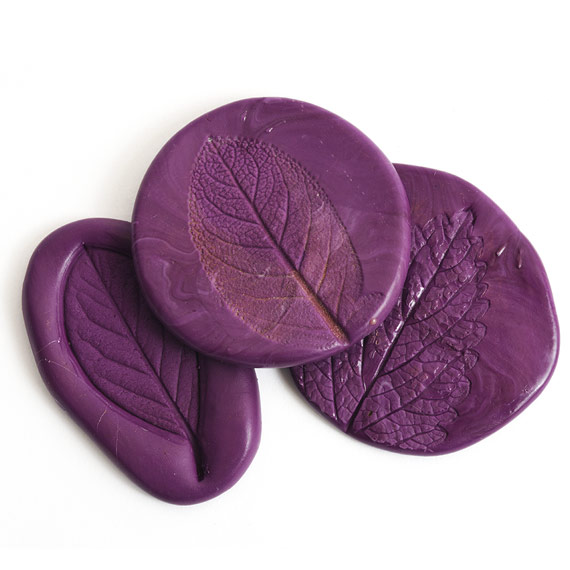
Step 8:
Here is the same process using a leaf to make an interesting mold!


Step 9:
After you have removed the organics from the silicone putty, allow for the mold to set for 24 hours. The silicone putty will continue to off-gas within this period. If you do use Nunn Design Resin right away within the mold prior to allowing the mold to set, air bubbles will release into the resin.
Watch Video!
Here is a quick 3min video where I walk you through making a mold with leaves and organics!
Shop Nunn Design Wholesale
Nunn Design has been supplying jewelry artists with findings for over 20 years. Shop wholesale jewelry findings for creative jewelry makers.
Shop Nunn Design!How to Purchase Wholesale?
If you are interested in becoming one of the many designers who trust their jewelry to Nunn Design Findings, please join us by registering to become one of our wholesale customers!
Please visit our Where to Buy Page for a listing of online stores that sell Nunn Design Findings retail.

If you enjoyed reading this post, please subscribe to our blog. Here are 10 Reasons Why to Subscribe and a place to do so!
Such a cool idea! I’ve made a mold of a starfish for use with polymer clay, but never of a leaf for use with resin. I’m really sad that I just got rid of the rest of my silicone putty while cleaning up for a move!