


Be Inspired
Part 2 of Exploring New Techniques with Resin

Welcome to Part 2 of a multiple part series documenting some creative time I had exploring new techniques using Nunn Design 2-Part Resin.
In Part 1 I had accidentally discovered that pure metal powders, a product that I had purchased to use with Epoxy Clay, worked amazingly well with Nunn Design 2-Part Resin.

To recap, this is what the pure copper metal powder looked like when it was applied to Nunn Design 2-Part Resin and then topped off with an additional coat of clear resin once it was cured.
In this post I’d like to show you what happen when I pulled out a pair of scissors!
PART 2 – EXPLORING NEW TECHNIQUES WITH RESIN

THE EXPLORATION:
Although I really liked the pure copper look, I had created in Part 1 of this series, I was curious on how I could add visual interest through imagery. After filling a series of bezels and applying some gold pure metal powder, I then let it cure. On a couple of the cured pieces – I rubber stamped the surface of the pure metal powders to provide that visual interest I was after. On the others – I took a pair of scissors and started to scratch the surface of the resin to create the lines. I placed the sharp point of the scissors into the resin and dug into the resin to create the dots.

THE HOW-TO:
Here is a quick and brief explanation of what I did to create this look:
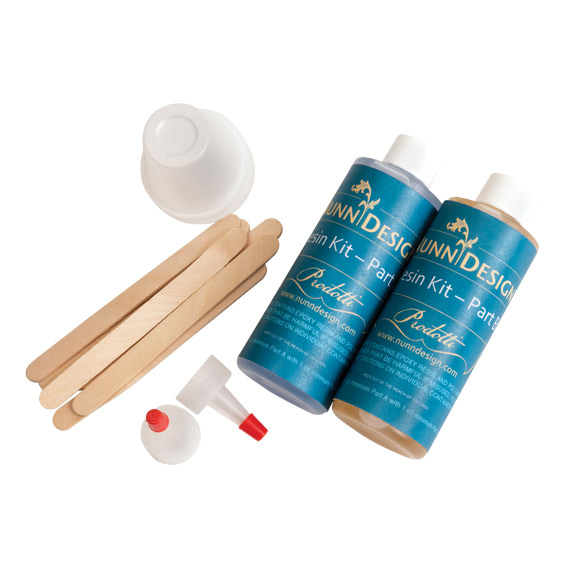
- Clean Nunn Design Bezels with rubbing alcohol.
- Mix Nunn Design 2-Part Resin.
- Drizzle the mixed resin into the bases of the cleaned bezels. With a toothpick, go along the inside edge of the base of the bezel. This is typically where air bubbles will lurk, so by agitating the resin, you will dislodge them.
- After you have agitated the resin, continue to drizzle the mixed resin until the resin is flush to the edge of the bezel or until it is slightly domed.
- Scoop up a toothpick worth of pure metal powder. Place the toothpick over the resin filled bezel and gently tap. The pure metal powder will drop onto the surface of the resin act like an oil slick… oh such a beautiful thing!!! The resin has to be fresh in order for the metal powder to spread like you are seeing here.
- Let the resin cure. I think I did 12 hours, but I think you could do it sooner. The resin just needs to be firm.
- If you are interested in rubber stamping an image onto the cured resin, apply a bit of StazOn Ink onto your rubberstamp. I like to test my image first on a piece of paper to see the design and how the stamp is holding the ink. If the image isn’t clear, maybe the stamp needed to be cleaned or more ink applied. Stamp onto the resin until you have an image that you like.
- Using a pair of scissors, scratch designs into the resin. Don’t be shy about it. If you don’t like what you design, you can always apply a little more resin over the full surface and dust it again with the metal powder.
- Mix another cup of Nunn Design 2-Part Resin and drizzle into the bezel until domed.
BUT WHAT IF I…
Here are a couple more explorations using this same technique.

Necklace A:
For this necklace, after I had scratched my design into the cured pure metal powder surface of the resin, I used my fingertip to smear some silver and gold powder over the surface. I then covered the design with clear resin and let cure.

Necklace B:
This is an example of what happened when I applied the pure powder to resin that wasn’t “fresh”. It didn’t provide me with a “oil slick” like surface. I actually had to stir it in and it came out like this. I still tried to scratch it up and apply a contrasting silver pure metal powder to the surface, but overall the piece didn’t turn out. Oh well…

Necklace C:
I don’t know about you, but I really don’t like wasting resin. I have a bin of bezels that I have filled colorized resin in my studio stash, so I pulled out one of them to create this piece. The base of the bezel was filled with colorized red resin. I then scratched my design into the red resin with my scissors and smeared with my fingertip some silver and gold pure metal powder. I then applied a coat of clear resin over the top and let cure.

SHOP THE SUPPLIES:


Shop Metal Powders
I have found two sources where to buy these metal powders. If you find another, I’d love to know about it!
NEXT WEEK:
There you have it! I hope you enjoyed Part 2 of this series of exploring new techniques with resin. Take a look at what is coming next week! Visit Part 3!

Shop Nunn Design Wholesale
Nunn Design has been supplying jewelry artists with findings for over 20 years. Shop wholesale jewelry findings for creative jewelry makers.
Shop Nunn Design!How to Purchase Wholesale?
If you are interested in becoming one of the many designers who trust their jewelry to Nunn Design Findings, please join us by registering to become one of our wholesale customers!
Please visit our Where to Buy Page for a listing of online stores that sell Nunn Design Findings retail.

If you enjoyed reading this post, please subscribe to our blog. Here are 10 Reasons Why to Subscribe and a place to do so!