


Inside Nunn Design, Transfer Sheets
Part 3 of Exploring New Techniques with Resin

Welcome to Part 3 of a multiple part series on exploring Resin.
For those of you that are new to Nunn Design, my name is Becky. I started Nunn Design more than twenty years ago in the back bedroom of my 1929 cottage home in Port Townsend, Washington. The business started as a result of needing to earn a living in a retirement town where jobs were scarce. As a result of leaning into what I knew how to do best, design and market products, I started down the road to building a line of jewelry findings that our customers know today.
The base for growing Nunn Design has resulted from a core element. That element is curiosity. As a child I was the one kid who would turn over a rock, lay down in the muck to examine all the amazing life that lived underneath. It is with that same curiosity that I now “play around with making jewelry.”
In Part 1 I had accidentally discovered that pure metal powders, a product that I had purchased to use with Epoxy Clay, worked amazing well with Nunn Design 2-Part Resin.

In Part 2 I was curious on how I could add visual interest through imagery. On a couple of the pieces I rubber stamped the surface of the pure metal powders to provide that visual interest I was after, but on the others, I took a pair of scissors and started to scratch the surface of the resin to create the lines. I placed the sharp point of the scissors into the resin and dug into the resin to create the dots.

In this post I’d like to show you what happen when I explored using collage and transfer sheets.
PART 3 – EXPLORING NEW TECHNIQUES WITH RESIN

THE EXPLORATION:
I was really curious on what kind of affect I could create if I applied transfer images onto the pure metal powders. Transfer images are created using a film called Lazertran. The film has a paper backing that is released when submerge into water. If this isn’t making sense, think about a temporary tattoo. It is sort of like that.
For Part 3 of my exploration with resin, I created a “sampler” for myself so that I could see what the various pure metals looked like within different plates of bezels. I also wanted to see what the “feel and look” would be when I applied the transfer images.

THE HOW-TO:
Here is a quick and brief explanation of what I did to create this look:
- Clean Nunn Design Bezels with rubbing alcohol.
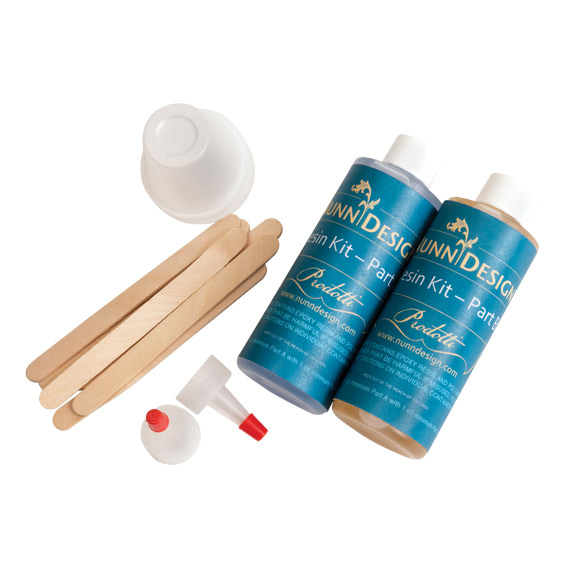
- Mix Nunn Design 2-Part Resin.
- Drizzle the mixed resin into the bases of the cleaned bezels. With a toothpick, go along the inside edge of the base of the bezel. This is typically where air bubbles will lurk, so by agitating the resin, you will dislodge them.
- Scoop up a toothpick worth of pure metal powder. Place the toothpick over the resin filled bezel and gently tap. The pure metal powder will drop onto the surface of the resin act like an oil slick… oh such a beautiful thing!!! The resin has to be fresh in order for the metal powder to spread like you are seeing here.
- Let the resin cure. I think I did 12 hours, but I think you could do it sooner. The resin just needs to be firm.
- Trim the desired transfer sheet image to size.
- Mix another cup of Nunn Design 2-Part Resin. Drizzle a couple drops of the mixed resin onto the cured pure metal powder that is lining the base of your bezel.
- Fill a small shallow dish with warm water approximately 3⁄4 of the way full. Drop your trimmed transfer sheets into the water and wait 30 seconds. The paper backing will release. Learn more here! Colorized Resin with Transfer Sheet in an Open Back Bezel
- Place the film of the transfer sheet onto the resin. Poke the transfer sheet to release any air bubbles that might be lodged under the surface.
- Apply more resin until domed. Let cure.
BUT WHAT IF I…
I was curious what it would look like if I had a paper collage sheet in the base of the bezel, then applied a transfer sheet over that. I mixed in a little pure metal powders to create this look.

I had some extra resin, so I pour the excess resin into a mold that I had made using EasyMold Silicone Putty. I had rubbed the mold with the pure metal powder and then poured in the clear resin. When the resin was cured, I popped them out of the molds and glued them into the Earring Post Mini Bezel and onto a Ring Adjustable 13mm shank.

SHOP THE SUPPLIES:


Shop Metal Powders
I have found two sources where to buy these metal powders. If you find another, I’d love to know about it!
NEXT WEEK:
There you have it! I hope you enjoyed Part 3 of this series of exploring new techniques with resin. Take a look at what is coming next week! Visit Part 4!

Shop Nunn Design Wholesale
Nunn Design has been supplying jewelry artists with findings for over 20 years. Shop wholesale jewelry findings for creative jewelry makers.
Shop Nunn Design!How to Purchase Wholesale?
If you are interested in becoming one of the many designers who trust their jewelry to Nunn Design Findings, please join us by registering to become one of our wholesale customers!
Please visit our Where to Buy Page for a listing of online stores that sell Nunn Design Findings retail.

If you enjoyed reading this post, please subscribe to our blog. Here are 10 Reasons Why to Subscribe and a place to do so!
I hope you do a video showing the metal powders in action, so that we can see what you’re demonstrating. I hope y’all are staying warm. I’m building my website! I’ve made sooooooooo many things with your beautiful products and I can’t wait to show you.
I’ll try to shoot a small video just to show you how the pure metal powder reacts with the resin.
I’m looking forward to seeing your new website! That is no small task! Congratulations.
Becky
Have you tried stamping, or with crystal clay, mixed in crystal clay, soooo many ideas!
I have tried rubber stamping (part 2) and metal stamping. Both came out great!!
My original exploration with the pure metal powders was with Crystal Clay. I couldn’t source them at the time,so I taught the techniques with PearlEx Powders. Here is one of them: https://www.nunndesign.com/class-1-part-2-crystal-clay-pearlex-powders-and-colorized-resin-tutorial/.
So many things can be done!!