


DIY Kits, Nunn Design Online Classes, Tutorials
Texturized Resin in Open Frame Hoops Tutorial + Video
![]()
What You Will Learn:
Texturized Resin in Open Frame Hoops:
This technique was discovered when I was in a creative panic over my resin setting up. I was losing my “resin window” as the resin started to get thick and hard within the mixing up. I was curious to see what would happen if I tried a variety of different things with my soon to be resin waste. This technique of Texturized Resin in an Open Frame Hoop was one of the projects that came out rather neat.
![]()
In this class, you will learn:
- How to mix resin
- A new technique for using up every drop of resin
- How to add texture to resin
- How to clean and drill resin
Supplies Needed:
ND Supplies:
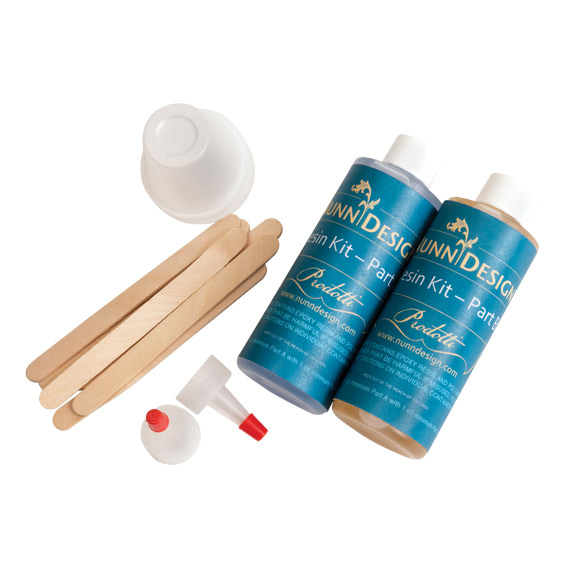
- Nunn Design 2-Part Resin Kit
- Nunn Design Open Frame Hoops
- Nunn Design Jump Rings
Other Supplies:
- Wet-wipes
- Baby Powder
- Toothpick
- Rubbing Alcohol
- Q-Tip
- Fine Steel Wool
- Plastic bag
Tools:
- Scissors
- Drill
- Needle Nose Pliers
Watch Quick 1 Minute Tutorial Video!
Learn How:

There are 4 sizes within the Open Frames Hoops. Each hoop is brass and plated with copper, 24k gold and .999 fine silver.
Step 1:
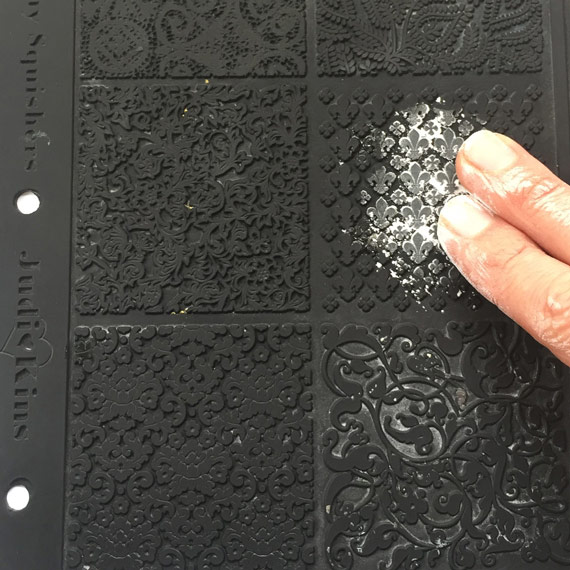
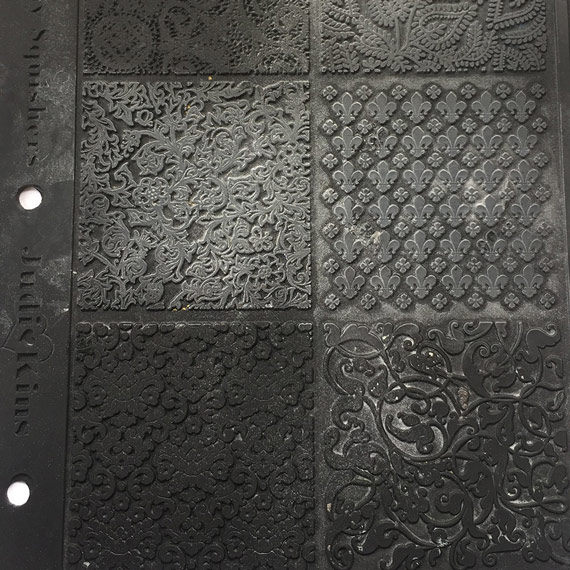
Select a design from the Clay Squisher texturizing pads. Nunn Design is a distributor of Judikin’s Clay Squishers, a heavy duty textured rubberstamping sheet. Clay Squishers are ideal for this texturized resin technique.


Step 2:
Applying baby powder to the rubber Clay Squisher will make it easier for the curing resin to release from the pad. Pour some baby powder onto a plastic bag. Place your fingers into the plastic bag and fully coat your fingers with the baby powder. Apply the baby powder onto the areas of the Clay Squisher that you want to pick-up the texture of the design.

Step 3:
Pick-up the Clay Squisher and turn it on its side. Bump the Clay Squisher against the surface of the table to remove any excess baby powder.
Place the Nunn Design Open Frame Hoops onto the baby-powdered areas of the Clay Squisher.

Step 4:
Read the resin instructions for safety concerns regarding the Nunn Design Resin.
When I work with resin, I always:
- Place a large plastic bag over my work surface and tape it down.
- I make sure I have ventilation in my workroom.
- I wear gloves.
- I wear glasses (readers because I can’t see anymore. Plus it protects my eyes!).
- I have a pile of wet wipes handy.
- This is a great blog post that covers 20 Habits for Successfully Using Nunn Design 2-Part Epoxy Resin. Even if you are a seasoned resin mixer, this might be worth a read.
- You can also watch this great video on How to Mix Nunn Design Resin!
Step 5:
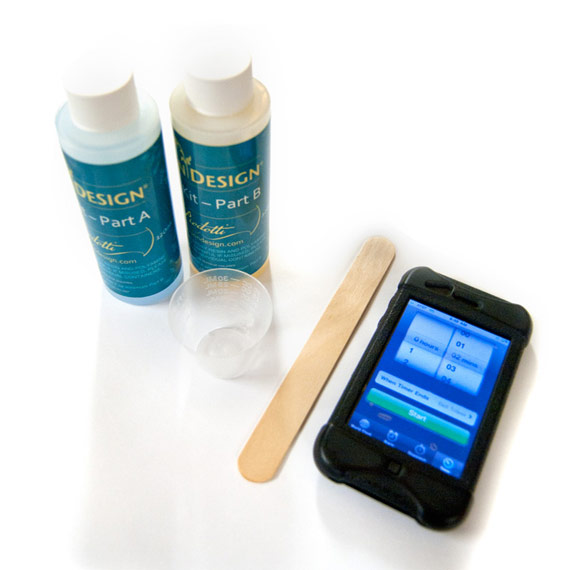
Place one cup (included in the Nunn Design Resin Kit) onto your table.
For curing purposes, it is very important that the resin be an exact 1 to 1 ratio of Part A and Part B. I suggest getting your eyes level with the resin so you can see the lines on the measuring cup.
Pour Part A of your resin kit up to the ½ fluid ounce mark on your measuring cup.
Pour Part B of your resin kit into the same cup until it is filled to the 1 fluid ounce mark. It is important to pour Part A first and then Part B. It is some chemical thing about the part A being heavier or something.

Step 6:
Set your timer for 2 minutes. Using the stir stick from your kit (a popsicle stick or coffee stir stick will work great too), slowly and carefully stir your resin scraping the sides as you stir. Stir for a minimum of 2 minutes. If your resin is still cloudy continue to mix until clear.

After mixing is complete and your resin is clear, scrape both sides of your stir stick on the edge of your resin filled cup.
Step 7:
In order for the resin to not seep out from under the edges of the Open Frame Hoop and for it to peel away from the Clay Squisher easily once it is in the soft cured state, the resin needs to be really thick before applying it to the rubber surface.
TIP: Resin must be thick prior to pouring or it will stick to the Clay Squisher.
Using a stir stick, scoop up the resin from within the mixing cup and drizzle the thick resin onto the powder-covered Clay Squisher. Spread the resin around with a stir-stick until the resin is even in height within the Open Frame Hoop. I also use my stir stick or a toothpick to agitate the resin along the edges of the Open Frame Hoop, causing air that might be trapped in those areas to dislodge and rise to the surface of the resin.


Step 8:
You will want to ‘babysit’ your resin for the next 1 – 2 hours. If you see bubbles rising to the surface, using your hot breath, breathe on them. It isn’t a “blow” sort of breath – more of a “huff” sort of a breath.

The hot air will make the bubbles expand, rise to the surface and pop. As the resin starts to set-up and become thicker, it will be more difficult for the air to rise to the surface. Make sure to check in on the curing resin and double check for air bubbles. If you do have some bubbles, use a toothpick to gentle drag them over to the sides. This agitation process will help them to pop. When the resin is thick and taffy like in texture it is time to let it be. If you attempt to pop bubbles at this time, you may end up with a gooey mess.

Step 9:
Set a timer for 6 hours.
Let the resin cure on the Clay Squisher for 6 hours or until the resin is firm to the touch. If the resin is too soft and slightly tacky, wait an hour and try again. This stage of the curing resin process is referred to as the “soft cure” stage.
TIP: Resin must be peeled from the Clay Squisher and cut during the soft cure phase. It will continue to cure and will become brittle over the next 48 hours, making it impossible to remove from the Clay Squisher and to cut.

Step 10:
After 6 hours of curing, while in the soft-cure stage and the resin is firm to the touch, bend back the Clay Squisher at one of the edges of the Open Frame Hoop, peeling it away from the resin.

You will know the resin is ready to release and peel away from the Clay Squisher when you start to see resin turn lighter in color. It is doing this because it is releasing from the rubber pad.


Step 11:
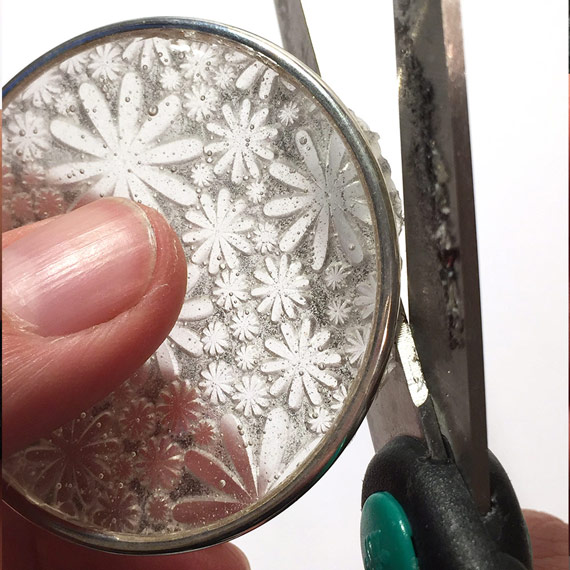
While still in the soft-cure stage (6 hours of curing), if you had any resin seep out from under the open hoop, use a pair of scissors to cut away the excess resin. Make sure to wipe down your scissors – removing any resin bits after cutting.
Step 12:
If the resin has sharp edges, use the finest steel wool to lightly sand the areas.

Step 13: Black Residue
Once the resin is fully cured and hard to the touch, if you have a little black residue from the texturizing pad on your resin, you can remove it by using a coarse ott of steel wool.

TIP: This isn’t a perfect technique. It is unpredictable. I have done two pieces side by side, same resin batch, same cure time, same room temperature. The only things that I can guess that have caused the resin to pull black from the rubber (mind you, I’m still figuring this out too!!!) is:
1. Maybe I had more baby powder on the one that released better?
2. Maybe the rubber on the clay squishers were of various ages?
3. Maybe the resin was thicker?
Honestly, I don’t know why sometimes it works and sometimes it doesn’t. I have used #00 steel wool to sand the resin to remove the rubber, but it still isn’t crystal clear. Keep me posted on what you experience.
After you have used the steel wool to sand the black residue off of your resin, clean with a wet-wipe.
Step 14:
To clean the resin of any steel wool residue, apply some rubbing alcohol onto a Q-Tip and apply.

Step 15:
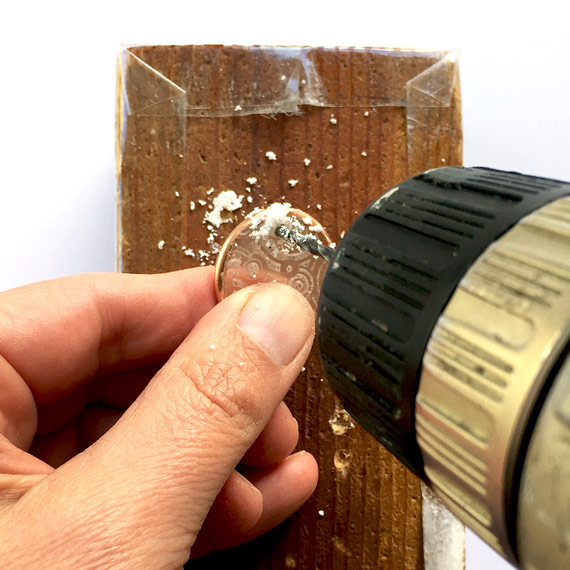
After the resin is fully cured and hard to the touch, you will be ready to drill a hole to attach a jumpring. Select an appropriate sized drill bit to fit the gauge of wire of the jumpring you intend to attach.

You will also want to think about the drilling position of the resin, making sure that there will be enough room for the jumpring to thread through the resin and for chain to be thread through the jumpring. Once you have your drill bit inserted into the drill place the open hoop filled with resin onto a wood block. Place the bit on the resin where you want to drill. Holding onto the Open Frame Hoop, drill straight down and through the resin. The holes should be clean and smooth.


Drill straight down and all the way through the resin (you will feel when you have hit the wood) and back up again. Attach a jumpring and thread your chain through for a great focal of texturized resin!
Tip: Make sure you have a jump ring large enough to fit through your hole and with a big enough diameter.
Watch Video:
Here is a tutorial video where I talk you through the process!
Shop Nunn Design Wholesale
Nunn Design has been supplying jewelry artists with findings for over 20 years. Shop wholesale jewelry findings for creative jewelry makers.
Shop Nunn Design!How to Purchase Wholesale?
If you are interested in becoming one of the many designers who trust their jewelry to Nunn Design Findings, please join us by registering to become one of our wholesale customers!
Please visit our Where to Buy Page for a listing of online stores that sell Nunn Design Findings retail.

If you enjoyed reading this post, please subscribe to our blog. Here are 10 Reasons Why to Subscribe and a place to do so!
New week new question…have you tried adding a very shallow layer of colored resin to the finished textured resin? That would [potentially] take care of the black parts left by the mat. Not saying this is an exact science (surprise, right?!) but I would gently pick larger “chunks” or areas of the pad residue with tweezers while still in the soft cure phase. It may distort the shape minimally – if you start to notice too much distortion while picking it out, stop! – but if it slightly distorts it should return to normal. The longer you wait to do that (the more the resin has set up), the more distortion you will experience. I love the idea of using steel wool to gently sand the resin – that’s a remarkable discovery! That would conform to the texture so much better than sandpaper of any grit.
I think adding clear resin as a sort of cover (doming it slightly) would make the texture details disappear. With a colored resin, you shouldn’t have that problem. Just please don’t show up at my door with torches and chains if I’m wrong. I’ll just blame it on not being able to explain my idea very well. ?
Katherine-
Have you tried this yet? I’d love to see what you created!
Becky
Wow, really cool! I’ve never seen anyone make textured resin before.
That is such a cool idea. Definately going to try this!
Good technique.
When you say “baby powder” – do you mean “talcum powder” or “cornstarch?”
I’m not sure what the difference is between all three of these options. What I do know is that I used a product with the name of Johnson’s Baby Powder. I would think that the other options would work!
Have you considered painting the textured back with acrylic paint? Wipe the wet paint from the high spots, leaving the paint in the wells of the texture. This would make the lacey pattern stand out from the front side.
Oh!!! That sounds so cool! I haven’t tried this, but I’d love to see what you create! Would you apply another coat of resin over the acrylic paint? Just from experience, I do know that the paint will scratch easily, so it might be worth somehow protecting it.
I loved the idea of saving the resin that is left over and the lace effect of the powder on the print. I also laughed at “squished” and the admonishment of not coming to your house if you disagree with your work. Ot a couple of great laughs put of that. But seriously, that was a GREAT TUTORIAL on resin. I am now just starting the medium (was afraid of it) and seeing how you do it was awesome! I will be holding on to thisand I was just about to mention using colored mica powder when I looked ahead and found out that colored resin could be used. So my first resin project will be to make these but with neon colored powder and yes, I do think that a layer of more resin would be needed but then your resin would have set and/or would over flow the ring….food for thought…💗🌈🌟