


![]()
![]()
Learn How to Drill a Hammered Ring To Create Great Wire Wrapped Jewelry!
Download our free tutorial for step-by-step written instructions and photos to inspire you to create.
Supplies Needed:
Nunn Design Hammered Ring
Nunn Design Beadcap 6mm Petal
Headpin or Balled Headpin
1 foot of 22-Gauge wire
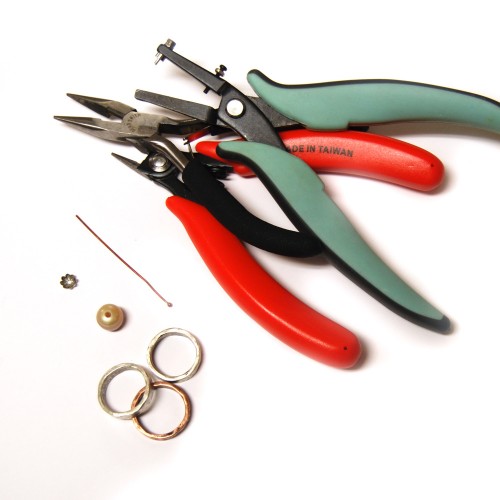
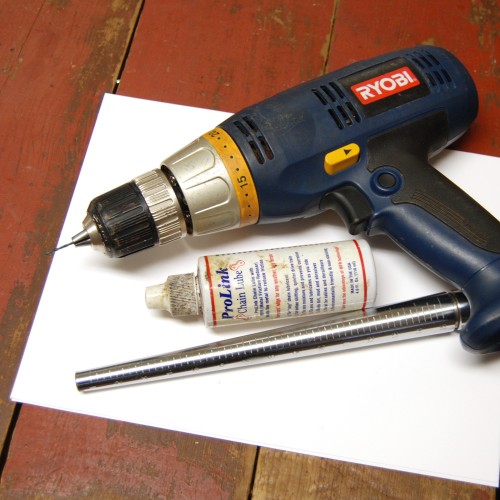
Tools Needed:
Drill & Oil (I used my husband’s drill with a 1/16” drill bit).
Ring Mandrel or a broom handle.
Something to keep your nice round ring supported.
Flush Cutter Pliers
Needle Nose Pliers
Hole Punch Pliers 1.25mm
Watch Video Tutorial!
Watch this quick video to see how easy it is to drill!
Learn How!
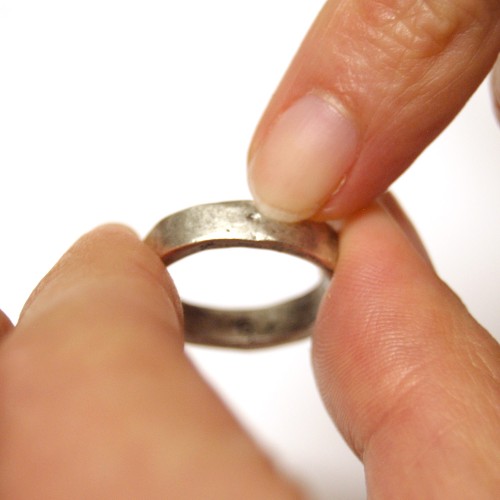
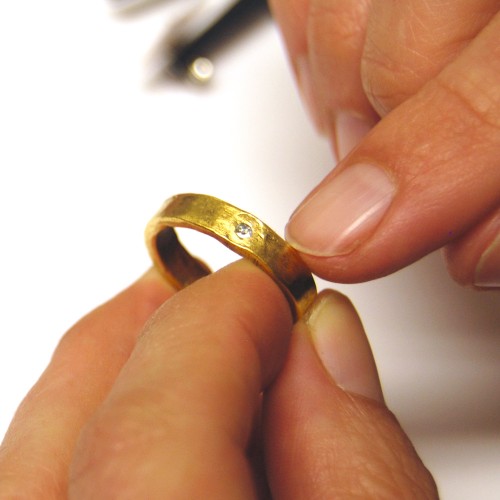
Step 1:
The Nunn Design Hammered Rings are marked with the size on the inside of the ring shank. You will want to drill and wire wrap your items on the opposite side of the ring shank, allowing the mark to remain visible.
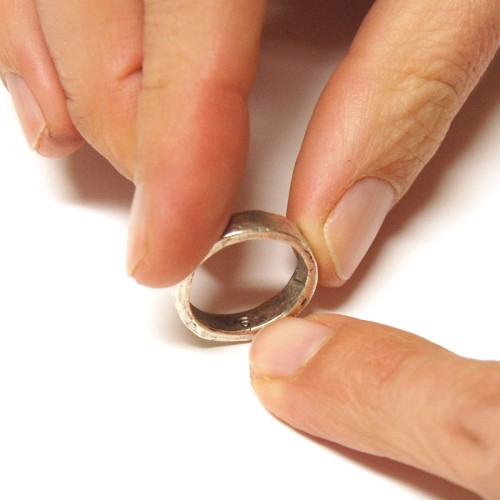
Step 2:
To prevent from having your drill bit slide all over the ring’s surface before you begin to drill the hole create a small divot on the ring with your 1.25mm hole punch. Press down ever so slightly to create a small mark. TIP: The truth of the matter is that you could probably punch a hole right into the ring shank just using the 1.25mm Hole. One of the reasons I didn’t just show this in this tutorial is because I was nervous that it would damage the shape of the ring and potentially cause cracking of the pewter and plating. BUT, when I actually did this tutorial, I didn’t have this happen (go figure).
After several attempts to make it look really bad, I mean, really squeezing hard, I did make it “flange-out” a wee bit. (image below). If you were covering up with a bead, this would be no big deal.
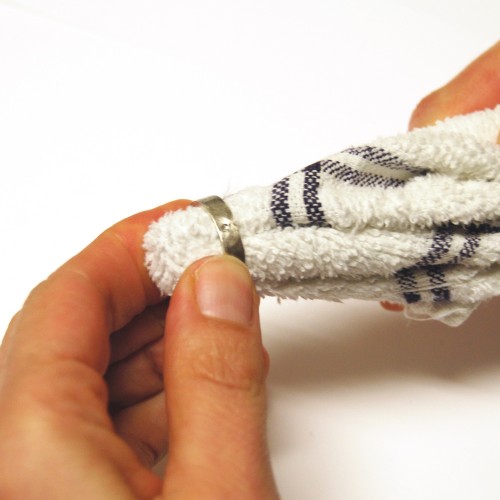
Step 3:
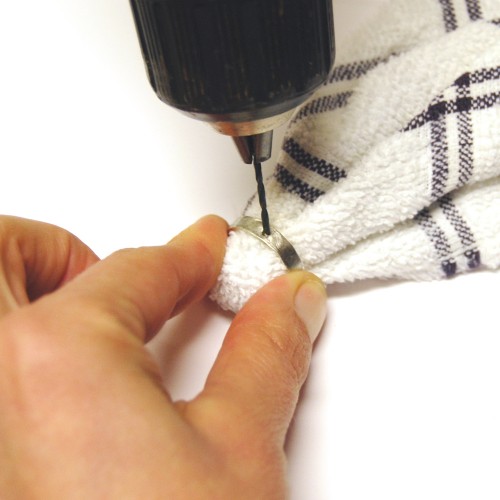
Moving onto the tutorial I was supposed to be talking about…How to “DRILL”. Once you have a small divot on your ring, thread your ring onto a surface that will provide the round ring shape with stability while drilling. This could be a wooden broom handle or a ring mandrel if you have one. I wrapped my ring mandrel with a rag so that I wouldn’t drill through onto my mandrel and potentially mar it.
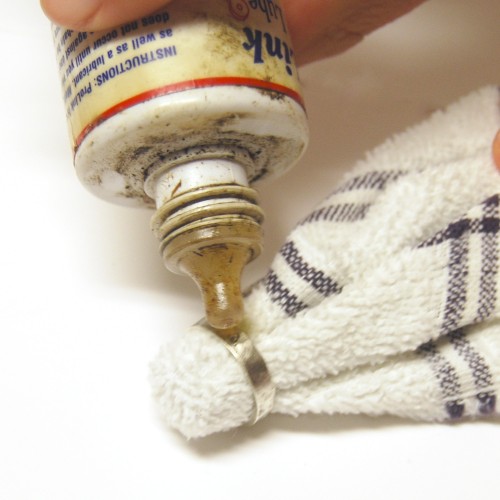
Step 4:
This is my husband’s drill and I promised him I’d use oil prior to drilling. Since I more than likely will want to use it again in the future, I thought I better do what we asked.
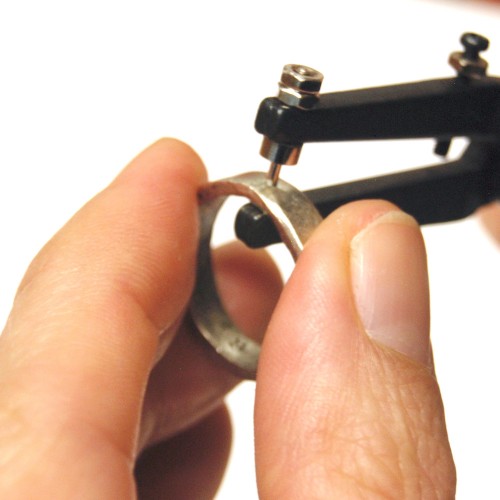
Step 5:
Place your drill bit into the small mark you created in Step 2. Hold the drill so the drill bit is aiming straight down into your ring and start to “pull the trigger” pressing slightly. No need to go too fast or to press too hard. Just take your time. You will feel the tension of the drill lighten up when you have drilled through.
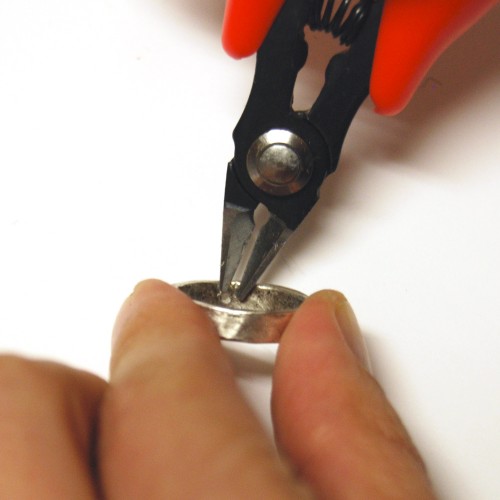
Step 6:
Take a look at your hole on the inside of the ring. If the hole is slightly rough, use your Flush Cutters to trim away any extra bits you might have in there. You will be wire wrapping the ring so there will be a buffer next to the skin, but it is good to check.
Step 7:
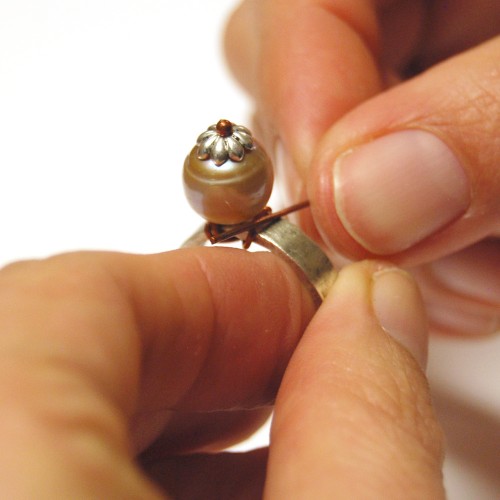
Thread your bead cap and bead onto your headpin. Thread the headpin through your hole in the Hammered Ring.
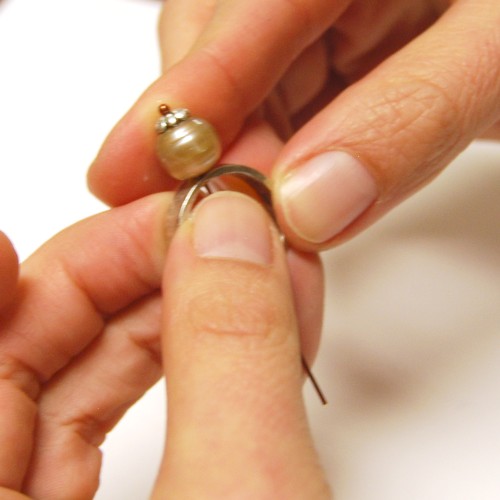
Step 8:
This is hard to show, but you just start to wrap your headpin around the ring. First go to one side of the bead and then the other side of the bead. I like to use my needle nose pliers to pull the wire tight as I’m wrapping.
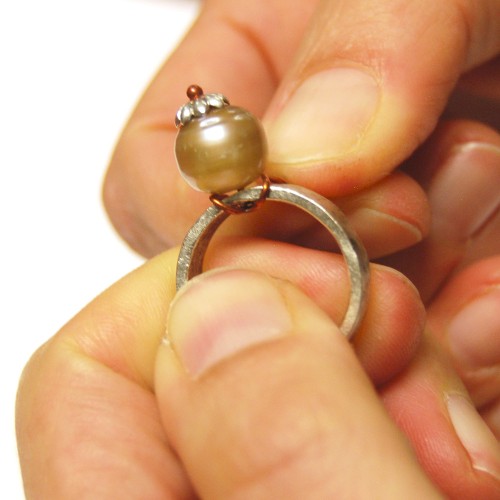
Step 9:
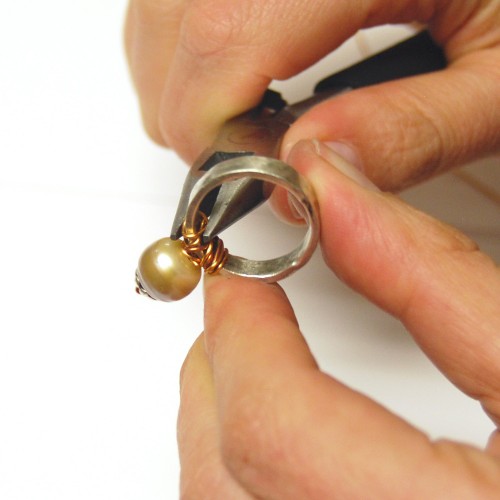
I used a wide-hole pearl bead for this ring and I was a little concerned that it could be a wee bit “wobbly”. To give the ring additional strength, I used some additional 22-gauge wire to wrap around the ring and pearl.

Step 10:
I like to make things all nice and tidy with my needle nose pliers (even though the messy look is so “in”). Use your pliers to scrunch and flatten the wire on the inside of the ring.
Hammered Rings are best stacked! Step and repeat to create a variety of fun and unique rings.
![]()
![]()
Are you ready to start drilling and wrapping? Here are some links to the supplies that you will need. Log on tomorrow as we launch our Hammered Ring Buy & Try, allowing you to purchase all the items you will need to start creating!
Shop Supplies:
Shop Supplies WHOLESALE:
How to Purchase Wholesale?
If you are interested in becoming one of the many designers who trust their jewelry to Nunn Design Findings, please join us by registering to become one of our wholesale customers!
How to Purchase Retail?
Nunn Design primarily sells wholesale, but we do offer Retail Kits and Retail Buy & Try Programs for certain projects. For all other findings, please visit our Where to Buy Page for a listing of online stores that sell Nunn Design Findings retail.
Shop Nunn Design Wholesale
Nunn Design has been supplying jewelry artists with findings for over 20 years. Shop wholesale jewelry findings for creative jewelry makers.
Shop Nunn Design!How to Purchase Wholesale?
If you are interested in becoming one of the many designers who trust their jewelry to Nunn Design Findings, please join us by registering to become one of our wholesale customers!
Please visit our Where to Buy Page for a listing of online stores that sell Nunn Design Findings retail.

If you enjoyed reading this post, please subscribe to our blog. Here are 10 Reasons Why to Subscribe and a place to do so!