


As your skill levels start to include some of the foundational classes that we cover here at Nunn Design, your imagination will start to be open to explore the possibilities.
In this tutorial, we will be covering:
- How to make a silicone mold using EasyMold Silicone Putty and a Nunn Design Charm
- How to mix and embedding Epoxy Clay-Black into Nunn Design Bezels
- Applying Gilding Flakes-Gold into the uncured Epoxy Clay
- How to make an impression into the Epoxy Clay using the silicone mold we created
Fast Tutorial Video:
Watch this Fast Video For a quick overview of the process and then read the full tutorial below!
Long Tutorial Video:
Watch the Long Video and see the complete process!
Learn How!
Supplies:
Nunn Design Bezels
Nunn Design Charm, Brass Stamping or Buttons
Easy Mold Silicone Putty
Epoxy Clay 50g-Black
Gilding Flakes
Other Supplies Needed:
Q-Tips
Rubbing Alcohol
Wet wipes
Toothpicks
Gloves
Baby Powder
Time
Gloss business cards or card stock
Plastic Bags, such as a Ziploc
Glass Dish
Tools:
Flush Cutters
Prepare Your Nunn Design Bezels:
Step 1. The Nunn Design Findings are oxidized to provide the aged look to the precious metal plating. The oxidization, when it comes into contact with the mixed Epoxy Clay could change the color of the clay. To avoid this, clean the bezel thoroughly prior to placing the Epoxy Clay within the finding.
To clean, get the tip of a Q-Tip wet with rubbing alcohol and clean away any of the blackened oxidization on all the surfaces of the bezel.

Prepare Charm for Mold
Step 2. With a pair of flush cutters, trim away the loop off of the Nunn Design Charm.


Step 3. Apply some olive or baby oil onto a Q-Tip and rub it on the Nunn Design Charm. The olive or baby oil on the charm will help it release easily from the EasyMold Silicone Putty.

Make the Silicone Mold
Step 4. EasyMold Silicone Putty has a 3-minute working time. For best results and maximum window of being able to work with the putty, make sure your room temperature in brought up to 70 degrees.
Step 5. Lay a piece of plastic, such as a small Ziploc Bag, onto your work surface. Pinch off a small grape-sized ball of Part A and Part B of the EasyMold Silicone Putty. Getting the knack for mixing just the right amount of putty will take some practice. You might mix too much or too little putty the first time. Try your best to guess the amount of putty you will need to have approximately 1/8” putty around the outside edge of your bezel’s rim. You will also want the thickness of the silicone putty to be approximately 1/8”.
Step 6. The working time of the silicone molding putty is only 3 minutes, so you will need to work quickly. Take a moment to make sure you have the following supplies. Laying out everything on your work surface prior to mixing will provide more ease as you work quickly.
- Nunn Design Charm
- Wet-wipes
- A flat surface to press the silicone putty into a flat disk
- A Ziploc Bag or piece of plastic
Step 7. Knead both part A and part B of the EasyMold Silicone Putty together until blended completely. The putty should be uniform in color.

Step 8. Roll the fully mixed EasyMold Silicone Putty into a smooth round ball that is free of creases. Place the mixed putty onto a piece of plastic. If you have creases, try your best to have the smoothest side of the mixed silicone ball facing up.
Step 9. Use one of the lids from the containers of EasyMold Silicone Putty or a flat surface, such as a glass bowl, to press down into the silicone putty. Creating a nice round and evenly flat disk out of the silicone putty.

Step 10. Press the slightly oiled Nunn Design Charm into the molding putty right away (it sets up really fast!). Use the lid of the putty or a flat surface to press the faceted charms firmly and evenly down into the Easy Mold Silicone Putty.

Step 11. Quickly remove the button and press in your bezel in a position that frames the impression of the button nicely. The loop of the bezel should be at the top of your framed impression, allowing you to have a perfect registration with each imprint. Leave the bezel in the putty while it sets-up.
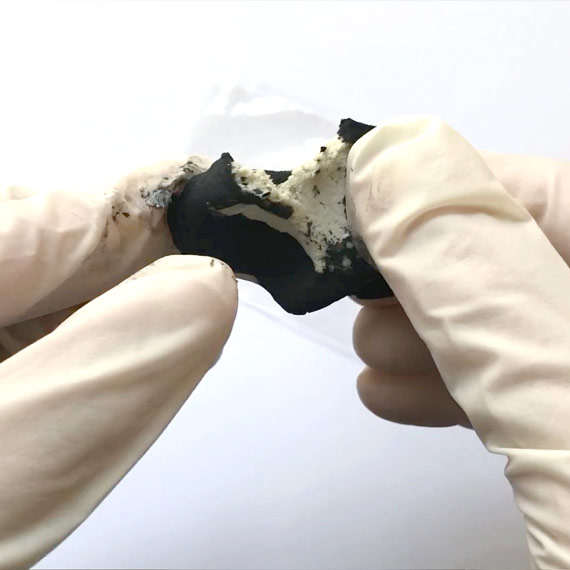
Step 12. The Easy Mold Silicone Putty will start to set and be firm to the touch after 20 minutes. Remove the charm from the putty by bending back the sides. The charm will easily pop out.

Step 12. The Easy Mold Silicone Putty will start to set and be firm to the touch after 20 minutes. Remove the bezel from the putty by bending back the sides, it will easily pop out.
Step 13. Wipe down the mold with a wet-wipe and store for your next creative project.
Repeat steps with different bezels!
Mix Epoxy Clay:

Step 14. Epoxy Clay is a 2-part epoxy. Mixing equal parts of A & B activates the clay. Once the clay is activated you have 90-120 minutes before the clay hardens and you can no longer sculpt or embed objects. Prior to mixing the 2 parts, it is recommended by the manufacturer to wear gloves when handling. Once the clay is mixed it is activated and is neutral and gloves are no longer necessary.
The gloves that are included in the Epoxy Clay 50gr Kits are not my favorite. They are way too big for my hands and I have a heck of time mixing and the clay while wearing them. If you are having the same challenge try a different brand. If you do not have a latex allergy, I recommend using a pair of industrial, powder-free, 5 mils, latex glove sized to fit your hand snugly.
I use my latex gloves over and over again to prevent waste. To get the most usage out of the gloves, place baby powder generously over your hands prior to putting the gloves on. This will make it easier to get the gloves off once you are finished mixing the Epoxy Clay.
Step 15: With the gloves on, open up the packages of Epoxy Clay and pinch off two equal-sized balls of Part A and Part B. Blend together the 2 parts fully until the clay is no longer marbled and is uniform in color.


Tip: I guesstimate the amount of Epoxy Clay that I will need to fill the bezels for the project I’m working on. I would recommend having plenty of bezels prepped just in case you have excess clay.
Tip: Make sure to wrap up your Epoxy Clay to prevent it from drying out and hardening. Store Part A and Part B in separate zip-lock bags to avoid contamination while it is in storage.
Step 16: Once the clay is mixed, you can safely handle the clay without wearing gloves. Prior to removing the gloves, use a wet-wipe to clean them fully. Store the gloves for your next creative jewelry making project.
Use a wet-wipe to also clean your hands of any baby powder prior to handling the clay.
Apply Epoxy Clay into the Nunn Design Bezel

Step 17. Roll the thoroughly mixed Epoxy Clay between your palms until it forms a smooth round ball.
Step 18. Press the ball of mixed Epoxy Clay into your bezel using the tips of your fingers. Since I will be pressing the silicone mold into the clay, I wanted the Epoxy Clay to be slightly domed so it can create a good impression.

If filling the corners with Epoxy Clay is challenging, use a toothpick to press the clay up into the corners of the bezel. Pat the toothpick marked clay with your fingers until smooth.
Step 19. Use a wet-wipe to clean-up any excess Epoxy Clay that might have been left on the jewelry finding. The Epoxy Clay hardens like cement, so cleaning it up now and being tidy as you go makes the process easier and the results so much nicer.
Step 20. If you have fingerprints in your clay, or if you want the surface to be smoother than you have, wet your fingers slightly with water and rub the Epoxy Clay. The water will help smooth the clay.
Add Gilding Flakes onto the Epoxy Clay

Step 21. Place some Gilding Flake onto your work surface. Wet the end of a toothpick and gently touch the Gilding Flake to pick it up. Place the flake onto the wet Epoxy Clay and slightly tack into place.

Step 22. Once the Gilding Flake is released from the toothpick, start to rub the flake into the Epoxy Clay with your fingertips. The Gilding Flakes tear very easily, but don’t worry. Just continue to adhere it onto the clay until you have your desired effect. Gently rub the Gilding Flakes into the Epoxy Clay until it is smooth.


Create an Impression into Epoxy Clay with a Silicone Mold

Step 23. Place the bezel of Epoxy Clay covered with gilding flakes face down onto the silicone mold and press down evenly. To make sure I have a really good impression, I like to pick up the mold and press the mold into the clay, as well as pressing the bezel down into the mold.

Step 24. If you don’t like the impression that was created, pat the impression in the Epoxy Clay with your fingertips until you have a smooth surface once again. You may need to pinch off some of the Epoxy Clay and reapply the gilding flakes. Press the bezel down into the mold again.

Step 25. Clean the side edges of bezel thoroughly with a wet-wipe, removing any of the Epoxy Clay. The Epoxy Clay will harden like cement, so cleaning as you go is a good habit to get into.


TIP: Before storing your silicone molds, wipe it down with a wet-wipe. This will allow you to have a clean mold for the next time.
Step 26. Let the Epoxy Clay cure for 12 hours. It will be hard to the touch, but will continue to fully cure for another 72 hours.
Design Option!

You can apply colorized Nunn Design Resin over the top to create a totally different look! To learn more about how to mix Nunn Design Resin and how to colorize it with Castin’ Craft Opaque Pigments, take a look at our previous blog post.
Shop Wholesale Nunn Design Findings
Shop Nunn Design Wholesale
Nunn Design has been supplying jewelry artists with findings for over 20 years. Shop wholesale jewelry findings for creative jewelry makers.
Shop Nunn Design!How to Purchase Wholesale?
If you are interested in becoming one of the many designers who trust their jewelry to Nunn Design Findings, please join us by registering to become one of our wholesale customers!
Please visit our Where to Buy Page for a listing of online stores that sell Nunn Design Findings retail.

If you enjoyed reading this post, please subscribe to our blog. Here are 10 Reasons Why to Subscribe and a place to do so!
Love love love and I’ve just found your blog. I have subscribed and look forward to reading heaps. sending love.
I’m glad you found us too!!
Enjoy!
Becky