


12 Tutorials to Unwrap Creativity, Tutorials
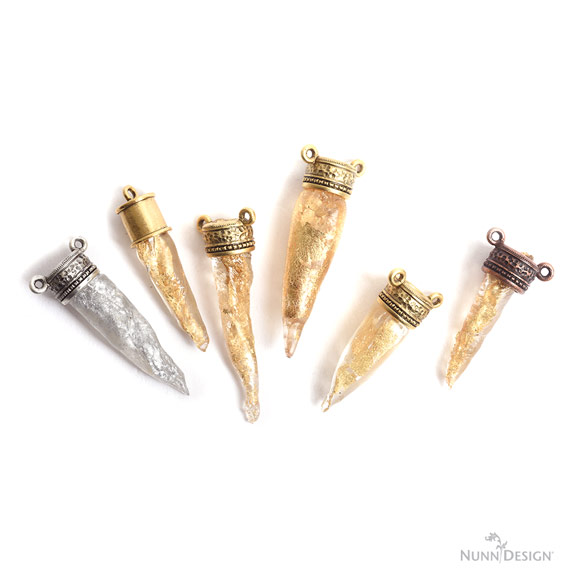
Nunn Design Resin Drop Pendants using Excess Resin and Gilding Flakes

I’m always seeking ways to use up that soon to harden cup of mixed Nunn Design Resin. This tutorial allows you to use every last bit of your resin without concern of waste. This is the 9th tutorial in our 12 Tutorials to Unwrap Your Creativity series!
Here is what you will learn in this tutorial:
- How to mix Nunn Design Resin and use every last bit!
- How to cut and apply Gilding Flakes to the soft cured resin
- How to sculpt and insert into a Nunn Design Pendant top.
Supplies:
Nunn Design Supplies:
- Nunn Design 2-Part Resin Kit
- Gilding Flakes
- Nunn Design Itsy Bottle Tops
Note: We now offer Tassel Tops and End Caps. These are the tops and ends that we originally offered as part of our Itsy Bottles.
Other Supplies:
- Wet-wipes
- Toothpicks
- Stir Sticks
- Mixing Cups
- Business Cards or glossy card stock
- Rubbing Alcohol
- Plastic Bags
- Q-Tips
Tools:
- Scissors
- Tweezers
- Needle Nose Pliers
Mix Nunn Design Resin:
1. Read the resin instructions for safety concerns regarding the Nunn Design Resin.
When I work with resin, I always:
- Place a large plastic bag over my work surface and tape it down.
- I make sure I have ventilation in my workroom.
- I wear gloves.
- I wear glasses (readers because I can’t see anymore. Plus it protects my eyes!).
- I have a pile of wet wipes handy.
- This is a great blog post that covers 20 Habits for Successfully Using Nunn Design 2-Part Epoxy Resin. Even if you are a seasoned resin mixer, this might be worth a read.
- You can also watch this great video on How to Mix Nunn Design Resin!
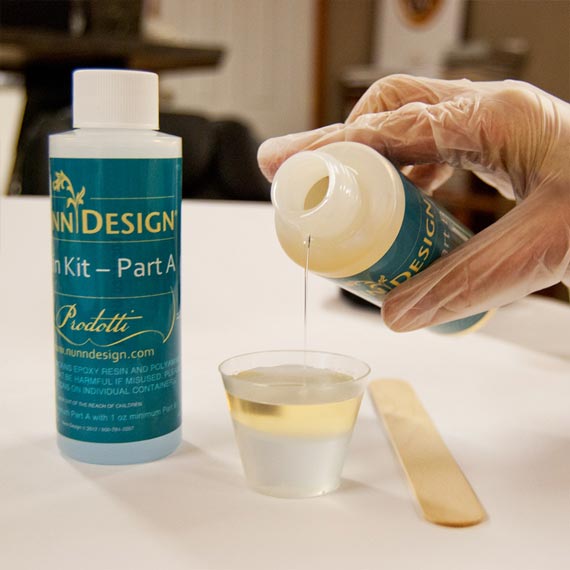
2. Place one cup (included in the Nunn Design Resin Kit) onto your table. For curing purposes, it is very important that the resin be an exact 1 to 1 ratio of Part A and Part B. I suggest getting your eyes level with the resin so you can see the lines on the measuring cup.
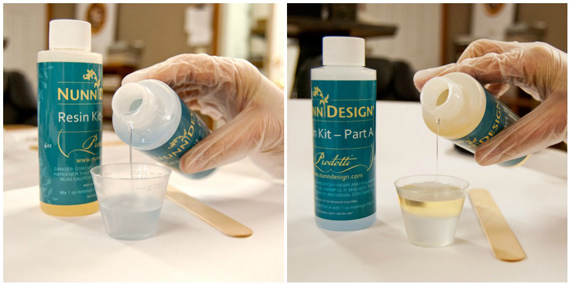
Pour Part A of your resin kit up to the 1 TBS mark on your measuring cup.
Pour Part B of your resin kit into the same cup until it is filled to the 2 TBS mark. It is important to pour Part A first and then Part B. It is some chemical thing about the part A being heavier or something.
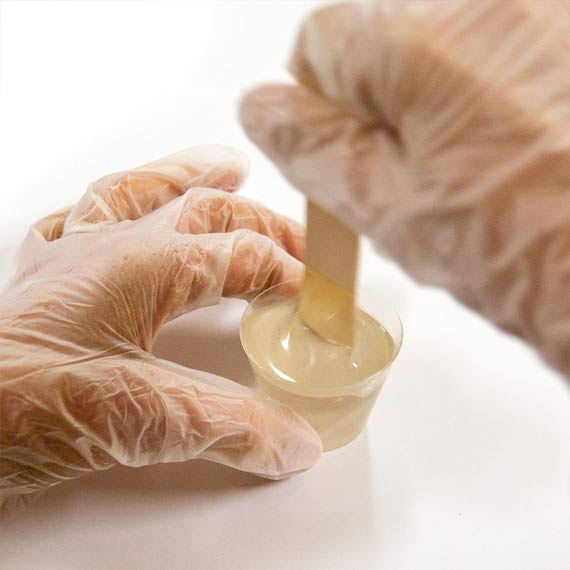
3. Set your timer for 2 minutes. Using the stir stick from your kit (a popsicle stick or coffee stir stick will work great too), slowly and carefully stir your resin scraping the sides as you stir. Stir for a minimum of 2 minutes. If your resin is still cloudy continue to mix until clear. After mixing is complete and your resin is clear, scrape both sides of your stir stick on the edge of your resin filled cup.
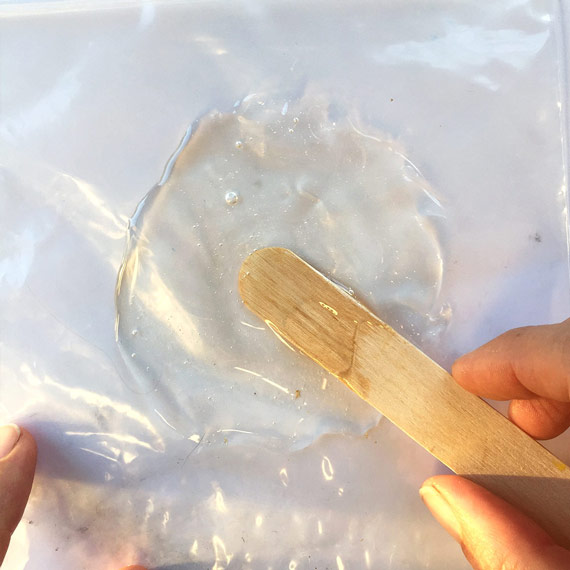
4. When the resin starts to become very thick and warm to the touch in the mixing cup, use your thick mixing stick to remove the resin. Scoop the thick resin onto a piece of plastic, such as a Zip-Lock Bag. Smear the resin around with the stir stick until the resin is consistently about 1/16” in height.


Cure Resin for 5-6 Hours:
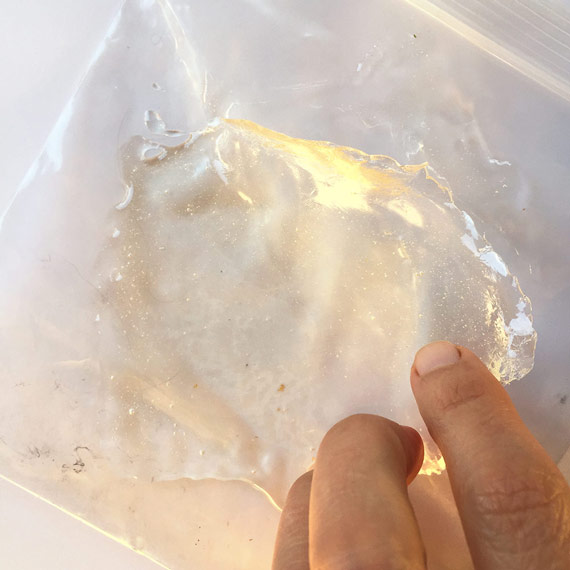
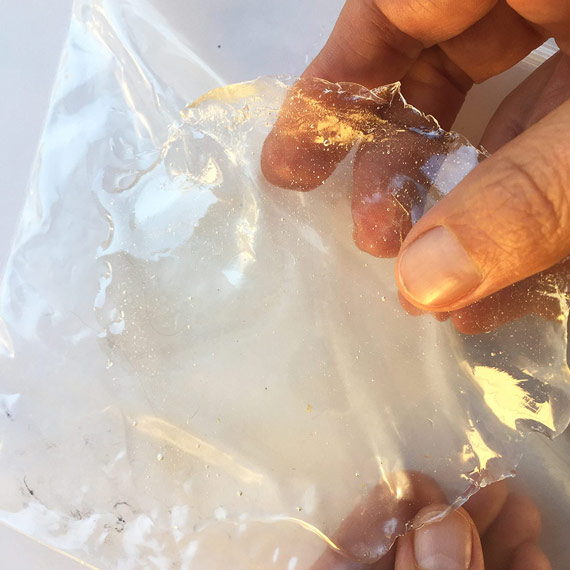
5. Let the resin cure on the plastic bag for about 5-6 hours, or until it is not longer sticky to the touch. This 5-6 hour curing phase for the resin is referred to as the “soft-cure phase.” The resin will be very soft and easy to handle. Peel the resin from the plastic.
6. The Nunn Design Itsy Tops are oxidized to provide the aged look to the precious metal plating. The oxidization, when it comes into contact with the resin, could change the color of the resin. To avoid this, clean the tops thoroughly prior to application of the resin.
Dip the tip of a Q-Tip into rubbing alcohol and clean away any of the blackened oxidization from the tags surface.
Shape the Resin Drop and Apply Gilding Flakes:

7. Using a pair of scissors cut the soft cured resin into a triangle shape. Lay the resin down onto a piece of plastic. With a pair of tweezers, place several pieces of gilding flakes onto the resin.

8. With your fingertip, rub the gilding flakes into the resin until it is smooth and fully adhered. The resin will be slightly tacky and the gilding flakes will easily adhere.

9. Start to roll the resin into a cone with the gilding flake on the inside of the cone. I have to admit that there is no one-way to do this step. You will need to experiment until you get just the shape that you like. If the resin is too thick, it will be easier for the roll to unravel. Several times I have rolled, then unrolled and pulled the resin so it is thinner and then rolled it up again.

10. Use your fingertips to sculpt and mold the top end of the gilded resin until it is small enough to insert into the end of one of the Itsy Bottle Tops. Press the resin up into the top until it is fully inserted.


11. Continue to sculpt the resin with your fingertips until you have the desired look. On several of these samples I used the scissors to cut and create a distressed look.


Let Cure Completely:
12.
I tend to work in a small area (typically my kitchen table), so I like to work on a surface that projects can be easily moved around and not disturbed. Place some business cards or some heavy card stock onto your work surface, making it easy to move the pendants without getting any resin on your fingers.
TIP: I would recommend covering the card with glossy packing tape or a small plastic bag. This will prevent the resin from sticking to the paper.

13. Let the resin cure. It will start to be hard to the touch as early as 12 hours, but the resin will continue to cure up to 72 hours.
Shop Supplies Wholesale:
Retail Supplies:
Nunn Design primarily sells wholesale, but we do offer Retail Kits and Retail Buy & Try Programs. For all other findings, please visit our Where to Buy Page for a listing of online stores that sell Nunn Design Findings retail.
Shop the Supplies Wholesale:

If you enjoyed reading this post,
please subscribe to our blog.
Here are 10 Reasons Why to Subscribe
and a place to do so!
Shop Nunn Design Wholesale
Nunn Design has been supplying jewelry artists with findings for over 20 years. Shop wholesale jewelry findings for creative jewelry makers.
Shop Nunn Design!How to Purchase Wholesale?
If you are interested in becoming one of the many designers who trust their jewelry to Nunn Design Findings, please join us by registering to become one of our wholesale customers!
Please visit our Where to Buy Page for a listing of online stores that sell Nunn Design Findings retail.
If you enjoyed reading this post, please subscribe to our blog. Here are 10 Reasons Why to Subscribe and a place to do so!
Looks very interesting! I will give it a try:)! Thanks ?
I love this look! Can’t wait to try it…tomorow