


Tutorials
How to Use Organics in Open Back Bezels with Nunn Design 2-Part Resin
![]()
If you haven’t yet explored using Open Back Bezels and Nunn Design 2-Part Resin, you are in for a creative treat! The look is beautiful and the process to do this technique is fairly easy.
Learn How!
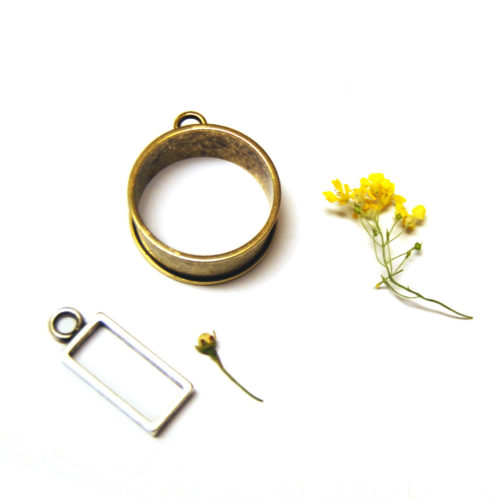
Materials Needed:
- Nunn Design Open Bezels
- Or Nunn Design Open Frames
- Nunn Design 2-Part Resin Kit
Other Supplies:
- Dried Flowers or Organics
- Packing Tape
- Scissors
- Toothpicks
- Wet-wipes
Step 1: Prepare your Organics
We created a great blog post that you might find helpful on how to prepare your organics for resin. It is titled: A Beginners Guide to Drying and Preparing Organics for Creating Resin Jewelry. Bop over for a quick read. A lot of the success you will have with your finished pieces depends on how you prepare your organics.
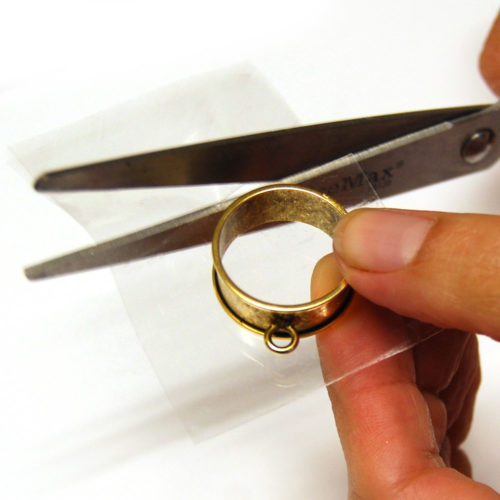
Step 2:
Cut a piece of packing tape and place it on your work surface. Place your Open Frame or Open Bezel onto the tape. Press down and rub your bezel back and forth on your work surface, burnishing the tape onto the backside of the bezel. Trim away any excess of the packing tape to avoid it from getting attached to anything while you are pouring or letting your piece cure. Trust me…it happens!
Tip: Check to see that your packing tape is clear and there is no residue or mottling in the adhesive. If there is, it will show up in your finished resin piece when you remove the tape once the resin is cured. Try to use an area of the tape that does not have blotches or marks.

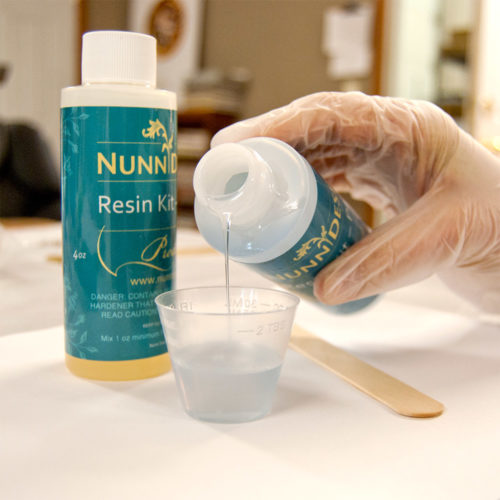
Step 3: Ladies and Gentlemen, Mix Your Resin!
Read the resin instructions for safety concerns regarding the Nunn Design Resin.
When I work with resin, I always:
- Place a large plastic bag over my work surface and tape it down.
- I make sure I have ventilation in my workroom.
- I wear gloves.
- I wear glasses (readers because I can’t see anymore. Plus it protects my eyes!).
- I have a pile of wet wipes handy.
- This is a great blog post that covers 20 Habits for Successfully Using Nunn Design 2-Part Epoxy Resin. Even if you are a seasoned resin mixer, this might be worth a read.
- You can also watch this great video on How to Mix Nunn Design Resin
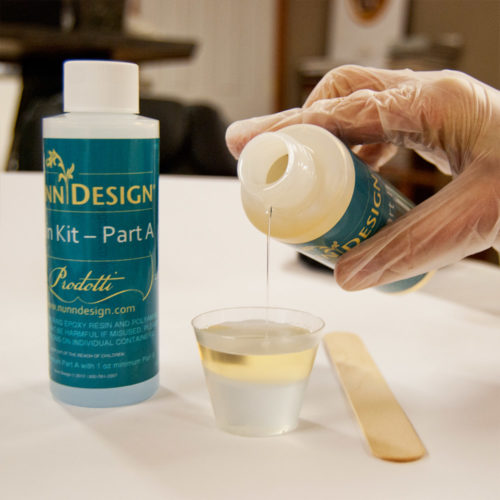
Step 4:
Place one cup (included in the Nunn Design Resin Kit) onto your table. For curing purposes, it is very important that the resin be an exact 1 to 1 ratio of Part A and Part B. I suggest getting your eyes level with the resin so you can see the lines on the measuring cup. Pour Part A of your resin kit up to the ½ fluid ounce mark on your measuring cup. Pour Part B of your resin kit into the same cup until it is filled to the 1 fluid ounce mark. It is important to pour Part A first and then Part B. It is some chemical thing about the part B being heavier or something.
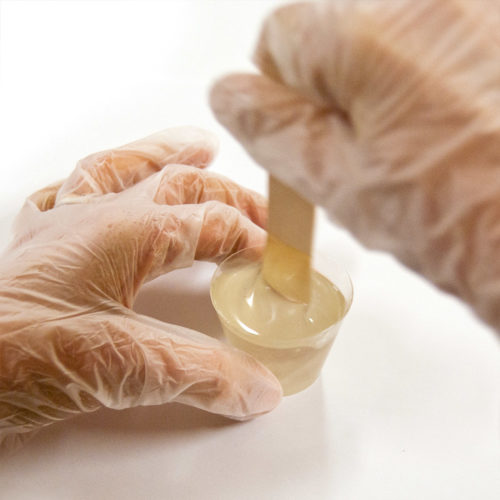
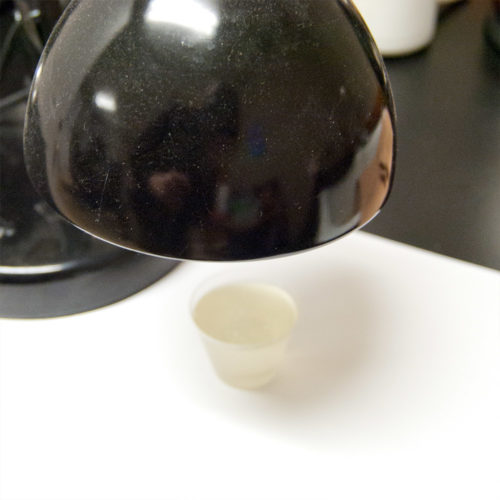
Step 5:
Set your timer for 2 minutes. Using the stir stick from your kit (a popsicle stick or coffee stir stick will work great too), slowly and carefully stir your resin scraping the sides as you stir. Stir for a minimum of 2 minutes. If your resin is still cloudy continue to mix until clear. After mixing is complete and your resin is clear, scrape both sides of your stir stick on the edge of your resin filled cup. Set the mixture under a warm lamp for 5 minutes. I like the lamps with the adjustable arms that can get right down next to the resin. This aids the air bubbles in the resin to rise to the surface and pop.
Step 6:
I tend to work in small area (typically my kitchen table), so I like to work on a surface that projects can be easily moved around on and not disturbed. Place some business cards or some heavy card stock onto your work surface, making it easy to move the bezels without getting any resin on your fingers.
Tip: If you have a lot of overflow of your resin, when you place it on the business card to dry, it may stick to the surface of the card. Place a small zip lock bag onto the business card or cover the business card with packing tape to prevent your pieces from getting stuck.
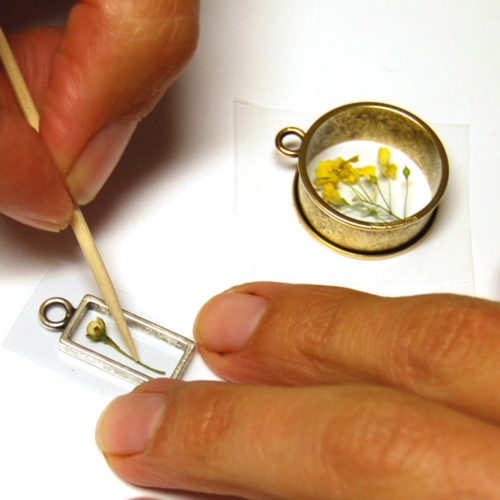
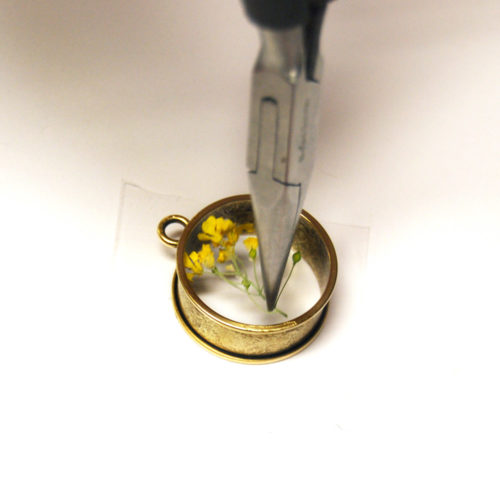
Step 7: Embed Your Organics
All right, there are two ways to do this; the fast way and the slow way.
The Fast Way:
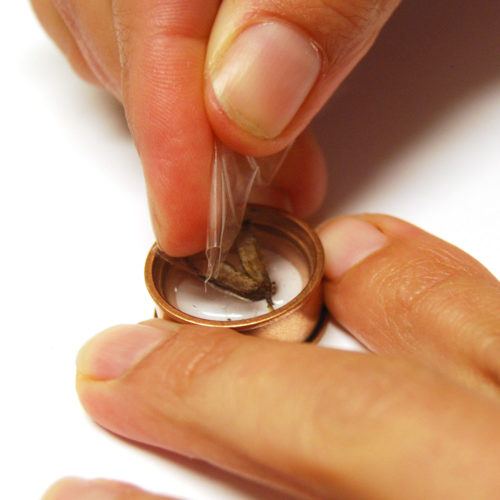
Place your organics into your open bezel or frame. Make sure the organics are fully pressed against the tape. This will prevent the organics from rising to the surface and “floating”. Slowly drizzle your mixed resin over the organics filling the bezel until partially full, but not domed. Use a toothpick to agitate the resin and make sure there aren’t any air bubbles lurking below the surface. Once you are confident, continue to pour your resin until the bezel is filled and highly domed and set aside to cure. This doesn’t work 100% of the time. I have had my organics rise to the surface and poke out of the resin.

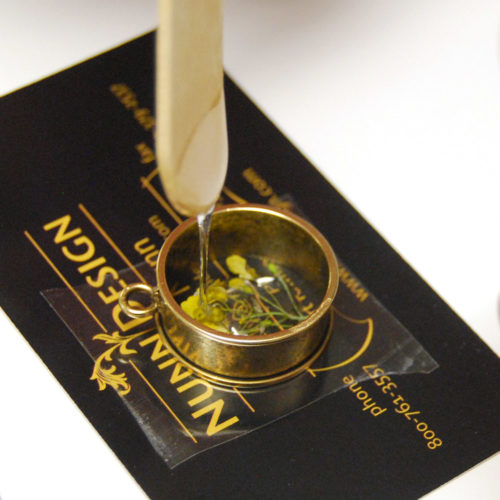

The Slow Way:
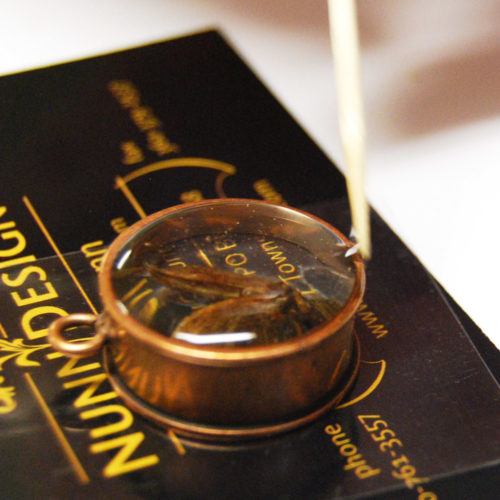
The slow way requires you to do two pours of your resin, but the results are 100% spot on. Place your organics into the bezel and fully press against the tape. Slowly drizzle your mixed resin over the organics filling the bezel partially full, but not filled. Use a toothpick to agitate the resin and make sure there aren’t any air bubbles. Let your resin cure. Mix up another batch of 2-part resin and drizzle the resin into your bezel. Before your bezel is completely full and domed, use a toothpick to slightly agitate the resin and to make sure there aren’t any bubbles lurking! If any bubbles do come to the surface, use your breath to apply some hot air to the resin. This will cause the air bubbles to expand and pop.

Step 8:
If you have any resin where you don’t want it, use a wet-wipe to clean up the surface.
Step 9:
To finish your open bezel or frame, remove the packing tape from the backside once fully cured. If you have any excess residue from the packing tape on the backside, use the tape to remove it like you would when you are removing lint or animal fur from your clothes. Keep touching the packing tape onto the sticky surface until it is no longer sticky.

If you are a visual learning, you might want to take a peek at some of these videos!
Watch a Video!
Not all of these are about embedding organics, but all of them involve using open bezels and frames. You can tweak the tutorial by adding colorants and brass stampings to get totally different looks from almost the same technique.
- How to Embed Organics into Resin with Becky Nunn Design
- How to Incorporate Organic Matter into 2-Part Resin
- How to Fill Open Frame Pendants with Colorized Resin and Metal Stampings
- Open Frame Pendants Mini Tutorial
Enjoy embedding organics into open bezel and frames!
![]()
Shop Nunn Design Wholesale
Nunn Design has been supplying jewelry artists with findings for over 20 years. Shop wholesale jewelry findings for creative jewelry makers.
Shop Nunn Design!How to Purchase Wholesale?
If you are interested in becoming one of the many designers who trust their jewelry to Nunn Design Findings, please join us by registering to become one of our wholesale customers!
Please visit our Where to Buy Page for a listing of online stores that sell Nunn Design Findings retail.

If you enjoyed reading this post, please subscribe to our blog. Here are 10 Reasons Why to Subscribe and a place to do so!
Thank you for your beautiful ideas. The step by step tutorials are so great and really easy to understand! I want to make everything you have suggested. I am so lucky to have found you on Pinterest. I set up a board with your designs only. I am also following you via Pinterest! Again thank you so much for the wonderful craft ideas! I can’t wait to get started!
I love this type of feedback!! Thanks so much for taking the time!to comment!
Becky
Greetings! I have been trying to make pendants with resin and an open wire frame. Do you have any tips for keeping the wire sticking to the tape? Thank you!
There has to be a direct contact with the tape and frame. I’m not sure if you are using a Nunn Design Wire Frame, but where the frame wraps on the closure is tricky. I tap gently with a hammered on a metal stamping block to make that loop area level. I also stamp all around the frame make the wire flat.
What type of tape are you using? We recently have explored the blue painters tape. It released with no stickiness, but the back is slightly frosted. It is a nice look. Cut off a piece of tape and place it on the table. Place your wire frame on the tape and press the frame down firmly with your fingers. Rub back and forth on your table. You can also take a spoon or a burnishing tool and rub firmly making sure it is fully attached.
Just got here via pinterest. Your tutorials are so detailed. Bookmarked your site and subscribed on youtube. Thank you.
Welcome to Nunn Design! We are so happy that you found us (and that all of the Pinterest tutorials are being seen!!).
Becky