


Tutorials
Part 4 of Exploring New Techniques with Resin

Welcome to Part 4 of a multiple part series on exploring Resin.
One of the things that I love about the work that I do at Nunn Design, is having the ability to “play around” and talk about it. This is part 4 in our series documenting my creative time as I explored new techniques while working with Nunn Design 2-Part Resin.
In Part 1 I had accidentally discovered that pure metal powders, a product that I had purchased to use with Epoxy Clay, worked amazing well with Nunn Design 2-Part Resin.
In Part 2 I was curious on how I could add visual interest through imagery. On a couple of the pieces I rubber stamped the surface of the pure metal powders to provide that visual interest I was after, but on the others, I took a pair of scissors and started to scratch the surface of the resin to create the lines. I placed the sharp point of the scissors into the resin and dug into the resin to create the dots.
In Part 3 I explored using transfers and collage sheets.
Now let’s take a look at what is up next!
PART 4 – EXPLORING NEW TECHNIQUES WITH RESIN

THE EXPLORATION:
I love the look of natural stones and attempted to create a look that was similar. There were a couple steps to create this look, but each piece is a work of art.

THE HOW-TO:
Here is a quick and brief explanation of what I did to create this look:
- Clean Nunn Design Bezels with rubbing alcohol.
- Mix a batch of White Epoxy Clay and press it down into the base of the clean bezel.
- Using your finger tips, press into the Epoxy Clay some gold and silver Mica Flakes.
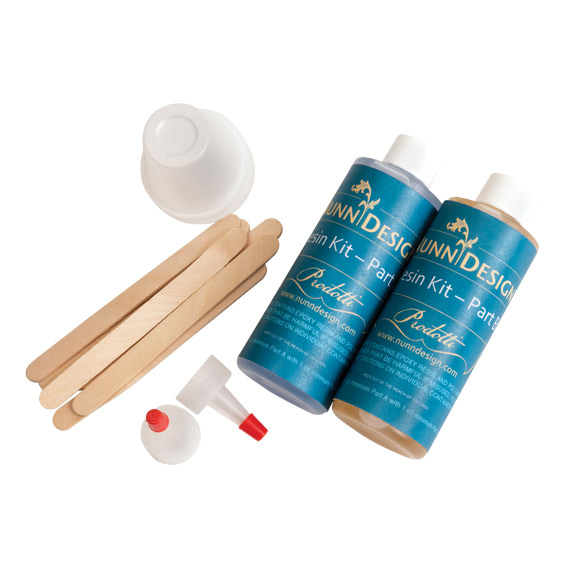
- Mix a batch of Nunn Design 2-Part Resin.
- Add a wee bit of White Castin’ Craft Opaque Pigment into the resin and stir until fully blended. You want the resin to be tinted just slightly, so you can see the Mica Flakes underneath.
- Drizzle over the top of the Epoxy Clay and Mica Flakes the colorized white resin. With a toothpick, go along the edge of the bezel where the Epoxy Clay is in contact with the resin. This is typically where air bubbles will lurk, so by agitating the resin, you will dislodge them. Continue to add the colorized resin until it is either flushed level to the top edge of the bezel, or fully domes.
- I then took a toothpick worth of pure metal powder (there they are again!!!) and tapped it over the surface of the white colorized resin. The powder spread like an oil slick completely covering the top of the resin.
- Once the resin was cured, I took a 0000 piece of steel wool and gently sanded the
Nunn Design 2-Part Resin. Some pieces I sanded more than others. - Let the resin cure. I think I did 12 hours, but I think you could do it sooner. Take a pair of scissors and scratch the surface of the resin to create a “grass like” effect.
- On pieces B, I dipped my finger tip into some pure metal powder gold and smeared it over the full scissor scratch marks. On piece D, I smeared the pure metal powder and then created the scissor scratch marks.
- On pieces B and D, I mixed another batch of clear resin and poured it over to create a high dome.
BUT WHAT IF I…
Here you can fully see the effect of the pure metal powder. On A and C, I sanded pieces A and C with the 0000 Steel Wool, but on B, I did not. The pure metal powder is smooth and the resin is clean. It just depends on the look that you like, and ultimately what your customers like!

I had a lot of colorized and clear resin that was left over from this experiment. I also had used a lot of matches to help get the air bubbles out of my resin (this isn’t something that I typically teach because the resin is flammable. It is really fast though because the heat of the flame makes the air bubbles expand and pop really quickly). I took the charcoal bits of the matches, dumped them into the cup of resin cup and stirred it all together. I then poured the mixed resin into the bezels. This was a really cool surprise!

SHOP THE SUPPLIES:


Shop Metal Powders
I have found two sources where to buy these metal powders. If you find another, I’d love to know about it!
NEXT WEEK:
There you have it! I hope you enjoyed Part 3 of this series of exploring new techniques with resin. Take a look at what is coming next week! Visit Part 5!

Shop Nunn Design Wholesale
Nunn Design has been supplying jewelry artists with findings for over 20 years. Shop wholesale jewelry findings for creative jewelry makers.
Shop Nunn Design!How to Purchase Wholesale?
If you are interested in becoming one of the many designers who trust their jewelry to Nunn Design Findings, please join us by registering to become one of our wholesale customers!
Please visit our Where to Buy Page for a listing of online stores that sell Nunn Design Findings retail.

If you enjoyed reading this post, please subscribe to our blog. Here are 10 Reasons Why to Subscribe and a place to do so!
Beautiful series.