


Inside Nunn Design
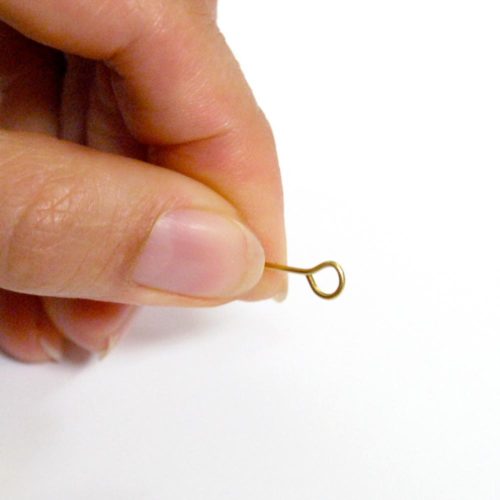
Make Beads with Beadcaps in this Heart Earring Project.

Learn how to make a head pin loop and create beads from bead caps in this simple Valentine Tutorial from the Nunn Design Archives.
Mix up a batch of Epoxy Clay
For this tutorial I used the Dark Brown Crystal Clay. I tend to like the clay to be behind the scenes and subtle. Crystal Clay, often referred throughout this tutorial as epoxy clay and is super easy to get the hang of. To begin, measure out two large pea size balls of part A and B and start to squish together until it is consistent in color and not marbled. You’ll want to wear your gloves for mixing.
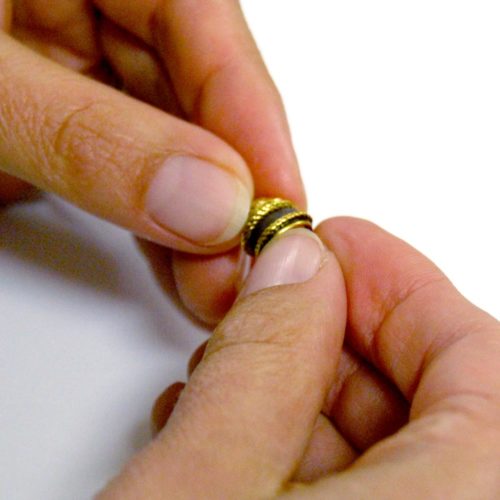
Squish Epoxy Clay between Coral Beadcaps.
Save a tiny ball for Step 4.
This is such a cool trick. I’ve totally been having a blast making beads and charms with epoxy clay. To make a bead from bead caps, take a small ball about the size of the interior of your beads caps. This may take a couple tries of pinching off excess and re-rolling the clay into a ball to get just right. You don’t want to have too much or the clay will squish out the sides and give you a mess to clean up.
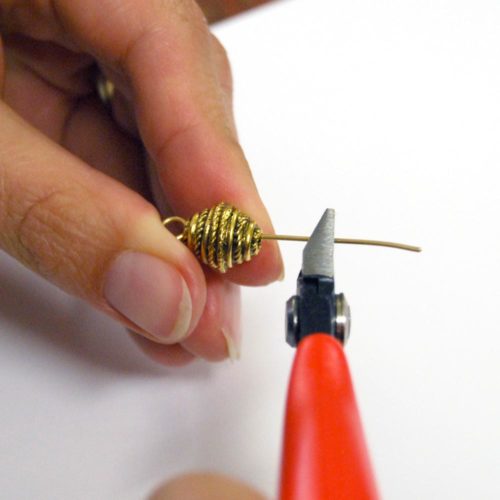
Auger out a channel for your head pin.
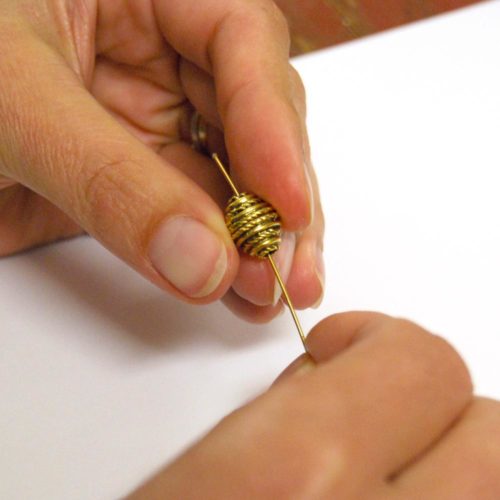
You’ll want to auger out the excess epoxy clay prior to the piece setting (you will have 90-120 minutes to work with the clay). I auger out the center by poking through the clay, cleaning up the excess and then really making sure I have a good pass through by rotating the headpins around the lip of the hole of the bead cap. Man, that is hard to explain, but hopefully you’ve got it. Pull out the head pin and let the bead dry overnight (12-14 hours)
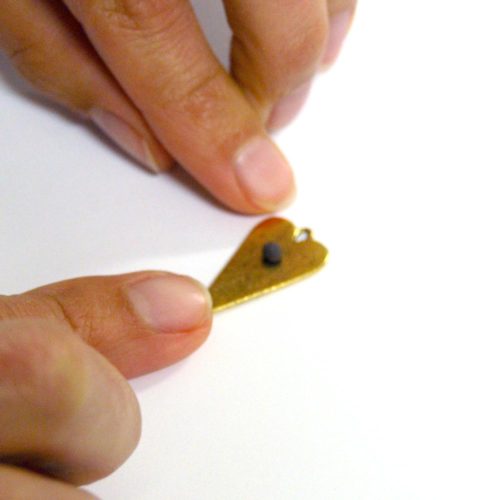
Create an embellishment on the elongated heart flat tag with bead caps.
See what I mean? I’m really into adding epoxy clay and squishing stuff into it. These little bead caps and crystal add so much to the charm.
Let cure for 12-14 hours
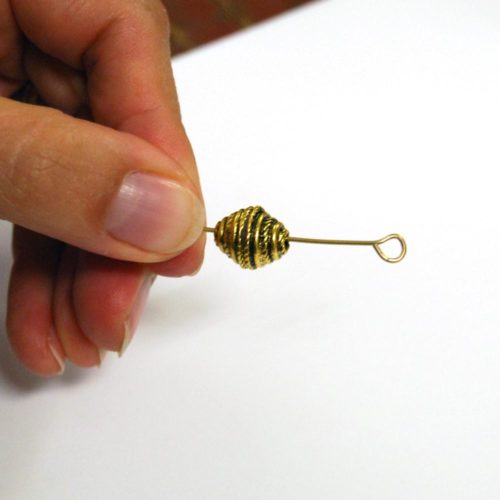
Creating loops on both ends of your bead cap bead.
After 12-14 hours, your bead will be rock hard. I’ve done my best at showing you how to make a looped head pin, but if you need more visuals, Google search “how to make a looped headpin.” There are some videos that will pop up you can watch.
Thread on the beadcap bead.
Make a loop on the other end.
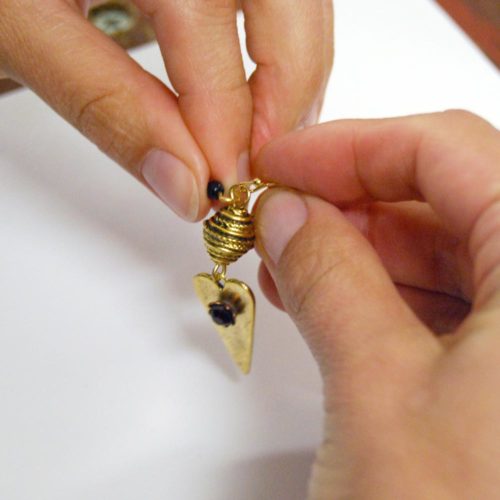
Attaching your elongated heart charm and ear wire
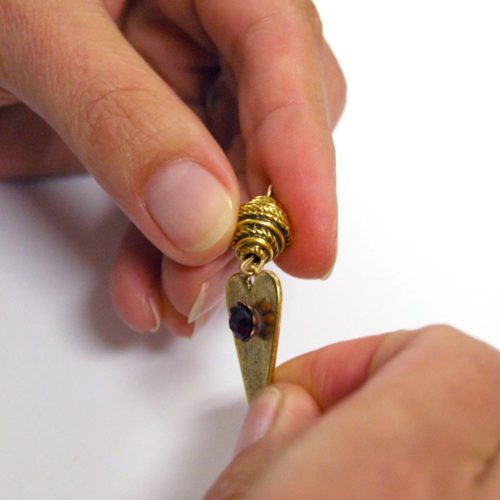
See how that is being done? After you make your loop, you just attach the charm on the bottom and ear wire on the top.
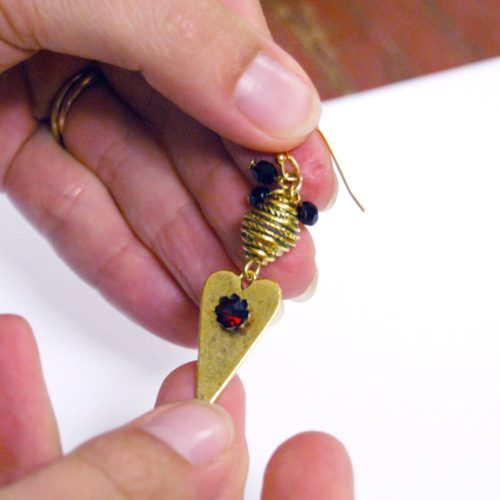
Make some bead dangles.
I selected a 4mm ruby faceted glass bead from my stash, but feel free to use whatever you have. I made three dangles per earring, but you could really go to town and add a bunch.


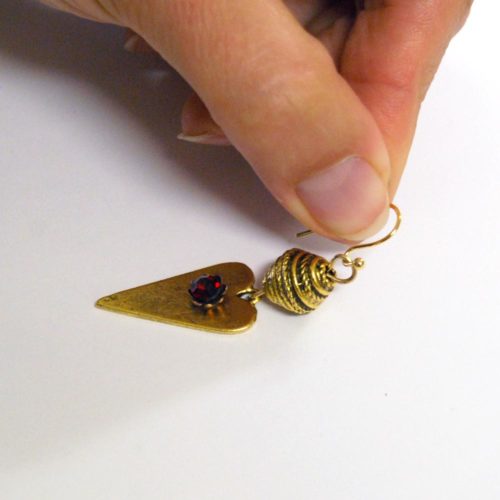
The finished project!
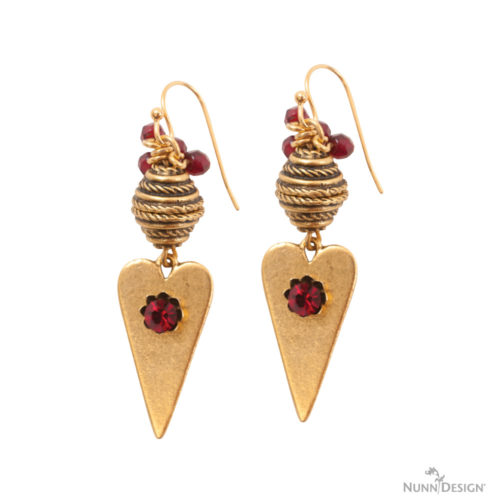
Isn’t that awesome? What do you think? Do you think this is doable for you? Have you already created something like this? Please show us! I’d love to see your creation.
Instructions For Elongated Heart Beadcaps to Beads Valentine Earrings
What you will need:
• Earwires (ewg-b)
• Headpins 2” (hpg-b)
• Beadcap 9mm Coral (bc9c-gb)
• Beadcap 6mm Petal (bc6p-gb)
• Elongated Heart Charm (ehcg-b)
• Chaton Birthstones Garnet (cha-gar)
• Crystal Clay – Dark Brown (cryclay-brown)
Tools Needed:
• Cutting pliers
• Needle nose pliers
• Beeswax Toothpick (included with Crystal Clay)
To Assemble the Beads:
STEP 1:
Pinch off two equal (large pea) size balls, of Part A (the color) and Part B (the hardener). Knead the two equal size balls fully together until the clay is a consistent color and not marbled.
STEP 2:
Pinch off a tiny bit of the mixed clay to use later in the center of each flower petal. Roll the remaining amount of epoxy clay into two equal size balls. Press one ball into the base of one of the coral bead caps. ½ of your clay ball should still be exposed. Press the second coral bead cap over and squish the two bead caps together. Repeat
with remaining clay and bead caps.
STEP 3:
Using a head pin, press through the center of the two pressed together bead caps. This allows you to have a channel through the center once the clay hardens. Repeat with second set of bead caps.
To Assemble the Heart Charm:
STEP 4:
To add the flower to the elongated hearts, use the tiny bit of clay we set aside from step 2. Press the bead cap into the clay. Repeat with second elongated heart.
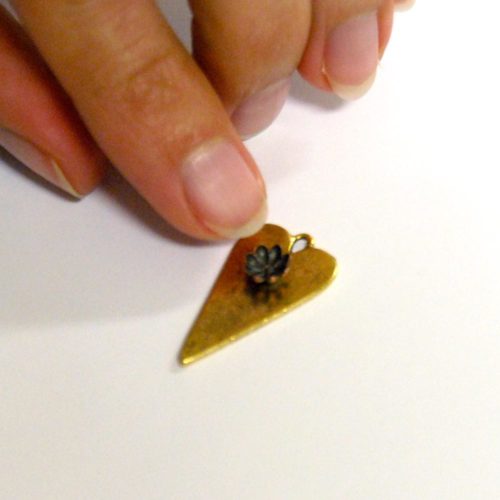
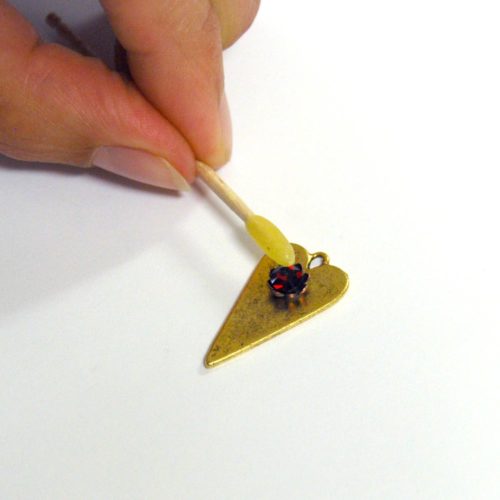
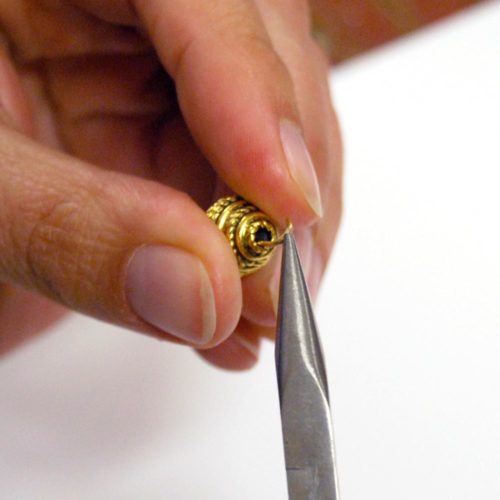
STEP 5:
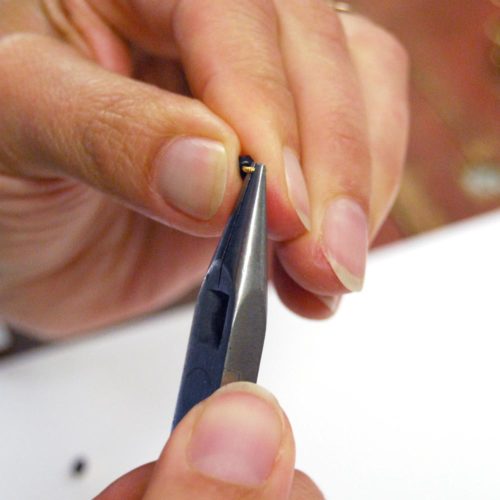
Apply a small amount of clay inside of the bead cap and embed inside bead cap. Using the beeswax toothpick, pick-up the individual Chatons and gently press each into the epoxy clay in the center of the inside bead cap. Repeat.
STEP 6: (no image)
Allow all pieces to cure 12-24 hours before assembling your finished earrings.
To Assemble the Earrings:
STEP 7:
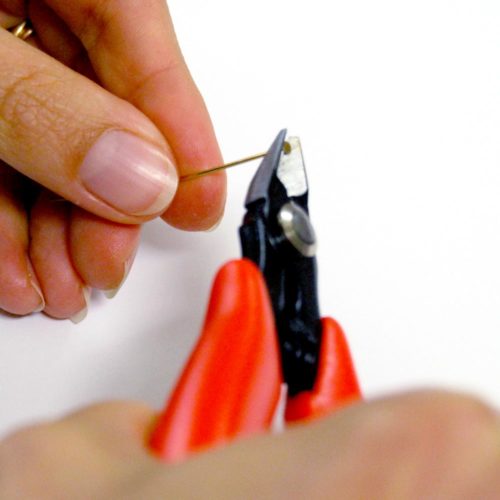
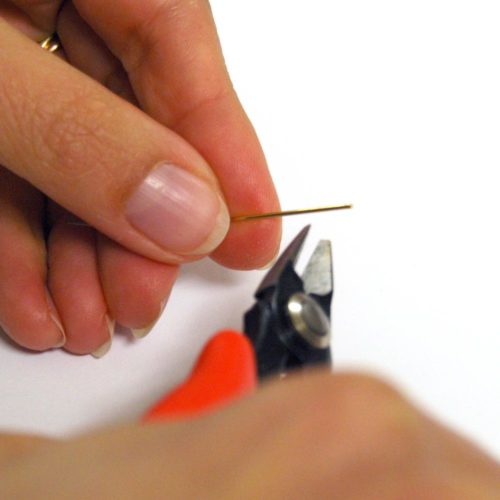
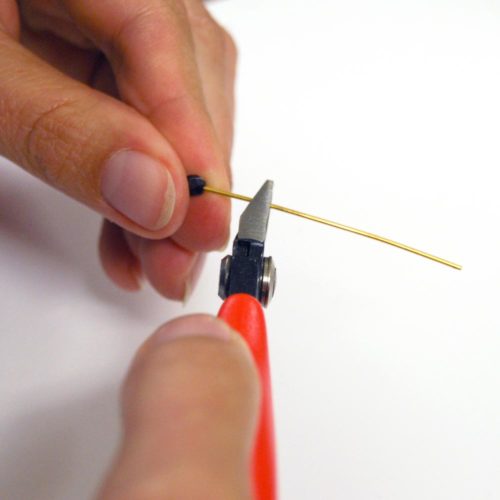
Using one of the headpins, trim off the head part with a pair of cutting pliers. Repeat with second headpin.
STEP 8:
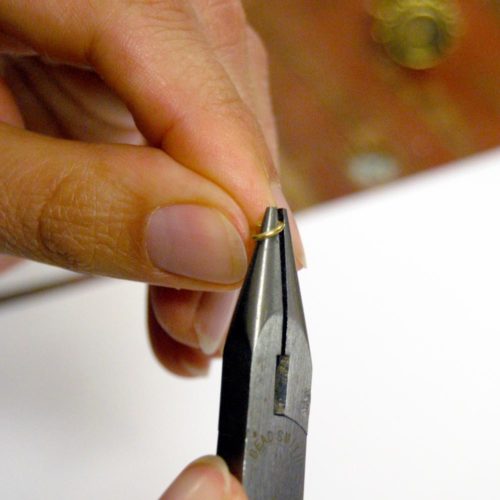
Using a pair of needle nose pliers, make a large loop on one of the ends of the headpin. Repeat.
STEP 9:
Thread the headpin through the Coral Bead made in Step 2. Repeat with second Coral Bead.
STEP 10:
Using a pair of needle nose pliers, make a loop on the bottom half of the headpin. Prior to closing the loop, attach the Elongated Heart Charm. Repeat.
STEP 11:
Thread 3 headpins through three 3mm beads. Cut each of the headpins approximately ¼” from the base of the bead with a pair of cutting pliers. Repeat with 2nd set of beads.
STEP 12:
Using a pair of needle nose pliers, make a loop on each of the 3mm beads and attach the beads and an ear wire to the large loop of the Coral Bead made in Step 8. Repeat. Prepare for requests to make a pair for your friends!
PDF Download: “Make This” Heart Earrings
See it in the Gallery: Chari Earrings
Shop ND Hearts: Here
Shop Nunn Design Wholesale
Nunn Design has been supplying jewelry artists with findings for over 20 years. Shop wholesale jewelry findings for creative jewelry makers.
Shop Nunn Design!How to Purchase Wholesale?
If you are interested in becoming one of the many designers who trust their jewelry to Nunn Design Findings, please join us by registering to become one of our wholesale customers!
Please visit our Where to Buy Page for a listing of online stores that sell Nunn Design Findings retail.

If you enjoyed reading this post, please subscribe to our blog. Here are 10 Reasons Why to Subscribe and a place to do so!