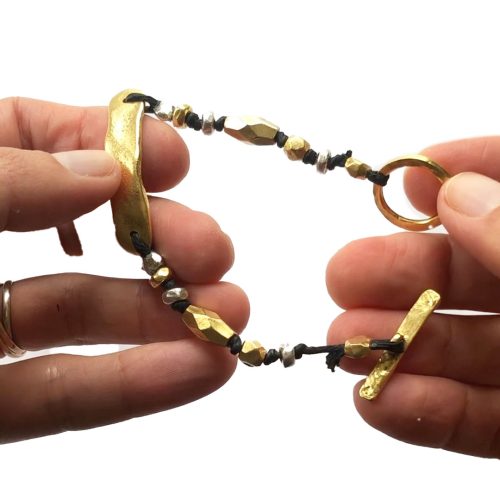
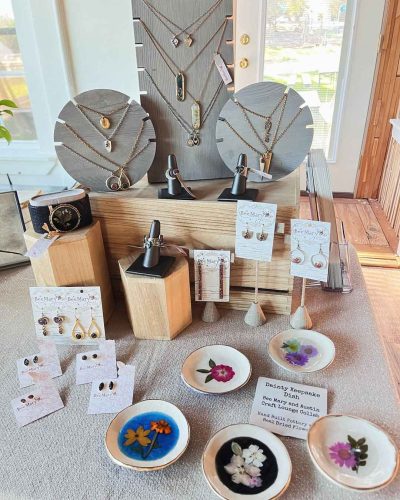
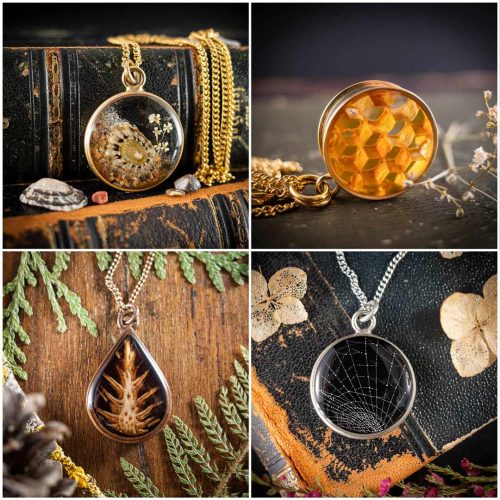
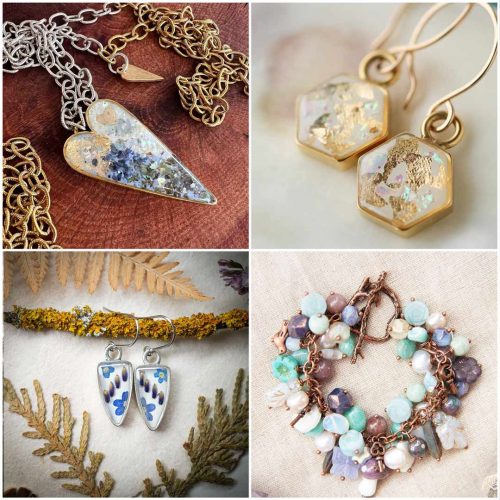
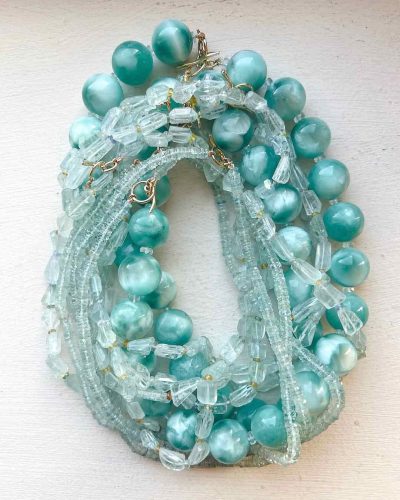
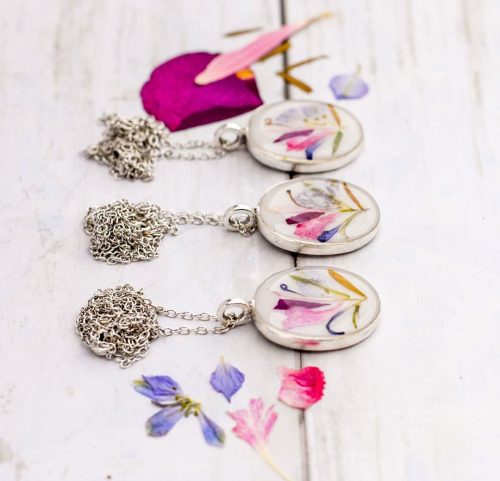
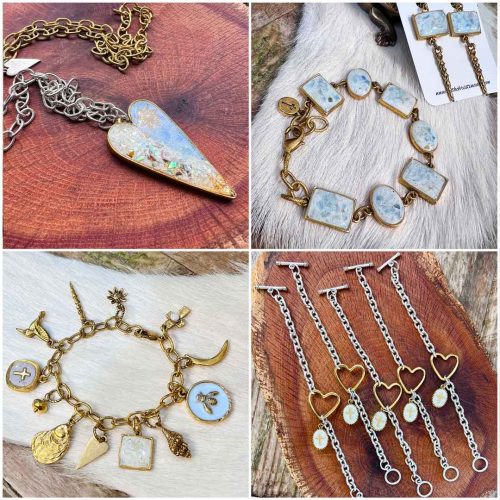
Nunn Design In The Press
Nunn Design has several projects in Springing Magazine’s Summer 2013 Issue. Learn three very different techniques with Innovation Team Members Karen McGovern, Erin Praiz-Hinz and Becky Nunn. Enjoy creating!
October 8-11, 2013, I will be teaching at Art Camp For Women in Colorado. To learn more about Art Camp For Women, sign up for their Newsletter entering you into a chance to win their Grand Prize Giveaway of 2014 Art Camp For Women session of your choice.
To learn more about me and what I will be teaching at Art Camp For Women, visit their blog for an interview spotlighting Nunn Design: http://www.artcampforwomen.com/artist-in-the-spotlight-becky-nunn-of-nunn-designs/
Melissa is the person responsible for all of the things you see graphically from Nunn Design. From our weekly newsletters, blog and Facebook posts, website, catalogue, postcard, collage sheets, to our packaging. Anything you see graphically designed – she is the person behind it.
One of the reasons that I love Melissa is captured in her jewelry. She is WEIRD. A quirky-fun-kind-of-weird. She brings to our team a fun and light energy that you can’t help but find endearing.
But that doesn’t mean that she isn’t passionate about what she does and her continued learning of new things. She is continually introducing Nunn to new fresh ways of marketing, product development as well as systems reorganizing. She is no wallflower. She is constantly questioning things, finding new ways and digging deeper to make Nunn Design the very best it can be as an industry leader.
I love art! Especially art that provides the ability to glimpse into the artist’s soul. For me, Melissa’s work shows me who she is. Her personality shows in what she creates; her quirky weirdness, her humor, her exploration, her creativity, her willingness to push the envelope.
What do you think? Should we have Melissa to do a tutorial on one of these jewelry pieces? Which one?
Other areas of interest around Nunn Design:
• Bead and Button is coming up! Please stop by our booth 812 to see previews of items we will be releasing for Summer 2013!
• We are finally up and live on Pinterest! There is DIY Project Board that has 44 projects (and counting) that you can download for free! Time to get inspired to teach a class or to create a new jewelry collection. http://pinterest.com/nunndesign/
• Look to see Nunn Design in Jewelry Affaire Summer as the featured artist!
• Also, look to see us in Bead Trends Magazine. We are featured in an article titled: Jewelry School.
*Psst -This is Melissa, I just want to say Thank you to Becky and our
Nunn Nest for appreciating my Weirdness and always allowing me to celebrate it!*
Artfest was a big event here in Port Townsend for many years. It has been sad to see the event no longer take place in our small town. Thanks to Anna Nasset, a local gallery owner of Artisans on Taylor, the tradition of inspiring and nurturing artisans will continue on with her first annual Artology Retreat.
The event will be taught by three talented artists; Juliette Crane, Danielle Daniel and Mindy Lacefield, June 5-8, 2013. The location is right on the water in beautiful Port Townsend, WA. Heck, if you make it out this way, stop in for a quick “Howdy!”
Visit the Artisans on Taylor website for more information: http://artisansontaylor.com/
A big fashion trend right now is high-end looking hair accessories. High-end looking doesn’t have to necessarily mean that they are expensive. Add a couple bead caps to a pearl bead, thread through a headpin and you’ve got yourself a great bauble to add to a store bought hairband. Or, add a dab of epoxy clay onto a hair comb and apply some rhinestone chain. The options are infinite.
***GIVEAWAY CLOSED***
We have partnered up with our friends at Fusionbeads.com to create this great Epoxy Ring Tutorial. Download the supply list from Fusionbeads.com and the step-by-step tutorial to create this fun epoxy ring project!
We will be sending 1 lucky reader all the Nunn Design products you will need to make this Epoxy Ring. Like us on Facebook and then comment on this blog post to be eligible to win. You can also post a link to this contest on your Facebook page to earn double entry. This contest ends at 11:59PM on May 5th with winners to be announced on May 6th.
Items used in this project:
raolc-sb Ring Adjustable Ornate Lg Circle Antique Silver
cryclay-black Crystal Clay Black
rc24-ssb Rhinestone Chain 24pp – Sterling Silver
cha-cry18pp-b Chaton Crystals 18pp (2.3mm)
bc6p-cb Beadcap 6mm Petal Antique Copper
bc12p-cb Beadcap 12mm Petal Antique Copper
Best of luck to everyone! Enjoy creating!
Update: Congratulations Deborah O’Keefe! You are the winner of the Epoxy Ring Giveaway.
This is the week of seed beads and bangle bracelets! Innovation Team Member Marla Salezze did this series of bangles for Nunn Design. Thank you Marla! We love these projects!
To see how to do something similar to Marla’s, check out Beadaholique’s latest video: How to Cover a Channel Bangle with Bead Weaving
The best part of this project is that it looks like it was super hard to create! There is something about a project that looks difficult to produce that makes it more desirable, don’t you think? Let me take the mystery out of this process.
To create these bangles all you need:
1. Crystal Clay – White
2. Nunn Design Bangle Bracelet Channel
3. Seed beads
Instructions:
Step 1.
Mix Crystal Clay following the manufacturer’s instructions. You’ll want about a large blueberry size ball of parts A and B. Once the two parts of the Crystal Clay are fully mixed, roll the mixed ball into a long snake of clay.
Step 2.
Place one of the ends of the snaked Crystal Clay down into the Bangle Bracelet Channel. I press the snaked roll of clay down with my left thumb, pushing it forward and stretching it out flat while my right hand is holding the excess snake of clay, slightly pulling it and rotating the bracelet slowly. It may take your own system to get comfortable, but in Step 2 you are laying the clay down into the channel. I try to keep the amount of clay flush with the side edges.
Step 3.
Place your seed beads onto a flat surface. You may need to turn some of the seed beads so the holes are all facing up. I used two business cards to create an 8.5” long strip of beads, about the width of the Bangle Bracelet.
Step 4.
Starting at one end of your 8.5” strip of seed beads, press the Bangle Bracelet Channel loaded with Crystal Clay into the seed beads. Use the tips of your fingers to gently press down the Bangle along the inside curved surface. Continue to roll the bangle across your strip of seed beads until you have made the full loop.
Step 5.
Use your fingers to pat down the seed beads into the Crystal Clay. I also use my fingernails to go along the outside edge of the Channel, making sure that a bunch of excess isn’t spilling over the sides. If you do have excess, use a wet wipe and wipe away the Crystal Clay while it is soft. It will be a real challenge to get off once it is set, so take your time and clean as you go along.
Step 6.
Okay, we are on step 6 here and I told you this was an easy project. At this point you are probably thinking I’m a big fat fibber, but it wasn’t all that hard. In fact the pictures above are the first two samples I ever made…hang in there!
Step 7.
Really Step 6, but who’s counting. If you had excess clay from Step 2, you will use if for this next step. If you don’t have extra clay, you will need about a pea size ball of parts A and B. Once the Crystal Clay is fully mixed, snake it out into a thin long snake. You will be basically using the thin strip of Crystal Clay to make a slip (like when working with pottery). I placed my fingers in water getting the clay very wet, so I could easily and gently rub it over the seed beads. The clay will fill all of the little holes.
Step 8.
Use a wet wipe to wipe away the excess clay. I again used my fingernails to go along the outside edges of the Bangle Bracelet Channel to clean up that side edge. If you don’t have fingernails because you bit them all off stressing if you were going to wrap this project up or not, use a butter knife.
I hope you will have fun with this. I did and I love the results. -B
Thanks to Carl Becker of ETI and Resin Crafts for an excellent article in Bead & Button Magazine on Epoxy Clay and Resin safety!
See the rest of the article on their blog: Our Expert Resin Safety Advice
—
If you are interested in learning how to use epoxy resin, we have taken the mystery out of the process by compiling 8 Free Videos on Perfecting Your Resin Technique.
Enjoy Creating!
Quarterly at Nunn Design, we drag all our toys out and spend the day playing. We are testing new prototypes, new techniques, learning to work with new tools. It is a great day that is had by all. We can’t wait for you to see what we are up to next!!!
Christopher – Head Shipper
Heather Thompson – Operations Manager
Cheryl Spector – The one you talk to!